It’s a couple of minutes past 5:00 pm and just as I am mentally switching gears to happy hour, I Read the Rest…
Happy Valentine’s Day
Valentine’s Day. Is this the holiday you love to hate, or is that just me? I mean, while I do Read the Rest…
French 75 Punch, Perfect For Your Holiday Party
While Jon and I are all about entertaining, admittedly we tend to enjoy hosting small, intimate gatherings over large, standing-room-only Read the Rest…
Berry Shortcake
It’s strawberry season here in our little neck of the woods, and I could not be happier. The local farms Read the Rest…
Valentine’s Day. Is this the holiday you love to hate, or is that just me? I mean, while I do swoon a bit over the concept of heart-shaped everything, my enthusiasm wanes somewhat with the over-commercialization of the whole thing. There is so much pressure to pack all of our collective love and romance into one day. THE day of love and romance. Like the other 364 days of the year can just forget about seeing anything slightly romantic when it’s their turn.
Did you know that the exact origin of Valentine’s Day is not entirely clear? I know, because I googled it. One theory is that it is actually a celebration of a Roman fertility festival. What?? This crashes headfirst with my very fond memory of painstakingly addressing 23 small Valentines so that I could distribute one to each of my classmate’s via their handmade mailboxes. I don’t recall Mom ever mentioning that the history of my little ritual may actually be based in s-e-x.
Don’t get me wrong. I really do like it all in theory. But, like so many holidays, the true meaning of it all gets a bit diluted by the over-commercialization of it. Not only are there red hearts everywhere, there are also not-so-subtle reminders that if I avoid those heart-ridden aisles, I may in fact be the the biggest love loser of all time.
While writing this, I came to the conclusion that I’m going to embrace this whole thing. In my own way. It’s a good time to remember that romantic love is only one kind of love. And that on Valentine’s Day we could show a little love to some of those around us. So, on this Valentine’s Day, I’m going to give the gift of an unexpected smile or compliment to someone I don’t know. For someone special in my life, I’m not only going to tell them I love them but also why. And, this one will be the most challenging for me, I’m going to give the gift of my patience if (when?) I encounter someone doing something stupid. This means a free hall pass for all of you drivers that cannot get it through your heads that the left lane is not the “drive at your own pace lane” or for that person in front of me at Safeway for not only wanting to pay for your groceries with a check, but also for when you fail to realize that you can actually start looking for your pen before your groceries are completely checked and bagged.
Who knows, maybe I’ll enjoy it all so much I’ll repeat it all again on the 15th.
So, maybe those advertisements are right. Valentine’s Day doesn’t have to be hard.
(If you have an inclination to bake a sweet for your Sweetie, you can’t go wrong with these sugar cookies. Click here for the recipe.)
It’s strawberry season here in our little neck of the woods, and I could not be happier. The local farms have their stands open and we’re practically gorging ourselves on the bounty. Which wouldn’t be a bad thing if we were just eating naked berries. If that were the case, we would be congratulating ourselves on our healthy diet. Instead, because we are making a daily habit of eating the berries layered up as shortcake desserts, the gorging behavior has crossed over into gluttony. Somehow we have rationalized that since it’s summer, and almost the 4th of July, we’re just doing our part to celebrate the season. I’m guessing if this behavior continues, my pants and I are going to have to have a little chat about who is to blame for the discomfort.
By simply using my star-shaped cookie cutter, buttermilk shortcakes take on a patriotic personality and will become the base for the signature dessert we will be serving at an upcoming 4th of July holiday celebration we are attending. In addition to the strawberries, I will add a few blueberries to ensure the proper nod to the red, white and blue.
I know there are many ways to serve this strawberry shortcake, but our preferred method is to layer the shortcake with ice cream and berries, with whipped cream on top.
This cake is a labor of love. By that, I mean it’s a lot of work. But I love carrot cake, so I put myself through the effort so that I can enjoy the end result. Cakes with a lot of flavor and texture are my favorite, which means this one tops my list.
Until now, I’ve always thought of this as a “winter cake.” Maybe because it’s a dark cake with lots of oomph to it, so it has always seemed like something you eat during sweater season. Or, maybe it’s because it’s my favorite cake, and the one I always want for my birthday, and my birthday is in December. But I had an “aha moment” last week that this would actually be a great Easter dessert. You know, carrots…bunnies…spring.
I’ve had this recipe in my file for years. Or, decades, to be more accurate. Someone I used to work with gave it to me. At some point, I couldn’t find it and went searching online for a similar recipe. The one thing I remembered about it was that it called for pureed and grated carrots. I couldn’t find the same recipe online, or even a recipe that used both pureed and grated carrots, so I was relieved when a year or so later I came across my old, faded copy of the recipe tucked away in one of my (many) recipe folders. My original copy was so faded that it was barely legible.
As I stated earlier, it’s not a simple cake to make. I find it’s best, and a little less overwhelming, to make it over two days.
Day 1. By baking the cake layers ahead of time, it allows you to refrigerate the layers overnight before frosting them. And, just as importantly, it allows you to get the really messy part out of the way long before you’re greeting guests at the door. As you can see from this picture, the effort that goes into the layers is a slightly messy undertaking.
Nice to have that out of the way on Day 1!
Day 2. The effort on the second day is less complicated. All that’s left at this point is to make the frosting and put the cake together. Because I know this step can be intimidating to some, here’s a great link from one of my favorite sites: Food52. If you’ve never checked it out, it’s a great site full of useful tips. In this case, it provides some great tips on mastering a layer cake. For this cake, I opted to make it a two-layer cake. By baking it in 2 pans, I eliminated the need to split the layers. Food52 provides a trick for cakes like this which is the concept of The Magical Crumb Coat. By applying a thin layer of frosting to purposefully trap the crumbs, and then refrigerating it for about an hour, I was able to get a clean “top coat” without any pesky crumbs.
For Easter, rather than try and make carrots out of frosting, like you see on so many bakery cakes, I turned to some of the creative people on Etsy for a cake topper. You can see some of my choices on my Pinterest board.
How do you spell love? For me, I spell it C.A.K.E.
At least that’s what I did last week when Jon baked me a cake for my birthday. A two layer cake. From scratch. With homemade frosting. Be still my heart.
He declared his intentions a couple of days before my birthday. He was almost a bit hesitant when he told me, perhaps fearing that I was going to tell him it was a mistake to try and tackle a cake. I think it’s worth saying here that, in our house, I’m the baker. I’m the one that bakes for fun, bakes for special occasions, and bakes for the blog. I’m the one with a close, and personal, relationship with the KitchenAid mixer. While Jon knows his way around the kitchen and bar, baking is my territory.
Which is probably why I was so touched by his gesture to bake me a birthday cake.
He chose one of our favorite cakes, the Cranberry Layer Cake with Cream Cheese Frosting. Armed with a printout of the recipe, he set to his task just as he does everything: Methodically and with purpose. It’s one of the things I love about him. But it is in sharp contrast to how I approach baking.
While he wanted to do the cake on his own without assistance (or god forbid interference) from me, he did have a few questions as he went. And, it made me realize that this was a good test for not only the recipe and but also my instructions. His efforts, and the resulting (delicious) cake were a good testament to the accuracy and clarity of the instructions. But it also showed me that sometimes maybe I leave out some details because, for me, there are some that are just common knowledge. So, I’m sharing his questions, and the answers, here for anyone that might be more novice than expert.
We don’t have a proper sifter (like the kind both of our moms had). So, I just use a fine mesh colander.
When a recipe calls for a cup of chopped nuts, do you measure the nuts before chopping or after? This was a good question. And one I never considered much before. I like this answer:
“1 cup of chopped nuts” is measured after chopping.
“1 cup of nuts, chopped” is measured before chopping.
I’m going to ensure this is how I describe it in my recipes going forward.
If you forget to bring your eggs to room temperature ahead of time (which I do all the time), you can place them in warm water for a few minutes.
When you add ingredients, unless the instructions specifically say to keep the mixer running while adding ingredients, stop the mixer when adding. This question came up after an attempt to add flour resulted in a plume of white dust. And I have to admit it sort of made me chuckle. But it also made me realize that, unless you’ve spent a lot of time mixing ingredients, this isn’t as obvious to everyone as it is to me.
Jon said that, even though he’s watched me frost layer cakes dozens of times, he resorted to Google for help before taking that step on. He found this link to be particularly good.
This isn’t a novel idea, but it’s certainly how my mind works. My food tastes and preferences change with the season. Part of it is driven, certainly, by what’s available. But it’s also just a feeling. For instance, I only make pot roast in the winter. Even though all of the ingredients are readily available year-round, unless the temperatures outside are telling me it’s fall or winter, I just cannot bring myself to make a pot roast.
So, with spring comes a shift in what we’re making, eating and serving. The days are a bit brighter and the food is a bit lighter. And right now, in this kitchen, it seems to be the season of citrus.
As I was lying in bed last night, I was doing a mental roll call of all of the entertaining opportunities coming up in the next few weeks. May Day. Cinco de Mayo. Mother’s Day. The Kentucky Derby. First day that looks more like summer than winter. Not to mention that May seems to be the month of birthdays. As I was going down the list, I realized that I could serve Key Lime Pie at any one of those parties. Any, or all.
I’ve been making this Key Lime Pie recipe for years. The original recipe came from a magazine (Cottage Living) that is no longer in publication. I was initially drawn to it because it called for using crème fraîche as the topping, which sounded like a perfect complement to the tart lime. It was and is. I’ve made a few tweaks to the original recipe but for the most part it’s just as it was printed back in 2008.
Over the years, I have primarily made this pie in a glass pie pan. It always worked well and I really had no reason to change. That is until last week when I found the cutest little springform pan. That little pan had me at hello. And, honestly, the last thing I needed was another baking pan. Judge (the situation, not me) for yourself.
But that darn cute pan was just like those “adopt me” puppies on Facebook. Need quickly gets overrun by the heart screaming, “You must take it home with you!” Because cute trumps logic every time. And so now I’m the proud owner of a 6” springform pan. At least it doesn’t need to be house trained.
I made a full recipe and just divided it into two batches. Fortunately, this recipe can easily be cut in half to work in a smaller pan. Having two separate (and adorable) little pies worked out great because I was able to give one to our neighbors. Her e-mail response says it all: “Without a doubt the best key lime pie – EVER!” Thanks, Jan! I couldn’t have said it better myself.
Two things attracted to me to this recipe initially. One, the name. The original name was Lazy Mary’s Lemon Tart. Any recipe with the word “lazy” in it will get my attention. And, two, the filling was mixed in a blender. (I guess using a blender is how Mary got her lazy reputation.) More on why these two points are relevant later.
If you read this blog regularly, you’ll know I’m a fan of Joy the Baker. That’s where I was introduced to this recipe. In her blog, Joy substituted some fruit I’d never heard of (nor could I find at the store). I went into making this tart thinking I would substitute tangerines for the lemon but then reconsidered and decided it needed a little more punch than you’d get from tangerines. (I’ll just have to settle for drinking my tangerines.)
Meyer lemons are currently in season, so those little wonderful football-shaped citrus became my fruit of choice for the tart. (The original recipe called for using Meyer lemons as well.)
The pastry in the original recipe is great, although it’s enough like a pie crust to provide this crust-challenged baker with a moment or two of fear. I found, the second time I made it, it works best if you can chill the crust for several hours or overnight. And, for the record, if there’s anything lazy about making this tart, it happens after you make the crust. The crust has a few essential steps (as Joy pointed out in her blog, and I trust her because she is called Joy the Baker).
Then came the filling. Remember that lazy filling I mentioned earlier? Well, not only do you use a blender but the original recipe invited me to just throw all the filling ingredients into my blending contraption and whirl away. Meaning, cut the lemon into chunks and toss it in, peel, rind, pulp, seeds and all. And, I have to tell you this. I could not do it. I stood there, looking at my whole lemon, and could not fathom the idea of all its parts becoming the base for my delicious filling. So, I retreated and came up with Plan B.
I zested and then juiced the lemon. So much for being lazy. But, I did add the zest and juice to the other ingredients in the blender (including cream cheese, which wasn’t in the original recipe) and was quite pleased with the results. And, I have to admit, the effort of pushing the “puree” button on the blender was simple enough that I did feel slightly lazy.
The result? Scrumptious. The crust is a perfect base and the filling has a wonderful texture and flavor. The first time we served it to guests, I cut everyone a slice and we politely ate off the plates it was served on. The next night, I just put the remaining tart in the middle of the table and we all sliced off slivers and ate them until the thing disappeared.
We topped it with whipping cream, but the tart can stand alone with just a dusting of powdered sugar. As our friend pointed out, with spring just around the corner, this tart would be an ideal dessert for Easter with some fresh berries.
Because I found that there really is some effort that goes into making this dessert, I’ve changed the name to simply “Lemon Tart.” Sorry, Mary.
Happy Entertaining!
Get your butter and shortening very cold by putting it in the freezer:
Add ice to your water to get it good and cold:
Pulse the dough ingredients until it looks like this:
And then add water until the dough forms into a ball:
Place the dough in Ziploc baggie and put it in the refrigerator to chill:
Roll the dough and ease the it into the tart pan, and then trim:
Prick the dough with a fork and then place it in the freezer:
Before baking, cover with parchment paper and add pie weights:
Juice the lemon for the filling:
Put all the filling ingredients in a blender:
Easy way to remove the tart from the pan after baking:
Note: This is an updated version (with many more pictures) of our Valentine’s Day post from 2013. You can read the original post here.
It’s probably safe to say I know my way around a pastry. Cakes, cookies, cupcakes, brownies. You name it, and no doubt I’ve gotten to know one or two of them in my lifetime. Unfortunately, it seems I’ve spent more time consuming them than preparing them, but I like to think of it as field practice as I develop my expertise. So, if you’re like me and are somewhat of a pastry aficionado, you’re probably familiar with Red Velvet. It shows up frequently on menus and and in bakeries. There are countless nods to it on Pinterest and all over the internet. In addition to the classic Red Velvet cake, I’m now seeing recipes for things like “Red Velvet waffles” and “Red Velvet cheesecake.” I even saw Red Velvet Oreos at the store yesterday. Basically, if you can add cocoa and red food coloring to it, I guess it can be called Red Velvet.
The original recipe for Red Velvet Cake seems to date back to the 1800’s, although I’m guessing that, by name alone, it got a bad rap during the “red dye #6 scare” in the 50’s. However, Red Velvet seems to have survived time and the FDA and has kept its rightful place as a well-loved dessert. If you’re interested in the colorful (no pun intended) history of the cake, you can read it here.
When it comes to cake, I’m a firm believer that cake simply exists as a socially acceptable way to eat frosting. Call me a frosting enthusiast, but I’m always happy when there is just a little cake base with a lot of frosting on top of it. It seems that the original recipes for Red Velvet Cake called for an ermine or boiled milk frosting. Maybe I’ll try one of them someday, although quite frankly neither name does much to entice me. (Ermine? Really? What marketing genius decided that was the perfect name for a frosting?) Regardless, for my Red Velvet Cupcakes, I use a cream cheese frosting.
Even with enough frosting, if the cake is dry and bland, there’s just really no point in it. Velvet, as in Red Velvet, supposedly refers to the velvety crumb of the cake. It’s a moist, chocolate-y cake and, in this case, with a cream cheese frosting. The red is really just a little bling to make it the star of the party. One thing to be aware of. If you want a really bright red cake, you need to add a lot of red food coloring. I used food coloring gel, and even with using most of the tube, my cupcakes were a dark, not bright, red.
Something sweet and homemade. Seems like a perfect way to celebrate Valentine’s Day, doesn’t it?
Some people start the new year like a runner leaving the start line of a big race. A little start pistol seems to go off in their head and they are off and running, chasing resolutions and ambitions, intent on making it to the finish line before they lose their resolve. Me? Not so much. I find that after the bustle of the holidays, I’m more inclined to mosey into the new year. All I really want to do is declutter my house, take a deep breath, and get back to my normal, comfortable routine.
The holidays leave me with a bit of a hangover, both physically and emotionally, so I need a little detoxing. Hopefully a little less wine, more quiet time, and real meals that don’t include appetizer buffets. So, if I find that we are entertaining during the first weeks of the new year, like we’ve done this season, a bright neon sign flashes in my head saying, “Simplify.” So, simplify I did. We served some of our good, basic meals (like chicken pot pies and pasta with vodka sauce) because I was craving a little comfort…and there is a lot of comfort in good comfort food.
If you are having people to dinner and you need a simple dessert idea, here’s what I do. Serve some good chocolates with a good aperitif. My favorite combination is dark chocolate (See’s lemon and pineapple truffles are absolutely decadent) and Limoncello. Sometimes I even take the chocolates out of the box and serve them from a fancy candy dish. But not always. We keep the Limoncello (and the glasses) in the freezer so we can serve it ice cold. (Lukewarm Limoncello could be considered barbaric, so don’t do it.) And, speaking from experience, I can tell you this: You shouldn’t be surprised if you and your guests finish the bottle.
It’s New Year’s Eve, which means I’m busy pulling together the final details for our dinner party.
Our friends offered to bring a standing prime rib roast (who am I to turn down a generous offer like that?), so that will be the star of this show. Giving the prime rib the star status it deserves, the rest of the dinner menu is being created around it. Including the green bean casserole. I’m serving it because our friend loves it. (Seems like a fair trade-off. You bring the prime rib and I’ll make green bean casserole.) And, while I love me some prime rib (occasionally), the richness of it should not be overlooked when planning what side dishes to serve with it. Fortunately, I just happen to think that mashed potatoes are not rich.
So, when it came time to think about dessert, I wanted something perfectly celebratory and special but not something that would feel like a big ol’ belly bomb of a dessert. Mousse seemed like a good choice. White Chocolate Mousse, in bite size proportions, even that much better.
I found this recipe in one of my cookbooks. I’ve challenged myself this year to actually use my (many) cookbooks rather than always relying on the internet for recipe searches. I liked the ingredients of this recipe but found the original steps a little confusing. Don’t be intimidated by what looks like a lot of steps. It’s just my attempt at laying out the recipe in such a way as to simplify and clarify the steps for you.
I think this dessert can be served in a couple of ways. After a big meal, like the one we’re having, I’m going to serve the mousse in appetizer spoons. Basically, one-bite desserts, so it’s a taste but not too much. But I could also see serving it in Champagne coupes or martini glasses with the raspberries on top.
We’re re-posting one of our most popular holiday recipes (originally posted in November of 2012). Since Nanaimo Bars are an annual tradition for us, it seems appropriate to once again share them with you. Happy Entertaining!
Every family has one, it seems. That thing that defines the holidays for them. Or at least the thing that they couldn’t imagine having the holidays without. For me, that thing is Nanaimo Bars. And, I find that I can make any day a holiday with a Nanaimo Bar.
The family cruiser, circa Nanaimo Bar discovery
Nanaimo, British Columbia is located on Vancouver Island. When I was a kid, we spent our summer vacations in a small cabin cruiser exploring the San Juan Islands. On longer trips, we’d head across the border up to the Canadian waters. Nanaimo was one of the ports that we’d frequently find our way to. Once we got docked at the marina, Mom, my little brother and I would walk into town. Mom was particularly fond of some bakery that was located there, which was worth the walk up the hill for the bread alone.
Back then, at least to me, Nanaimo was a small town. All I really knew about it was that it was one of the places we docked that was actually located in a town as opposed to so many places we went where there wasn’t much beyond the dock or gas pump that defined the place. That, and we always seemed to catch salmon when we were close to Nanaimo.
But, what the town is really known for, in my family and throughout British Columbia, is Nanaimo Bars. According to local legend, about 40 years ago a Nanaimo housewife entered her recipe for chocolate squares, named after her hometown, in a magazine contest. I guess this blog entry is proof that the housewife’s recipe won. Years later, in 1986, Nanaimo’s mayor held a contest to find the ultimate Nanaimo Bar recipe. I’m not sure where my Mom got the recipe. She started making them long before the recipe contest or the birth of the internet, where now if you Google “Nanaimo Bars” you will get hundreds of results. And Mom’s recipe is slightly different than the recipes I found online.
These little squares of chocolate-y scrumptiousness became an annual Christmas tradition in my family. To this day, every time I think about Nanaimo Bars, I am reminded of the Christmas that I arrived home from college a couple of hours after my two brothers. Which was just enough time for them to do what brothers do best. Come up with a devious plan meant only to inflict mental anguish and torment on their sister. They hid the Nanaimo Bars, leaving only crumbs in the pan for me to find. My predictability only played into their Machiavellian plan. I walked through the front door, gave quick hello hugs to everyone, and then raced to the refrigerator. Upon finding the empty pan, I cried. Ah, nothing screams “Merry Christmas” quite like abuse from your siblings.
The Hostess, surrounded by her tormenters, circa “The College Years”
After Mom passed away, I got her handwritten copy of the recipe. I now make them every year for Christmas, too. And sometimes I make them whenever I need a little holiday in my life. This year they helped us ring in the New Year. And I’m thinking they may make our Valentine’s Day a little sweeter, too.
Okay, here we go again. A new recipe (yea!) that, yet again, I can’t seem to share without telling you the story behind how it got from idea to reality. The scenario behind today’s recipe repeats itself on a pretty regular basis around here. In this case, I received a recipe from a good friend of mine (“You have to try this recipe! It’s so good!” my friend wrote.) I promptly put the recipe for Cranberry Cake away in the place where I keep such things and vowed to try it soon.
With Thanksgiving rapidly approaching, it seemed like the right time to try the cake. But I couldn’t find the recipe she had sent me. (Note to self. I need to improve my filing system.) So, I did a quick search online which provided two different recipes that I thought sounded good.
Of the two cranberry cake recipes I had, I was leaning towards the one that was called a layer cake since it meant there would be frosting involved, and I’m a big fan of anything with frosting. However, I didn’t actually look closely at the recipe until it was time to start making the cake. At that point, I realized that the recipe called for using a white cake mix. Not that I’m all holier-than-thou regarding the use of cake mixes, but I didn’t have a cake mix in the pantry and didn’t want to make a trip to the grocery store. (See! Not judgmental, just lazy.) So, instead of a mix I used the vanilla cake recipe that I have been using for cupcakes, and then added orange zest, chopped cranberries and walnuts to the batter.
You need to make this cake. I’m not kidding. You need to make this cake. The taste combination of the sweet cake and tangy cranberries with the sweet/tangy cream cheese frosting is perfect.
If you’re looking for an alternative to pie on Thanksgiving, give this cake a try. Sure, there may be those that complain that a cranberry layer cake isn’t a traditional Thanksgiving dessert. But I’m guessing those naysayers will be outnumbered by those who, after their second or third piece of cake, will tell you that they are quite thankful you chose to serve cake rather than pie.
Blogging is a virtual thing. Probably more than any other aspect, that’s what I’ve come to realize and appreciate about this gig. We sit, in our house, and blog and cook and photograph, and then share everything with all of you electronically. It is both a bit mind-boggling and challenging. For someone who blogs about inviting people into your home to create community, because that’s what I crave, it’s at times ironic that we do it all in complete isolation.
Which is perhaps why, when we got to meet a fellow blogger live and in person, I was practically giddy. Joy the Baker (Joy Wilson) has just published her second cookbook, Homemade Decadence, and she was in Seattle doing a baking demonstration and book signing. (If you’re unfamiliar with Joy, check out her blog at joythebaker.com.)
Jon and I, along with about 70 other groupies, crammed into The Book Larder in Seattle, a bookstore that classifies itself as a “community cookbook store.” This is the kind of small, local bookstore that Meg Ryan owned in You’ve Got Mail until that horrible Tom Hanks came along and changed everything. This is the kind of little guy that you root for always.
In front of her captivated and mesmerized audience, Joy prepared a pumpkin pie. A pie! For some, a pie is possibly one of the most intimidating desserts to make. The mere thought of making a pie crust from scratch has reduced more than one somewhat competent cook into a sweating, cussing, anxious heap of frustration. And that was in the privacy of her own kitchen, not in front of an audience. Oh, wait. That was me.
And, yet, Joy the Baker performed her pie making skills in front of an audience, all the while chatting with us as if we were sitting in her kitchen and had been friends like forever. She was, in a word, just simply adorable. And I don’t think I was the only one in the room developing a serious girl crush on her.
The audience oohed and ahhed and whispered amazement to their neighbors. We all knew the difficulty of the task she was undertaking and that with just a tiny slip up, we could potentially witness grave failure. We wouldn’t have been more spellbound had she been suspended 100 feet above us, dangling by her teeth from some thin wire, slowly performing pirouettes.
If you’ve been following this blog for a while, you know I’ve had more than one tragic attempt at making pie crusts from scratch. (Click here or here if you care to relive my somewhat less than successful attempts.) More than a bit discouraged from my past attempts, I had pretty much given up. But, I have to tell you. After watching Joy, somewhat effortlessly, turn butter and flour into a masterpiece, my spirit is rekindled. I’m getting back on the flour-dusted pie horse and giving it another try. Besides the fact that I’m probably 20 years older than Joy, I’ve decided when I grow up I want to be just like her.
My history with frosted sugar cookies goes waaayyy back. Almost to the beginning of time. Well, at least the beginning of my time. I learned the art of, and appreciation for, making sugar cookies at my mother’s knee. Of course, in this case, her knees were in the kitchen. And, given that she had five kids and a husband to feed and a house to keep, I’m guessing her knees, and probably her back, ached. But that’s a tale for another day.
Every year, at Christmas, Mom would make sugar cookies. She’d don an apron, make and roll the dough into a nice circle, and then cut shapes with her metal cookie cutters: The gingerbread man (always a favorite because it was big), the reindeer and the angel (both which required special skill when handling because of the thin parts that were vulnerable to cracking), the Christmas tree and the Santa Claus. Before putting them in the oven, she’d let me help by carefully adding the colored sprinkles. At least that’s my recollection. No doubt I got sprinkles all over everything and she got to clean up the mess.
At some point, I got my own collection of cookie cutters and my own cookie sheet. Miniature replicas of Mom’s. I think the cookie cutter shaped like a little dog was my favorite. I never had an EasyBake oven. I got to bake my cookies in the real oven.
One of my forms of rebellion as a teenager was to take cookie-making up a notch. Declare my independence and do things different than my parents. I discovered the fun of frosting the cookies rather than just using sprinkles. Same cookie cutters, just with a different finale. I would make a big batch of frosting, divide it into several bowls and, using food coloring, prepare my palette. Mom had this metal Mirro cake decorator, with various tips, that I would use to decorate the cookies. One year, I spent hours decorating a couple dozen cookies. Then my brothers came home and the entire batch disappeared. It was probably my first experience with the concept of disproportionate effort versus reward.
I continued the tradition through the years. Like my mom, every year for Christmas I’d make cookies. When the kids were growing up, the annual cookie decorating was the one event we never missed. They, too, always preferred the biggest cookie cutter. It provided the broadest canvas for their frosting artistry. And, in turn, provided the biggest score when they got to eat one of “their” cookies.
With my burgeoning collection of cookie cutters, I was able to expand to year-round cookie making. (Perhaps the ice cream cones I made one year for a 4th of July party were some of my favorites.)
This year for Halloween, I got the idea to make mummy cookies. I had seen pictures of mummy cupcakes, so I figured I could do the same with cookies. (One of those, “How hard can it be?” moments.) A trip to JoAnn provided the edible eyeballs (as I called them, they are actually Wilton Candy Eyeballs). You just gotta love a world where you can purchase edible eyeballs. Since these were for a party, I used a 3 1/2″ round cookie cutter because I wanted them to be big and, due to their large size, imply one serving per guest. For the frosting, I used a good, basic vanilla buttercream. After baking and cooling the cookies, I got down to the business of decorating. I used a dab of frosting on the back of each eyeball to adhere them in place (Jon’s brilliant suggestion). Then, using a standard basket weave decorating tip, I just sort of randomly ran stripes of frosting across the cookie. To answer my own question, it wasn’t hard at all.
While I love making frosted sugar cookies, honestly, my favorite part is eating them. I may have been slightly miffed at my brothers the year they scarfed my cookies without a second thought, but honestly I understand it. It’s really not that different than how I consume them.
You know how irritating it can be when some people sit around and talk about how different things used to be, back in “their” day? Well, I think today I’m one of those people. I’ve spent the last few days thinking about Halloween, and I keep reminiscing about how simple it used to be.
Take costumes, for example. When I was really young, Mom would buy one of those cheap but readily available masks, which was always the core of my costume. You know which ones I mean. Those molded plastic ones that looked harmless enough until I actually put it on. That’s when I would realize that the one piece of innocent looking elastic that held it in place was ridiculously tight. The mask would fit so snuggly against my face that I could barely breath or see. That was until one end of the elastic came loose, rendering the whole thing useless. The masks always came with some simple, cheap costume, which made the whole process of dressing up a cinch. As I got older, I was able to be a little more creative and design my own costumes. I would like to formally apologize for the year I went as a hobo. I meant no disrespect to any class of people. I was 8. I thought it was fun to wear a collection of old clothes and carry a little handkerchief tied to the end of stick. But today, in these “politically correct” times, kids have to worry about things like that.
Perhaps the thing I miss the most is the innocence of trick-or-treating. I, along with my brother or a group of friends, would strategically wander through nearby neighborhoods, amassing our candy booty as we went. Given that, on a good night, we probably hit over 50 houses, there is no way my parents knew all the people we collected candy from. They didn’t have to. Those weren’t the things that parents had to be worried about back then.
And then there’s the whole pumpkin carving thing. Remember when carving pumpkins meant you just grabbed one of your mom’s kitchen knives and hacked away at it until you had a jagged, 3-toothed grinning Jack-o-lantern? Now with the pumpkin carving tools and patterns that are available, one feels a little old-school if armed only with a knife and an imagination. But, I’ll admit it. In this case, I’ve fallen prey to the hype.
Our friends hosted their annual pumpkin carving party this week. The invitation said to bring a cleaned-out pumpkin ready to carve. They created workspaces by covering several tables with inexpensive plastic tablecloths. There were several obligatory (and sharp) kitchen knives being brandished about, usually by someone with a cocktail in their other hand. (Thankfully, and surprisingly, no one lost a finger.) But, also on hand were an arsenal of official pumpkin-carving tools, including these little battery-operated saws. Which, quite frankly, didn’t work very well. We broke two of them before we figured out how useless they were. But we hacked and carved to our heart’s content, and the end result was equal parts fun, gratifying and impressive.
While all things Halloween may have been simpler when I was a kid, the party was a great example of how this holiday hasn’t outgrown its ability to be simply fun.
Sometimes, something hits you and it’s so darn obvious you can’t believe it hasn’t been utterly clear before that point. So it was with my realization that I come from a long line of southern women. Well, I always knew about my heritage. But what I finally realized is that heritage runs deep and shows itself in all different aspects of my personality.
Three generations of southern women
Because I grew up in the Northwest, I had only considered the south as something extraneous; my roots, if you will, but nothing more significant than that. But then I started realizing how deep those roots grew. I first started thinking about all of this when my cousin sent me this funny bit about things that southern women say. Until that point, I hadn’t really considered that not everyone skedaddles when they leave in a hurry. But I still don’t understand how on earth someone can explain that a painting is not hanging straight if they don’t say it’s cattywampus. And, perhaps most perplexing to me is that my liberal use of the term “goober,” when describing persons of an irritating nature, is not commonly used nor understood.
Then, last week, it came to me. There was more to this southern thing than just catchy phrases. Southerners love to feed people. It’s what they do. Southern women have traditionally been caretakers and they nurture and give through comfort food. When someone is in distress, southern women feed ’em. When people are celebrating, southern women feed ’em. Food is the center of a southerner’s community. And, all I can figure is this must be where I get my propensity to feed people.
That was the epiphany I had as I was making cupcakes for a baby shower. This wasn’t a shower that I was actually invited to. I’ve only met the mother-to-be a couple of times, but her dad and stepmom are some of our closest friends. When I heard they were throwing their daughter a baby shower, I practically blurted out, “Can I make cupcakes for it?” After that moment, and several times during the making of said cupcakes, I couldn’t help but wonder why I felt compelled to participate in this shower. Then it hit me. I love to feed people. I give through food. There was going to be a crowd gathering to celebrate the arrival of a new baby, and I wanted to feed ’em.
And, here’s the part of this story I probably love the most. Even though the baby is a girl, rather than choosing a traditional pink-themed shower, the mom-to-be instead opted for a nautical, blue and yellow theme in honor of the years she spent boating with her parents. That made my job easy. And fun. Something lemony would provide the yellow while the blue/nautical was easily taken care of after a quick shopping trip through the aisles of Etsy.
I thought a lemon cupcake and lemon frosting would be too lemon-y, so I instead made Vanilla Cupcakes with a Lemon Curd Cream Cheese Frosting. I used what is quickly becoming my go-to recipe for vanilla cupcakes, with just a couple minor modifications. The frosting recipe once again came from Stacy at WickedGoodKitchen. That girl knows her frosting! She describes this frosting as having the “texture of mousse and tastes like lemon cheesecake.” How could I not try that? I tweaked it ever-so-slightly, and the results were a light, creamy, lemony frosting.
It’s been a while since I baked a cake for Jon’s birthday. And, when I say “a while,” I really mean I can’t actually remember the last time I made him a birthday cake. But before you judge me, let me just say that September is when we typically take a vacation, so the last few years we’ve celebrated his birthday somewhere far from home and far from the kitchen where cakes are made.
But this year, his day called for a cake.
Two things inspired my decision to make an Apple Spice Cake. First, the season. I had apples from our neighbor’s garden that needed a purpose. The day was a cool, fall day, so baking something spicy and cinnamon-y just seemed right.
My second inspiration came from this picture of Jon and his brothers, circa 1965. This photo actually appeared in Sunset magazine. That’s what happens when you and your brothers are beyond adorable, your mom was a state Dairy Princess and you live next door to a Sunset magazine photographer. Long before selfies and YouTube videos, this was the trifecta of celebrity.
Surprisingly, I had a bit of a challenge finding a good apple spice cake recipe. I liked the name of one from Paula Dean (“Uncle Bob’s Fresh Apple Cake”) but based on the reviews it needed some tweaking. So, I started there, changed things up, and landed with this one. Paula’s recipe was for a Bundt cake, but I wanted a cake I could frost, so I baked mine in 2 – 8″ pans instead. (I used 8″ instead of 9″ pans so that each layer would be taller to minimize the cake to frosting ratio.)
This is a dense, substantial and flavorful cake. You can actually see, and taste, the chunks of apple in it. (I have made similar cakes where I’ve grated the apples rather than dice them, and I may do that next time.) But it’s not an overly sweet cake. So, I thought it called for a frosting that was sweet, but not too sweet, and maybe with a little tang, similar to what you would use for a carrot cake. I went with a Cinnamon Cream Cheese frosting, and it was the perfect topper for this cake.
Then, I got a little carried away. I wanted to decorate the cake somehow and decided that one of the birthday banners like I’m always seeing on Pinterest and Etsy would be perfect. The easy part was finding one and printing it on my printer. I love that people just provide these things, free of charge. It seems amazingly generous to me. This particular one came from www.simplyklassichome.com. Locating one and printing it took maybe 6 minutes. And, I thought, “Oh, this is so easy and quick!” Then I spent another 45 minutes cutting the letters out and adhering them, then getting them on the twine with just the right amount of spacing, and then tying the banners to the straws. Some things really are a little more difficult than they look. Patience isn’t one of my greatest virtues, but fortunately tenacity and stubbornness are two things I’m known for. I’m glad I made the (small) effort. The banner really finished the cake.
If it’s not someone’s birthday, go ahead and make this cake anyway and find another reason to celebrate. That’s the beautify of life. Every day gives us something worth celebrating.
There has been a whole lotta blackberrying going on around here lately. Sometimes, everything comes up roses. At this particular time, it seems everything is coming up blackberries.
Fortunately, I love blackberries and all of their deliciousness. It doesn’t take much effort on our part to find a variety of ways to take advantage of their abundance. First, there was spinach salad with fresh blackberries. Then, every morning for the last two weeks, our daily smoothies have gotten a boost of antioxidants because I’ve added a handful of blackberries to them. Now Jon is working on a blackberry Caipirinha cocktail (recipe coming to a blog near you, soon!). And, of course, blackberry cobbler has come to more than one dinner party in the past couple of weeks. And, yet, we still have blackberries. And stains on many of our kitchen towels as proof.
Driven by my never-ending love affair with ice cream, I made some lemon ice cream. My need to use some more of the berries turned the lemon ice cream into lemon blackberry ice cream. In a word, yummers. (That is literally the word that popped into my head when I was eating the ice cream. Forget the fact that it’s not actually a word. In this case, it’s not only a word, it’s the perfect word.)
The recipe that initially got me excited about making lemon ice cream called for using water, but I decided that wouldn’t give me the creaminess I was envisioning and craving. So, instead, I basically used the same custard base for the ice cream that I use for other ice creams but added lemon zest and juice. I reduced the amount of whipping cream and vanilla. And for the berries I used the same process as I do with raspberry ice cream: During the last few minutes of freezing I added muddled blackberries. If recipes weren’t all about taste, I would make this ice cream again just for the color.
When we first launched our blog, one of our earliest posts was about blackberries. Specifically, it was about my dread of having to help Mom pick them as a child, my new found appreciation of the “chore” as an adult, and the glorious outcome that is blackberry cobbler. You can read that post here.
A lot has changed since that post. Back then, the only people that visited our blog were my in-laws. (They are still our most avid fans.) We were just starting to navigate the unknown world of blogging and what it takes to have a blog. Today, we think of our website as a real blog. We must be official because we have pages on both Facebook and Pinterest. We have a Twitter account and an Instagram account. And, we have real followers and analytics that allow us to track how many of you visit us on a daily basis.
Over the last couple of years, some of the most common feedback we’ve gotten is that many of you appreciate detailed instructions in the recipes, and pictures — not just of the end result, but also of what it’s supposed to look like at various steps as we make it.
But, some things have not changed. Like the untapped blackberry bramble in our neighborhood. Every year, I cannot believe the bountiful harvest we get from that undiscovered thicket. (Of course, when neighbors ask where it is, I have to admit we’re a little vague about its whereabouts. “Oh, you know, over there in that direction.”) And my thrill of coming home with our harvest and making blackberry cobbler has not changed either. We know that several of you have made this cobbler, and have shared your prize-worthy efforts with us, which makes the whole thing that much grander.
So, in honor of where we are today, what we’ve learned along the way, and the blackberries that will soon become cobblers, here is an updated post complete with more pictures. Including this adorable picture of Olivia, helping my wonderful friend Kim (Olivia’s grandmother) make the cobbler. I don’t know which part of this I love the most: The fact that a toddler is helping to make our blackberry cobbler recipe or that she’s standing on the counter as she does so.
And this bears repeating. Even though I have made this cobbler now countless times, every single time I pour the sugar/water onto the cobbler, I think “This is not going to work.” I just can’t fathom that the liquid will be absorbed and that I won’t end up with a soupy mess. But it does work. Amazingly well.
Or, in this case, cupcakes. I know they are a little trendy right now, but I’m very fond of cupcakes. Like Jon says, they are fun because everyone gets their own cake.
For this particular birthday party, cupcakes seemed like a better choice than cake. For one thing, it was at someone else’s house, and I didn’t want to haul plates and forks. Nor did I want to show up with my contribution to the party and require that they provide plates or forks. So, cupcakes seemed like the perfect no-imposition dessert. Secondly, it was a large party (about 20 people), and it would take a really large cake to feed that many. Although, lesson learned on this one. I underestimated how much dessert everyone would eat. I only took 2 dozen cupcakes, even though the recipe made more than that. Everyone had a cupcake and several people immediately wanted seconds. Next time I’ll take the whole batch.
Since we’re smack dab in the middle of summer, I wanted the cupcakes to be summery. With raspberries in season, I decided a vanilla cupcake with raspberry frosting would be a perfect birthday party dessert. I’ve been wanting to try something that I had seen on Wicked Good Kitchen a while ago. Her recipe was actually for a strawberry frosting, but I figured raspberries could easily be substituted. In her recipe, she had used freeze-dried berries for the frosting. Intrigued, I promptly ordered some from Amazon. You pulverize the berries into a powder (I used a clean coffee grinder), and then use the powder in the frosting. The benefit, or so I read, is that you get all the flavor of the berries without introducing a lot of unwanted juice or liquid, which can drastically change the consistency and texture of the frosting. I acknowledge that by using freeze-dried berries I wasn’t actually taking advantage of the seasonal berries. But, it’s what gave me my inspiration. And, I used a fresh berry on top of each cupcake.
For the cake, I used a recipe that had been touted the “best white cake recipe {ever}”, and after making it I think I have to agree. She said it would quickly become my favorite recipe, and she’s right. With the exception of adding more vanilla than the original recipe called for, I didn’t change anything about it and the cupcakes turned out perfectly.
Occasionally on Facebook or in e-mails I see one of those lists that contain things that “kids born today” will never experience. Like VCRs or walking across the room to change the TV channel. At the risk of totally dating myself here, I’d like to add something else to the list: Hand-crank ice cream makers. Oh, sure, kids today have to occasionally stand in line at Molly Moo’s or Coldstone, so I guess they’ve suffered some anticipation angst in the name of ice cream. But like so many aging adults, I just have to say it’s just not the same as when we were kids and had to make the stuff the old-fashioned way.
My memories of making homemade ice cream are always centered around a little town in the southeast corner of Kansas, where my grandparents lived. Inevitably, and much to my dad’s chagrin, it seems we always visited my grandparents smack dab in the middle of summer when the heat, to say the least, was stifling and downright miserable. So, it seemed that the proverbial lipstick on the Kansas pig was homemade ice cream. (“It’s hot, buggy and godforsaken here, but, hey, we can make ice cream!”). Grandpa would pull out the old manual crank ice cream maker while Grandma mixed up the ice cream fixin’s. The outer bucket of the freezer was filled with ice and rock salt, which served as the freezer. The kids got in on the act by clamoring for their turn at manning the crank. For those of you who have never done it, the fun and appeal of turning the crank wears off after about 2 1/2 minutes. Which is unfortunate given that the ice cream had to be churned, constantly and at a pretty good pace, for about an hour before it was ready. After enough whining and hopeless cranking, the kids were excused of their duty by some woeful-looking adult who would sit, one hand on the crank and the other holding a cold beer, sweating and silently cursing the advent of ice cream. With the burden of responsibility lifted from our tiny shoulders, we were free to do what kids do best: Prance, hover and incessantly chant, “Is it ready yet?” for an hour while the grownups did all the hard work. God I loved making ice cream back then.
Years later, my dad purchased an electronic version of the old hand-crank machine. I’m sure this seemed like a newfangled contraption to him. The outer bucket was plastic, instead of wood, and electricity provided the cranking. But it still needed ice and rock salt to freeze the ice cream. Dad would always put some old towel down under the bucket to protect the deck or sidewalk from the salty sweat that apparently was produced by the melting ice during the crank. Sounds similar to the adults cranking the handle in Kansas, doesn’t it?
Fast forward a few decades, and here I sit enjoying my homemade ice cream from my little Cuisinart. (Talk about newfangled!) No sweat, no toil. No cranky adults. No prancing around in my grandparent’s sweltering, airless backyard. But still a little anticipation of the sweet reward that is homemade ice cream.
I’ve never been much of a “fruit and vegetable” gardener. I’m one of those people who loves the idea of growing their own produce but sort of lacks the motivation to do much about it. And, living in a place where we’re surrounded by farmland, and a string of roadside stands with an abundance of local produce, I have even less motivation to take on a garden at home. But last year, we inadvertently became farmers, thanks to the tenacity of one lone, wild strawberry plant that appeared in our flower garden. Jon asked if he should pull it. My response was, “If it wants to be there, who am I to persuade it otherwise.” Over the winter, that lone strawberry vine seemingly rounded up a couple dozen of its friends to make a verifiable strawberry patch right there in our front yard. It makes me smile to think that, without any effort on our part, these little plants took it upon themselves to show up and produce. Even though our crop can hardly be called a bounty, we now have enough strawberries for strawberry shortcake several nights a week.
Our little spontaneous strawberry patch is working out quite well. Because, as it turns out, there are few desserts that I love more than strawberry shortcake. But even though it’s one of my favorites, it’s a seasonal dessert for me. I only make it in the summer when the berries are local, fresh and super sweet. (And in this case, local occasionally means grown in our own garden.) In a word: Yum.
Our version of strawberry shortcake is a spin on the classic. We make it by starting with a layer of good textured cake, then add vanilla ice cream, berries and whipping cream. I don’t know when or why I started adding ice cream to the mix, but now I can’t imagine serving it any other way. I used to use Krusteez Scone Mix for the shortcake. It was easy and good. But, we’ve recently started using Lemon Pound Cake, and we’re hooked. As one guest said recently, the subtle lemon flavor of the cake, combined with the sweet strawberries, is the perfect flavor combination. We agree.
You have many options for the cake part of this dessert: From scratch, from a box, or something pre-made from a bakery or from the freezer section. Whichever way you choose, just do it. There are strawberries out there being called to their rightful place in this universe as a dessert at your next party.
And, honestly, isn’t strawberry shortcake what summer is all about?
It was one of those afternoons where I feeling pretty snorty about my entertaining prowess. The table was set, the salmon was marinating, the rug in the guest bathroom had been shaken. The pound cake was baking in the oven. I still had an hour and a half until our guests arrived and all I had left to do was take a shower and get dressed.
Our planned dessert for the evening was strawberry shortcake, and I had decided that a nice pound cake would be a good base to the strawberries. I was working off of two recipes: One that is supposedly from the Ritz Carlton Tea Room and one from an old copy (from 2007) of Cooks magazine. I have always liked Cooks because of the detailed definitions they provide from their multiple attempts to get a recipe right. It was fairly easy to combine the Ritz recipe with the process provided by Cooks. Even though Cooks warned that making a pound cake was “no cake walk,” after seeing how beautiful my batter was, I had all the confidence in the world that I was, contrary to the alert, indeed enjoying a cake walk.
And then it happened. About halfway through the bake time, the cake fell. And it fell hard. I was using a Bundt pan and, at that moment, it looked like a little ring of failure. The outside and inside edges of the pound cake were still where they were supposed to be but the middle was completely deflated. I think what I said at that moment was, “Oh, #%i&!” Since it still had over 20 minutes to bake, I decided to just let it bake. I mean, at this point, how much worse could it get?
So, there I was. An hour and a half until our dinner guests arrived with our dessert now looking like a bad tire blow-out. Surprisingly, I didn’t panic. Even when Jon asked, “Nowwhat are you going to do?” Since our strawberry shortcake consists of shortcake, ice cream, strawberries and whipping cream, I figured that, even minus the cake, I still had the makings of a dessert of berries on ice cream. Fortunately, I hadn’t printed menus.
After the allotted time, I tested for doneness with a skewer, because no toothpick was long enough to reach the crevice of my cake. I let it cool for a few minutes in the pan and then turned it out onto the rack to cool completely. And, here’s where the sad story ends. In its inverted position, it looked perfect! You couldn’t tell that it had fallen. At that point even if it was a mess when I cut it, I’d just put a bunch of pieces in each bowl, cover them with enough ice cream and berries and no one would be the wiser. But, even when I sliced it, there was no hint of its condition. It was a Christmas Day miracle in June.
Even though it all turned out well in the end, I was still perplexed by the whole thing and wanted to try and figure out what had happened. I’m not quite sure why I thought to do this, but I checked the Best By date on the flour. I’m guessing that the 2 1/2 year old cake flour may have had something to do with my baking disaster. Note to Self: Only use fresh ingredients. And, it’s better to check for freshness before you use an ingredient, not after.
I’m happy to report that I made the cake again this week (with fresh all-purpose flour), and the cake was a success.
It’s easier to get all of the ingredients prepped first. Zest and juice the lemons, whisk the eggs, and sift the flour before you start mixing everything. In the end, this recipe uses the ingredients suggested by the Ritz recipe (with just the addition of vanilla) but follows a lot of process defined by Cooks.
The results? Cake heaven. This pound cake has a perfect texture. Seriously, even the first cake in all of its deflatedness it was wonderful to eat. The subtle lemon flavor is a perfect offset to the sweetness. And while the recipe doesn’t actually call for a pound of each ingredient (like its original namesake), it does have a good amount of butter and sugar. Perfect taste and texture. What more could you ask for in a cake?
This is one of those cakes that disappeared quickly, one little shaved-off slice at a time.
I think this dessert has been around for a long time. But I had never had it until I was at my cousin’s house in Houston when she hosted me, my sisters, my aunt and my other cousin for brunch. Given my cousin’s perfectly Southern and lavish home, which is a perfect reflection of her, I assumed this dessert was one of those that required a lot of effort (or had even been made by a caterer). It was SO good, I eagerly accepted her offer of a second helping with barely a hint of embarrassment on my part. I got the name of the dessert from my cousin, and then looked for a good Strawberry Napolean recipe online.
I had avoided working with puff pastry basically my entire life. I had it in my mind that without a marble slab and a lot of finesse, the pastry wouldn’t puff that way it’s supposed to. Maybe I had it in my mind that it was French. Whatever it was, there was just something about it that I found intimidating. But that’s how good this dessert is. I was determined to get over my fear and master the puff pastry. And, much to my delight, it was, well, easy! So, if you’re like me and you’ve avoided recipes that use puff pastry, here’s your chance to bake like a professional baker with none of the fuss. If you’re still doubtful, maybe the fact that earlier this week I used a box of puff pastry that had been in my freezer for about a year and still had perfect results will nudge you over to the “I can do this” side.
Just thaw and unwrap the sheets and cut along the fold lines.
Bake in the oven and they puff just like their name says they will.
Slice each pastry down the middle to make two halves.
You’ll end up with six pieces. Pick the two prettiest ones to use as the tops.
The combination of the puff pastry, fresh fruit and custard is undeniably lip-smacking delicious. This is one of those desserts that comes together rather easily but makes you look like you know your way around a wooden spoon.
The milk and pudding thicken when whisked.
Whip the cream until soft peaks form.
Gently fold the cream into the pudding/milk mixture.
Layer the custard and berries (and don’t be stingy with the custard).
Drizzle a little icing on top and then cut, serve, and take a bow.
While the original recipe calls for strawberries (hence the name Strawberry Napolean), I’ve found that any berry works well. For the Fourth of July, I used both blueberries and strawberries for a wonderful and patriotic spin on the original.
What is it about zucchini. It seems that every fall some well-meaning neighbor (the one with the big vegetable garden) brings us a gift of a home-grown zucchini. They are always ginormous things (we have friends whose pet dogs are smaller than some of the zucchinis). I know we have received this gift because gardens always produce more zucchinis than one person knows what to do with, so they are passed on to neighbors and become someone else’s problem to solve.
This has been going on since the beginning of time. I remember my mom, who never grew a zucchini in her life, grating zucchini to freeze for “future baking.” So, that’s what I do. Grate it, freeze it and forget it’s there. And, judging by the Ziploc baggie full of grated green that I found in the bottom of our freezer, that’s what happened this time. It was dated September ’11. It had just sat there in frozen limbo, for over 2 years, waiting for a purpose.
I didn’t actually see the date on the bag until after I had defrosted it. At that point I was committed to making muffins so I just hoped that we wouldn’t die from some horrible people-killing scourge that grows in frozen zucchini after 2 years.
If it looked a little sad and dilapidated when I took it out of the freezer, it looked utterly pathetic after it thawed.
Ewwwww.
Two years of freezer frost created a lot of water when thawed. So to take care of that problem, I just opened one end of the baggie about an inch and squeezed until all of the liquid was gone.
And, here we are. Two years and two hours later enjoying a delightful zucchini chocolate chip muffin made from a homegrown zucchini. I have to admit, this isn’t a bad way to get a serving of veggies.
There’s a reason I waited so long to make these Caramel Layer Chocolate Squares. And, I almost didn’t tell you about it because in doing so I’m going to disclose how lazy I really am. But here it is. I didn’t want to unwrap a whole package of caramels. I’m not a patient person and the task of taking the caramels out of those little cellophane wrappers is just a little slow and tedious for me.
My mother-in-law gave me this recipe. A long time ago. And I’ve had it in my file ever since waiting for the right burst of energy that would motivate me to take on the caramels. So, when I saw caramel bits at the grocery store, the first thought I had was, “I’m going to make that recipe!” Seriously. Didn’t make them for years because of the effort involved in caramel unwrapping but made them as soon as Kraft provided me with an easy way out. It makes me fear I’m about to qualify as a card-carrying member of the Lazy People Club.
Her recipe called for baking it all in the microwave. At the risk of completely contradicting myself and my earlier comments about preferring to take the simplistic route, I have to admit I’m really not a fan of baking in the microwave. Not sure why exactly. While I don’t have the patience to unwrap a bag of caramels from their wrappers I do prefer to bake something in the oven even though it takes 3 times as long as doing it in the microwave. Apparently what I lack in patience I more than make up for in contradictions.
If you’re like me and tend to think that a recipe has to be made from scratch to be good (meaning that it doesn’t call for a cake mix), this is one time when you should make an exception. It comes together quickly and bakes up to be a real crowd pleaser. If you don’t really consider yourself a baker, but you’re on the hook to bring the dessert to some potluck or dinner, this is the dessert for you. Easy to prepare and you can almost count on someone asking for the recipe.
Even before Pinterest came along, I was a collector of things that inspired me and recipes I wanted to try. Instead of pinning recipes and ideas to a board, I would tear them out of magazines or print something from some website and tuck it into my file folder. Or folders. I have always had stacks of recipes that I wanted to try. About once a year, or when the folder would be to that bulging and unmanageable stage, I would go through and try and organize my stash in some way that made sense. The organized state of it all would last about a month and then it would return to a jumbled mess. Even as I write this I realize that I’ve managed to suggest that all of that is in the past, when in reality I still keep a lot of paper copies of recipes and ideas.
During one round of organizing a while back, I realized I had several versions of a dessert called a Lemon Icebox Pie. From what I’ve been able to determine, icebox pies originated in the South (like so many great foods do) sometime in the 1930’s. Supposedly since these pies required no, or little, baking, they were a solution for southerners who still wanted a dessert even on a hot, summer’s day. But the popularity of these pies spiked in the 1950’s and 1960’s when no-bake pies became sort of the rage. And I don’t know when the pre-made graham cracker crusts became available, although I do remember Mom using them when I was a kid.
Because I’m such a fan of all things lemon-y, this particular no-bake pie was appealing to me. Although it’s a good thing I didn’t become too heavily invested in the no-bake concept, since this particular recipe requires the pie to be baked. As I said, I had several different recipes, so this is a cobbled together version of 2 or 3 recipes from my folder with the main inspiration coming from a restaurant in New Orleans (Clancy’s). While most recipes just call for refrigerating the pie, Clancy’s freezes their dessert. I cut our pie in half and tried it both ways. While both ways are good, our guests voted unanimously for the frozen version. You can chill according to your personal preference but I suggest if you freeze yours to allow it to sit at room temperature for about 10 minutes before serving. I used the topping that I always use on my key lime pie, which is super easy and a nice finish to a pie like this.
We had a bag of Meyer lemons in the refrigerator and I love their flavor, so that’s what I used for the recipe. But I’m assuming any lemons would work just as well.
The result is a not-too difficult to make pie that is a light, fluffy dessert and a perfect combination of tart and sweet. Given the history of this dessert, I kind of wish I had one of those hour-glass/curve-hugging dresses from the 50’s to wear when I serve it. I’d wear pearls, too.
Press the graham cracker mixture into a pan.
First zest then juice your lemons.
Whisk the egg yolks and sugar until thick and pale yellow.
Bake until set.
Cool, add the topping and then refrigerate or freeze.
The original recipe for Hummingbird Cake was submitted by a reader and first appeared in Southern Living magazine in 1978. It was included in an article titled, “Making the Most of Bananas” with a great lead in about the virtues of bananas. Since then, it holds the title for the magazine’s “most requested recipe.” Back in the day, this cake recipe also supposedly won numerous blue ribbons at various county fairs.
I made Hummingbird Cake recently for dessert during our girls weekend retreat. It’s a good cake for a large group because, due to its sweet and rich flavor, a little goes a long way. A 9″ cake easily fed our group of 10 with plenty left for the next day. (Which was breakfast for some.) It makes a moist cake and all the flavors mix well without being a “tropical” cake that you might expect from the ingredients.
The only changes I made to the original recipe were to make it a 2-layer cake rather than a 3-layer as the recipe directed, mainly because I only had two round pans. I also used my frosting recipe rather than the one the recipe provided.
Not sure where the name comes from although some speculate it might be because it is a sweet cake and maybe there’s a correlation between the cake’s sweetness and the nectar that hummingbirds are drawn to. I don’t know if that’s true or not, but our friends made several wisecracks about how many hummingbirds were sacrificed in order to make the cake.
This is a nice springtime dessert, if for the name alone.
This is a pretty bold proclamation, but I think these are the best chocolate chip cookies in the world. I mean, I know this is almost sacrilege, given that the chocolate chip cookie is an American icon and so many of us have our own definition of the best one. If you don’t like nuts in your cookies or if you think chocolate is an inconsequential part of a chocolate chip cookie, then this probably isn’t the recipe for you. However, if what you want in your cookie is lots of nuts and chocolate in each bite, keep reading.
This recipe is adapted from a wonderful cookbook called The Pastry Queen. The name alone probably tells you what you need to know about the recipes. The author, Rebecca Rather, owns a bakery in Fredericksburg, Texas. If you’ve never been there, you’ll get a sense for the town from her recipes. Scrumptious Southern baking at its finest.
The book was given to me years ago by my sister-in-law Lisa. While browsing through it the first time, I came to a screeching halt on the recipe for chocolate chip cookies. I think Rebecca had me at “one tablespoon vanilla,” because I’m sort of a believer in adding an extra splash of vanilla to recipes. After I made these cookies the first time, I’ve never gone back to any other recipe. (And god knows I’ve tried my fair share of them.) I’ve tweaked the recipe ever-so-slightly over the years. These cookies turn out perfectly every time and are always a hit with everyone who tries them.
We recently took a tray of them to a potluck and they disappeared quickly. For all of you who asked for the recipe, here you go!
I’ve made these cookies countless times. For something different, and thinking in terms of creating more cookies than the original recipe, I tried using my small ice cream scoop (just over an inch in diameter). The smaller scoop makes the cutest little chocolate chip nibbles with the same delicious taste as their larger counterparts. The recipe contains baking times for both large and nibble-sized cookies.
These cookies freeze wonderfully well. I actually freeze some of them as soon as they cool so I can keep a stash in the freezer for the Bartender (who will only share them with our guests after some arm-twisting).
If I’m being totally honest, I have to admit that sometimes I feel like the Scrooge of Valentines Day. It’s not that I necessarily dislike the Hallmark-inspired day. It’s just that sometimes if feels like there’s a lot of pressure to participate in it all. It’s the forced romanticism I tend to bah-humbug. I like to think of love and romance and sweet gestures as a daily thing, not a cram-it all-into-one-day sort of thing.
With that said, truth be told I like all of the hearts and red and pink and cute little “Will You Be Mine” Valentines. In grade school, I loved the handmade mailboxes and Valentines secretly dropped into them by classmates. But now, I just like the thought of saying “I love you” as being my idea and not something that’s scripted for me one day of the year.
Want an any-day-of-the-year, from-the-heart way of saying “I love you” to all those special people in your life? In my book, nothing says it like chocolate. With raspberries. Made from scratch. Go ahead and swoon.
This dessert started with one of my Mom’s recipes: Raspberry Torte. It’s one of the cherished few that I have that is in her handwriting (on a 3 x 5 index card, of course), and I’ve held onto it all these years. But I’d never actually tried it until now. We were taking dessert to a dinner party and I decided to make Mom’s recipe. But when I started looking at the details, I wasn’t sure it would actually turn out. And then I realized it didn’t have any chocolate in it. So, I turned to the internet and started googling. I found a recipe on Cooks.com that sounded pretty good but ended up tweaking it quite a bit. The end result was a nice, dark chocolate sponge cake with a raspberry mousse topping. And the best part is that, even at 7000 feet (where we live in the winter), the cake turned out perfectly! (That’s not something I can say very often. Thanks to the altitude, most of my cakes fall in the center.) And the raspberry mousse is simply delectable.
Of course I understand how someone might have asked, “Why exactly do you need 10 pounds of tangerines?” And that person would have been asking without even a hint of exaggeration, because I literally had 10 pounds of tangerines in the refrigerator.
To answer that question, let me just say I’m not sure it’s a matter of need. Maybe more like a slight urge to hoard, because I know good tangerines are seasonal and there will come a day when I won’t be able to just buy them whenever I want.
So, then I needed to do something with my stash. What a happy coincidence that we had a group of friends coming for the weekend. Since one of our dinners was beef stroganoff, I was looking for something light for dessert. A quick surf of the net yielded several recipes for tangerine mousse. A perfect solution to use some of the tangerines and provide just the kind of dessert I was picturing after a big, heavy meal.
This is a wonderful dessert. It’s light and airy, with just the right amount of tangerine-ness to give it flavor. At the risk of sounding like Dr. Seuss, let me say you can serve it in a spoon or you can serve it in a cup; you can eat it sitting down or you can eat it standing up.
Zesting and Juicing
If I was slightly intimidated by the process before I started, I quickly discovered it came together pretty easily. Turns out it’s not that difficult to properly dissolve unflavored gelatin or whip egg whites just so. And, I was able to prepare it in the morning and clean up my mess before our guests arrived without leaving any hint of the tangerine carnage. I served it in my vintage champagne glasses, but you could use any cup or parfait glass or martini glass. And I think the porcelain spoons are a great way to serve it on a buffet or for a walk-around party.
Baby, it’s cold outside! And the snow has been falling pretty much non-stop for the last several days. Around here, that is all cause for celebration.
When you live in a mountain resort community, snow is a good thing. And it’s a reason to be outside. It’s like a big white playground, just begging kids of all ages to come out and play. Sometimes snow can just be so much fun.
If snow is for all ages, then the refreshments should be, too. Hot chocolate appeals to all of us, young or old. But there’s something wonderfully adult about this hot chocolate. It’s a little bit of decadence in a cup, that you can wrap your hands around and enjoy marshmallow tip to chocolate-y bottom. And if you’re really feeling like a grown-up, go ahead and add a shot of Peppermint Schnapps. It all makes for a perfect combination of play hard/relax hard.
There is no other time of the year when traditions mean as much as during the holidays. Big or small, simple or complex, it seems that just the term “holiday tradition” conjures up something in all of us. It just doesn’t seem like the holidays if those things that have defined the season for us before are missing. This can especially be true with food. Yet, for many, this is also the time of year to try something new, maybe with the thoughts of introducing a new tradition for future celebrations.
My mom was someone who cultivated year-over-year traditions and tried new things. We always had the same breakfast on Christmas morning, complete with her cinnamon rolls. And Nanaimo Bars were standard, as was spiced eggnog. But one year, she found a recipe in the newspaper for one of those Bûche de Noël (Yule Log) cakes. If you’ve never made one, or witnessed someone else making one, let me just say that it’s not a simple dessert to make. My poor mom spent the better part of two days making that thing. I watched her as she made the cake from scratch, and then rolled the warm cake up in a tea towel, then as she unrolled it after it had cooled to fill with the cream filling, only to roll it up again, all the while being patient and careful so that the cake wouldn’t crack during any of these calisthenics. Then she frosted the whole thing and decorated it to look like a log. And, while the dessert won points for effort, the cake was more work than it was worth. Needless to say, that particular dessert didn’t become an annual tradition our house.
That is why this seems like good time to share my mom’s chocolate cream pie recipe with you. It’s hard for me to think of the holidays, or any family gathering for that matter, without thinking how Mom would make this pie. (Except for the year it got pre-empted by the Yule Log.) This was always a family favorite at our house.
I guess I got my need for tradition and my need for experimenting from my mom. I have made this pie countless times, for our holiday dinners and special occasion get-togethers. But I’ve also tried many, many new recipes as well. Some successfully (and worth repeating), and others, well, not so much. My own renditions of the once-seen Yule Log, I guess. Thanks, Mom, for showing me that both traditional and new have a special place in our kitchens.
Chopped Chocolate
Chocolate appears speckled as it begins to melt
Chocolate mixture has thickened and first slow bubbles have appeared
Adding the warm filling to the eggs, and then slowly incorporating it all back into the custard, ensures you don’t end up with chocolate scrambled eggs.
Plastic wrap prevents skin from forming as the filling cools
One More Note: There may be some of you who have been following along with my attempts at mastering the art of making from-scratch pie crusts and are looking at this picture and saying, “She finally did it!!” Well, in the spirit of full disclosure, I have a confession to make. This crust came out of a box. Now, before you make a snap judgment about my lack of perseverance, let me just say that I actually did attempt another pie crust from scratch for this pie. When it completely (and I cannot overstate the word “completely” here) flopped, I gave up (for today) and resorted to the can’t-fail-from-a-box pie crust. But given that Mom always used the pre-made pie crusts, it somehow seems fitting that, for her pie, I did too.
As I write this, Mother Nature is doing her darndest to make it perfectly clear that fall is here. The real fall, not that oh-aren’t-the-leaves-pretty fall. The skies are gray. The wind is howling. And the temperature is almost bone chilling. But don’t get me wrong. I’m not complaining. These days, I love a good excuse for staying indoors.
Fall is actually one of my favorite times of year. I love the transition from outdoor living with barbecues and evenings spent on the patio to indoor living with soups and something good cooking in the oven that always seem right when the temperatures get cooler and the days get shorter. In honor of this blustery day and the season, here is a recipe for Apple Crisp; something good to warm your kitchen and share with anyone lucky enough to be invited. Not only does this make a very scrumptious dessert, it reminds me of everything I like about the community of kitchen-heads that this blog is all about. Upon reflection, here are some of the things I like about recipes:
They are shared. And as a result, recipes can create a community of sorts. This is an example of one of those things that you can give away and keep at the same time. While I have encountered some people that are stingy about sharing for some reason, most people are extremely generous with their recipes. For example, this recipe comes from the woman who owns our local nursery, Christianson’s. It was recently included in their newsletter, that my sister-in-law created each month. And now it’s on our blog. Years ago, people shared recipes on 3×5 index cards. Today, it’s virtual. We got the idea for this blog after responding to so many e-mails from friends requesting recipes. It just seemed easier to put them all in one place for everyone who wants them.
They become part of us. Ancestry, by definition, is the origin or background of something. People are usually very quick to say where they got a certain recipe. In the newsletter, Toni Christianson says “This recipe has been a favorite in the Christianson family for many years. We call it ‘apple crisp’ even though it’s called ‘Apple Betty Pie’ in the Better Homes and Gardens New Cookbook from 1965.” What started in a cookbook is now part of a family. And is now being shared virtually in newsletters and on blogs. Time after time when someone shares a recipe with me, copied from some index card that says, “From the Kitchen of Great Aunt Edna”, I’ll find the same recipe in a cookbook or online. After decades of enjoying what Great Aunt Edna prepared, I doubt that anyone ever stopped to consider where Great Aunt Edna got it in the first place. It became hers simply because she was the one who always prepared it. Sometimes the origins get a bit blurred over generations as the recipes are threaded into some family tapestry somewhere. Today, in this virtual world, we try very hard to respect intellectual/creative property and give people credit where credit is due. But sometimes, the lines between Great Aunt Edna and Betty Crocker can get a bit blurred.
We can make them our own. By either making a recipe exactly as written or by modifying it to make it right for us, by virtue of simply making something it becomes a part of us that we share with others. Within a recipe, there are lots of steps along the way where you can personalize, by adding a spice or substituting an ingredient or changing how you do something. We make it work for us and in that way we make it our own. I love that you can do this with a recipe. In the newsletter’s version of the Apple Crisp recipe, it read “You can use half orange juice and half triple sec orange liqueur, or you can use all liqueur.” I used all Grand Marnier and loved the results.
Now it’s time to get baking. This recipe is easy, and lets you take advantage of some of those great apples available right now. Sure, doctors may tell you that an apple a day will keep them away, but I personally think it’s here, in a crisp, where the apple realizes its true life’s mission.
The truth is I don’t make cakes very often. And the reasons are pretty simple. First, a big cake goes a long way, and unless there are several people indulging, it seems a little like overkill to me. And, second, unlike some desserts, there isn’t a good way to test it before serving it to guests. And that always makes me slightly nervous.
But I was asked to bring a chocolate dessert to a birthday dinner party lately (specifically chocolate, for the birthday boy), and I immediately thought of a cake that I had seen in my Pastry Queen cookbook at one time. It’s called a Tuxedo Cake and it seemed to be the right thing for the party.
It wasn’t a quick cake to make. From start to finish, it probably took over 3 hours. But let me just say this. Best. Cake. Ever. One of the guests said more than once, “I don’t really care for cake. But I want to eat that whole thing.” It was really that good.
I ended up using parts from 3 different recipes. While the traditional Tuxedo Cake calls for a whipped cream frosting, I wasn’t sure I could keep the cake refrigerated and was afraid that the whipped cream would break down a little between prep and serving. The Swiss Meringue Buttercream turned out to be a great frosting for the deep, dark chocolate cake. It isn’t as sweet as some frosting but it can hold it’s own against a strong star, like the cake. I had wanted to make this frosting for a while but had been a little (okay, a lot) intimidated by all the woeful stories I had read about people’s attempts, and failures, at making this frosting. (Perhaps it was the consistent use of the term “curdles” that caused my alarm.) But armed with some good tips from Epicurious.com, I chanced it. And I’m so glad I did. Finally, while Tuxedo Cakes are generously covered with the ganache, I found that I only needed about half of the recipe to get the coverage I wanted.
Now I’m just sitting here hoping someone calls and invites us to some get-together and asks me to bring a chocolate cake so I can make this one again.
Last week would’ve been my dad’s 95th birthday. In his memory, and to celebrate his birthday, I decided to make his favorite pie: coconut cream. Which means this is the next installment of the The Great Pie Challenge (TGPC) here in the Entertaining Couple’s kitchen.
The first pie I made last week was a throw-away. I mean, dump-in-the-garbage-can kind of throw-away. There were basically two things wrong with it. First, I didn’t roll the crust thin enough which resulted in (yet again) too much crust for the filling. I could’ve lived with that had it not been for the second problem. The half and half I used had apparently gone bad. Even though the date on the carton indicated that it was good for another few weeks, the cream inside didn’t get the message. One taste and we both knew it was bad. So into the garbage can my sour, overly-crusted pie went.
Since we had friends coming for a visit, I turned right around and made a second pie. It tasted great! And it looked pretty good. But despite my best efforts with baking an unfilled pie crust (often referred to as blind baking, which somehow seems appropriate to me), I was still getting a pie crust with air bubbles and some shrinkage. My crimped edge lost its definition. So I finally cried “Uncle” and ordered some pie weights.
Which brings me to last week’s Pie #3. The dough was a great consistency when I took it out of the food processor and shaped it into a disk. I put it in the refrigerator for an hour. When I rolled it out, it was still working okay. But when I attempted to lift it into the pie pan, things went downhill. The dough was breaking, not stretching like it should. I dumped it back onto my floured surface, made a new ball and re-rolled it. The second time it worked better, but not perfectly.
I’m not really a “if at first you don’t succeed, try, try, try again” kind of person. I’m more of a “if at first I don’t succeed, try again; get discouraged and then really have to talk myself into trying one more time” kind of person.
I just keep looking at this process and, quite frankly, am absolutely astonished that I’m having so much difficulty with it. I mean, it’s flour, Crisco and water, for god’s sake. How difficult can this be? Well, if my attempts are any kind of proof, the answer is “plenty.”
As I attempted to make Dad’s pie, I kept thinking about those women (and men) who enter their pies at the state fairs and come home with blue ribbons. I looked at my poor, tattered pie crust as it lay waiting in the pie pan and the thought of anyone viewing it, much less judging it, actually made me laugh. Which is pretty amazing given that in situations like that I would normally be closer to tears than laughter.
So it wasn’t perfect. What the heck. I’d be serving it to friends and to my husband, not entering it into any contest. The same people would be eating it that, on a daily basis, I am grateful for because they overlook my flaws and love me, imperfections and all. These people are the ones who teach me that I judge myself much more harshly than they ever would. So it would be with my pie. Maybe it’s not the prettiest thing to look at. But looking at my pie was a good reminder that there is so much more that matters than looks. At the end of the day, I think Dad would’ve been pleased with his pie.
Hostess Note: Many recipes for coconut cream pies call for covering the entire pie with whipped cream. This is how you’ll see it many times in restaurants. I didn’t do that with this pie because (a) Dad never ate his pie that way and (b) we have one of those whipping cream dispensers and we have found that our guests really, really like to add their own (plentiful dollop) of whipped cream to their own desserts.
I’ve spent a fair bit of time around pastries. Probably more time consuming them than preparing them, but still enough time to know a good one when I eat it. So, if you’re like me and are somewhat of a pastry aficionado, you’re probably familiar with Red Velvet. It shows up frequently on menus and and in bakeries. The original recipes seem to date back to the 1800’s, although I’m guessing that, by name alone, it got a bad rap during the “red dye #6 scare” in the 50’s. However, Red Velvet seems to have survived time and the FDA and has kept its rightful place as a well-loved dessert. If you’re interested in the colorful (no pun intended) history of the cake, you can read it here.
When it comes to cake, I’m a firm believer that cake simply exists because it is a more socially acceptable way to eat frosting than with a spoon. That’s probably why I like mini-cupcakes. The cake to frosting ratio is a pleasing proportion for a frosting enthusiast like me. It seems that the original recipes for Red Velvet Cake called for an ermine or boiled milk frosting which I’m curious to try sometime when I’m playing bakeress in the kitchen, although quite frankly neither name does much to entice me. (Ermine? Really? What marketing genius decided that was the perfect name for a frosting?) Regardless, for my Red Velvet Cupcakes, I use a cream cheese frosting.
But even with enough frosting, if the cake is dry and bland, there’s just really no point in it. Velvet, as in Red Velvet, supposedly refers to the velvety crumb of the cake. A moist, chocolate-y cake with cream cheese frosting. The red is really just a little bling to make it the star of the party.
First there was Cracker Jacks. Followed by Fiddle Faddle. And then Kettle Corn. A distinct evolutionary track of my caramel corn addiction. There is just something about the perfect combination of sweet and salty that I can’t seem to resist. If only Brussels sprouts could have that effect on me.
Honestly, I’d never bothered to try and make caramel corn at home before. The whole “making caramel” thing was slightly intimidating to me for some reason, probably because it involves boiling corn syrup and sugar to the just-right stage of caramelization. That just seemed like a level of precision that was beyond my level of competency and desire. And I had heard too many stories about failed attempts by others. But it became a curiosity and desire for me when my sister-in-law, Lisa, kept asking if I had a recipe for caramel corn, so I decided to try it out for myself.
I had several recipes for caramel corn that I had cut out over the years in my expansive “to try” file. I was happy to see that none of the recipes required the use of a candy thermometer, because that seemed to simplify things. The recipe that I ended up using was a modified version of Kendall-Jackson’s Double Gold Caramel Corn, which they tout as a perfect snack pairing with one of their Chardonnays. I think “Chardonnay” was probably the selling point for me, so I tried it. The results were good, but I ended up making it again a few days later and increasing the recipe for the caramel which provided more caramel coating. The popcorn just seemed to need a little more coating to hold it all together, probably due to the addition of the nuts. The result is a sweet and salty caramel corn that we’re finding to be a little addictive. We’ve easily worked our way through two large containers of it in just a few days.
On Friday, I was sitting here having one of those serious “what was I thinking” moments. My family Thanksgiving get together at my sister’s house was less than 24 hours away. I had volunteered to bring, among other things, a couple of pies. Pumpkin, for obvious reasons, and chocolate cream, because the chocolate cream reminds everyone of our mom. This should not have been a big deal. I’ve been making pies for years. But, I’ve been making them with store-bought crusts. Our big family secret to perfect pies always included the red box out of the dairy section. For several reasons, personal pride, ambition, our daughter’s inspiration and encouragement (and perhaps just a hint of chagrin at my crusts-from-a-box), I decided that I would learn to master making pie crusts from scratch this year. You know the kind I’m talking about. The old fashioned ones, made with ice cold ingredients that make that super flakey crust you see on Crisco commercials. And, of course, I waited to take this on until the day before I needed to be good at it.
However, I’ve been anticipating this day for a while. I started preparing by eating a lot of pie. And by collecting recipes and tips from experts I found in various articles I read. Equipped with my stack of written paraphernalia, I hit the kitchen hard yesterday morning. Hours later, I was covered in flour, and I had finished the two pies, but I was feeling less than elated with the results. One of the tips from a pie-making expert said to roll the dough thick, because you want your crust to be “generous.” So, for the first pie I did just that. Well, the crust was, without a doubt, generous. There was a LOT of crust to this pie. It didn’t help that my new glass pie pan (bought specifically for this purpose) was the size of a hub cap. The pumpkin pie looked like the sad, misguided skinny girl who made an unfortunate choice in prom dresses and purchased a dress consisting of one too many layers of ruffles. The girl just gets lost in the dress. It’s all about proportions, after all. I mean, in regards to the pie, the filling was there, you just had to look a little bit to find it. I rolled the second crust thinner but it lost some of its shape as it baked, so in the case of the chocolate cream pie its frame is a little lackluster. If my worst case scenario is unattractive appearances, I can live with that. My real fear was that the crusts would be chewy, not light and flakey as they should be. And of course that wouldn’t be known until the pies were served.
You know how I’ve talked about being realistic about your skills and level of effort you’re willing to put into something? This was a case of my overestimating my skill and ability. I really thought I’d be able to master it. The first time I tried it. With nothing as a back-up plan except a trip to Costco to buy a couple of their pies. So, I just focused on the positives. One, my pies will be eaten by family. My family has to love me regardless of my pie crusts. Two, I’m confident the fillings turned out well. I’ve had lots of practice at those. And, three, there will be whipping cream. Whipping cream has saved bigger disasters than this on more than one occasion.
So, my pies and their crusts made their debuts yesterday. I won’t say they received standing ovations, but they were edible. And the pumpkin pie even got some honorable mentions for the crust. So, I’m sharing recipes for the pies and until I master the crusts, I’ll just let you provide your own.
Several years ago, we were fortunate enough to take a ski trip to Switzerland. In the land of the Alps, 3-hour dinners are the norm, not the exception. Which is actually a pleasant and indulgent way to enjoy dinner. Except, that is, if it’s your first day in Switzerland and you’re dealing with the inevitable jet lag. The first night at dinner, as we were fighting said jet lag, and after a couple of hours of sitting and several courses of food, we had reached the point where we were more interested in our pillows than in dinner. That’s when the waiters brought out dessert, which was basically a scoop of sorbet accompanied by a shot of vodka. The waiters poured the vodka over the sorbet. And we perked up. We all promptly took our spoons and mushed it all together, making an adult version of a Slushee. Sleep could wait. We wanted a second serving. Which all seemed to amuse the waiters greatly.
This really is a perfect solution to a dessert. Especially after a big meal. It’s light, refreshing, and beyond easy. Basically, scoop and serve. It’s been a hit every time we’ve served it. While you might be tempted to serve with a straw, I would only do so at the risk of listening to that irksome slurping sound that may result from your guests trying to get the last drops out of the bottom of the dish.
If you want to look like you made a fuss, serve with an assortment of chocolates. Because putting chocolates on a plate is slightly more fussy than scooping sorbet.
The sorbet pictured here is a blueberry pomegranate sorbet. (Delicious, with or without vodka.) But any fruit-flavored sorbet will work.
We all have those memories from our childhood of things we didn’t like to do. It was part of growing up. Our parents made us do some things that we didn’t enjoy. For me, one of the dreaded chores was picking blackberries. Growing up in the Pacific Northwest, where they grow wild and abundantly, it was an annual occurrence to go out and pick blackberries for a cobbler. Or jam. Between the long, willowy branches full of those hateful prickles, the bees and the purple fingers, I was just a phone call away from notifying the Child Labor Union that I was being mistreated.
No doubt, it probably wasn’t that pleasant for my mom, either. Not the berry picking, which she probably enjoyed, but rather having me along “helping.” Given how many berries had to be picked to even make a small dent in the coffee can that we used to gather the berries, I’m guessing I was slow to pick but quick to voice my misery the whole time.
So here’s the ironic thing. Now I pick wild blackberries whenever I can. When I discover untapped blackberry brambles, as I did last summer near our house, I get that same rush as when I find something special on sale. I have a berry pail that I take and I pick my way along the thorny bushes until my pail is full. While I pick, I honestly think about how fortunate I am to live somewhere where I can pick my own berries and am amazed that there aren’t dozens of people there picking as well. And, truth be told, I may spend a little time secretly calculating how much the equivalent harvest would cost me at the grocery store. My fingers still turn purple and sticky, but now they are a brand of accomplishment rather than irritation to me. I still don’t love the bees. I’d like to say that I’ve evolved to a greater place in nature and understand that all creatures have a place here and we have to all just learn to live together. In reality, I’ve just learned that there are fewer bees when it’s cool, so I try and do my picking right before sunset or in-between rain showers.
The serious quest for a good cobbler recipe started in earnest after I discovered the wild blackberries growing near our house last year. It was a great year for blackberries. They were small and juicy and sweet. The rewards of my pails full of berries and purple fingers is this cobbler. I tried several versions of cobblers, and believe me there is a variety out there, and finally landed on this one. Truth be told, even as I was making it the first time, I thought, “This will never work.” But boy was I wrong. The result is a little bit of crust and berries in each bite. Simply scrumptious.


 Which wouldn’t be a bad thing if we were just eating naked berries. If that were the case, we would be congratulating ourselves on our healthy diet. Instead, because we are making a daily habit of eating the berries layered up as shortcake desserts, the gorging behavior has crossed over into gluttony. Somehow we have rationalized that since it’s summer, and almost the 4th of July, we’re just doing our part to celebrate the season. I’m guessing if this behavior continues, my pants and I are going to have to have a little chat about who is to blame for the discomfort.


 Until now, I’ve always thought of this as a “winter cake.” Maybe because it’s a dark cake with lots of oomph to it, so it has always seemed like something you eat during sweater season. Or, maybe it’s because it’s my favorite cake, and the one I always want for my birthday, and my birthday is in December. But I had an “aha moment” last week that this would actually be a great Easter dessert. You know, carrots…bunnies…spring.


 He chose one of our favorite cakes, the


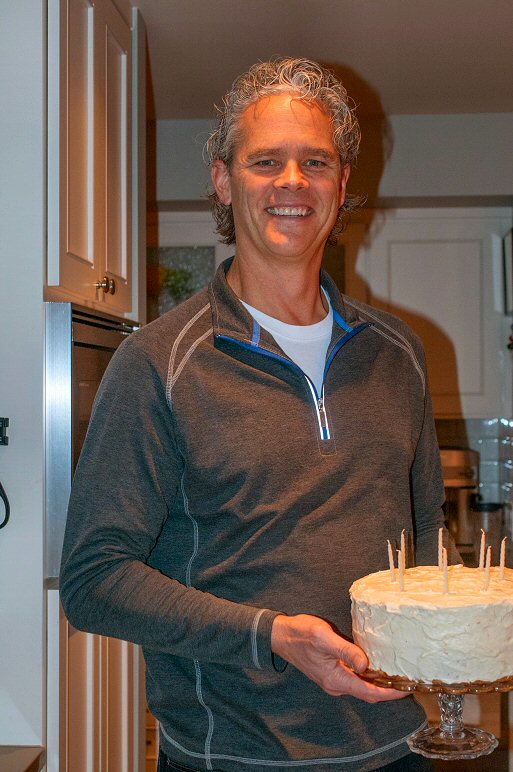


 I’ve been making this Key Lime Pie recipe for years. The original recipe came from a magazine (Cottage Living) that is no longer in publication. I was initially drawn to it because it called for using crème fraîche as the topping, which sounded like a perfect complement to the tart lime. It was and is. I’ve made a few tweaks to the original recipe but for the most part it’s just as it was printed back in 2008.
 But that darn cute pan was just like those “adopt me” puppies on Facebook. Need quickly gets overrun by the heart screaming, “You must take it home with you!” Because cute trumps logic every time. And so now I’m the proud owner of a


 If you are having people to dinner and you need a simple dessert idea, here’s what I do. Serve some good chocolates with a good aperitif. My favorite combination is dark chocolate (See’s lemon and pineapple truffles are absolutely decadent) and Limoncello. Sometimes I even take the chocolates out of the box and serve them from a fancy candy dish. But not always. We keep the Limoncello (and the glasses) in the freezer so we can serve it ice cold. (Lukewarm Limoncello could be considered barbaric, so don’t do it.) And, speaking from experience, I can tell you this: You shouldn’t be surprised if you and your guests finish the bottle.
 So, when it came time to think about dessert, I wanted something perfectly celebratory and special but not something that would feel like a big ol’ belly bomb of a dessert. Mousse seemed like a good choice. White Chocolate Mousse, in bite size proportions, even that much better.

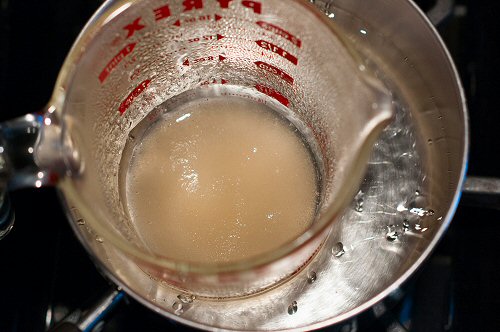
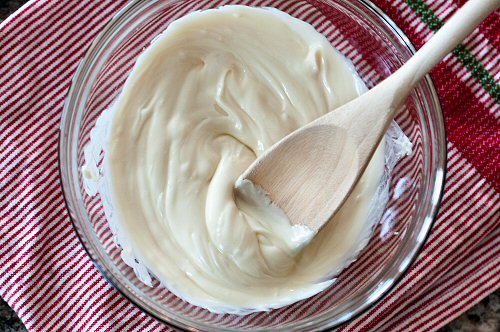
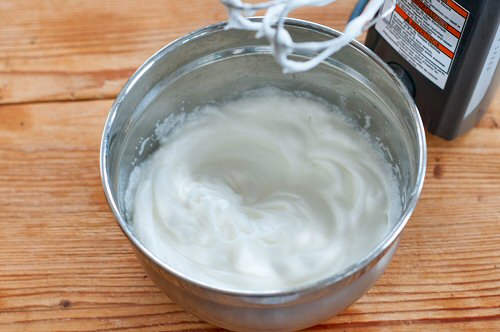
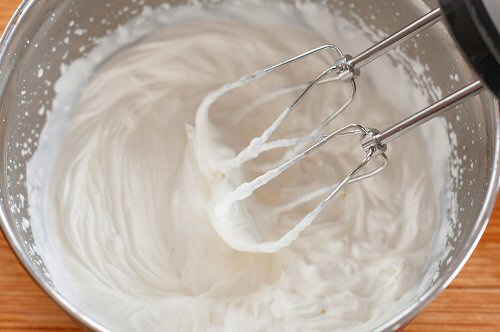
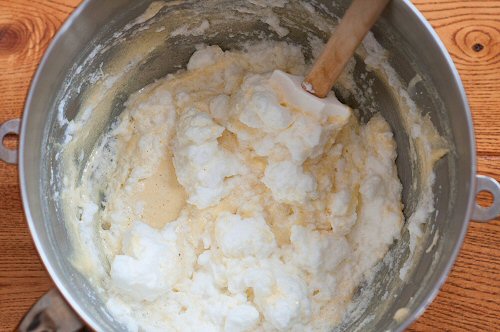


 JoAnn provided the edible eyeballs (as I called them, they are actually Wilton Candy Eyeballs). You just gotta love a world where you can purchase edible eyeballs. Since these were for a party, I used a 3 1/2″ round cookie cutter because I wanted them to be big and, due to their large size, imply one serving per guest. For the frosting, I used a good, basic vanilla buttercream. After baking and cooling the cookies, I got down to the business of decorating. I used a dab of frosting on the back of each eyeball to adhere them in place (Jon’s brilliant suggestion). Then, using a standard basket weave decorating tip, I just sort of randomly ran stripes of frosting across the cookie. To answer my own question, it wasn’t hard at all.


 And then there’s the whole pumpkin carving thing. Remember when carving pumpkins meant you just grabbed one of your mom’s kitchen knives and hacked away at it until you had a jagged, 3-toothed grinning Jack-o-lantern? Now with the pumpkin carving tools and patterns that are available, one feels a little old-school if armed only with a knife and an imagination. But, I’ll admit it. In this case, I’ve fallen prey to the hype.


 And, here’s the part of this story I probably love the most. Even though the baby is a girl, rather than choosing a traditional pink-themed shower, the mom-to-be instead opted for a nautical, blue and yellow theme in honor of the years she spent boating with her parents. That made my job easy. And fun. Something lemony would provide the yellow while the blue/nautical was easily taken care of after a quick shopping trip through the aisles of Etsy.


 But, some things have not changed. Like the untapped blackberry bramble in our neighborhood. Every year, I cannot believe the bountiful harvest we get from that undiscovered thicket. (Of course, when neighbors ask where it is, I have to admit we’re a little vague about its whereabouts. “Oh, you know, over there in that direction.”) And my thrill of coming home with our harvest and making blackberry cobbler has not changed either. We know that several of you have made this cobbler, and have shared your prize-worthy efforts with us, which makes the whole thing that much grander.
 So, in honor of where we are today, what we’ve learned along the way, and the blackberries that will soon become cobblers, here is an updated post complete with more pictures. Including this adorable picture of Olivia, helping my wonderful friend Kim (Olivia’s grandmother) make the cobbler. I don’t know which part of this I love the most: The fact that a toddler is helping to make our


 Occasionally on Facebook or in e-mails I see one of those lists that contain things that “kids born today” will never experience. Like VCRs or walking across the room to change the TV channel. At the risk of totally dating myself here, I’d like to add something else to the list: Hand-crank ice cream makers. Oh, sure, kids today have to occasionally stand in line at Molly Moo’s or Coldstone, so I guess they’ve suffered some anticipation angst in the name of ice cream. But like so many aging adults, I just have to say it’s just not the same as when we were kids and had to make the stuff the old-fashioned way.


 Jon asked if he should pull it. My response was, “If it wants to be there, who am I to persuade it otherwise.” Over the winter, that lone strawberry vine seemingly rounded up a couple dozen of its friends to make a verifiable strawberry patch right there in our front yard. It makes me smile to think that, without any effort on our part, these little plants took it upon themselves to show up and produce. Even though our crop can hardly be called a bounty, we now have enough strawberries for strawberry shortcake several nights a week.

 adding ice cream to the mix, but now I can’t imagine serving it any other way. I used to use Krusteez Scone Mix for the shortcake. It was easy and good. But, we’ve recently started using


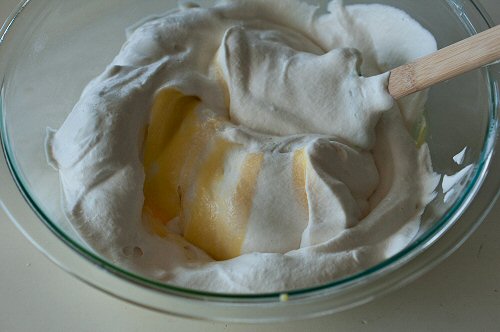


 Two years of freezer frost created a lot of water when thawed. So to take care of that problem, I just opened one end of the baggie about an inch and squeezed until all of the liquid was gone.
 There’s a reason I waited so long to make these Caramel Layer Chocolate Squares. And, I almost didn’t tell you about it because in doing so I’m going to disclose how lazy I really am. But here it is. I didn’t want to unwrap a whole package of caramels. I’m not a patient person and the task of taking the caramels out of those little cellophane wrappers is just a little slow and tedious for me.
 provided me with an easy way out. It makes me fear I’m about to qualify as a card-carrying member of the Lazy People Club.


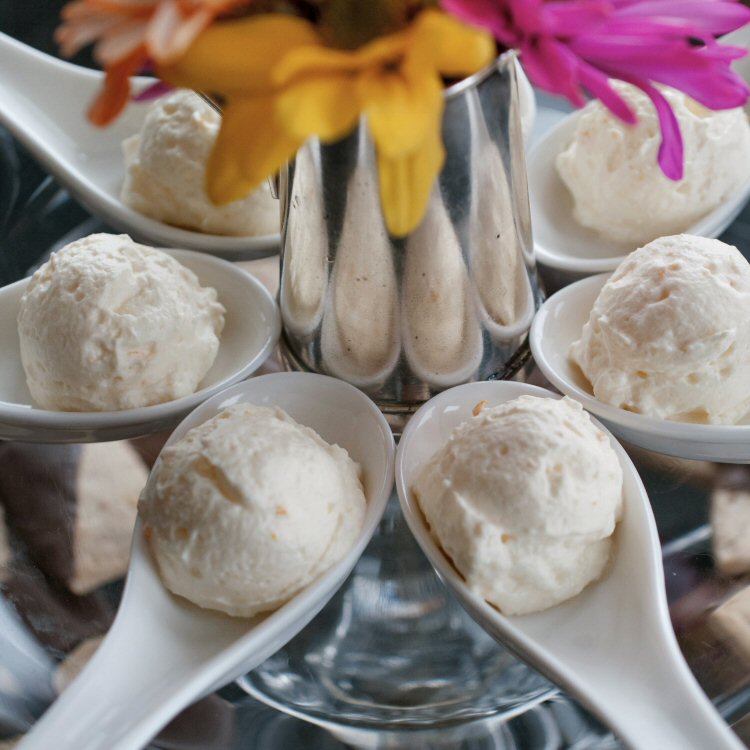


 Hostess Note: Many recipes for coconut cream pies call for covering the entire pie with whipped cream. This is how you’ll see it many times in restaurants. I didn’t do that with this pie because (a) Dad never ate his pie that way and (b) we have one of those whipping cream dispensers and we have found that our guests really, really like to add their own (plentiful dollop) of whipped cream to their own desserts.


 I had several recipes for caramel corn that I had cut out over the years in my expansive “to try” file. I was happy to see that none of the recipes required the use of a candy thermometer, because that seemed to simplify things. The recipe that I ended up using was a modified version of Kendall-Jackson’s Double Gold Caramel Corn, which they tout as a perfect snack pairing with one of their Chardonnays. I think “Chardonnay” was probably the selling point for me, so I tried it. The results were good, but I ended up making it again a few days later and increasing the recipe for the caramel which provided more caramel coating. The popcorn just seemed to need a little more coating to hold it all together, probably due to the addition of the nuts. The result is a sweet and salty caramel corn that we’re finding to be a little addictive. We’ve easily worked our way through two large containers of it in just a few days.


