It’s a couple of minutes past 5:00 pm and just as I am mentally switching gears to happy hour, I Read the Rest…
Happy Valentine’s Day
Valentine’s Day. Is this the holiday you love to hate, or is that just me? I mean, while I do Read the Rest…
French 75 Punch, Perfect For Your Holiday Party
While Jon and I are all about entertaining, admittedly we tend to enjoy hosting small, intimate gatherings over large, standing-room-only Read the Rest…
Berry Shortcake
It’s strawberry season here in our little neck of the woods, and I could not be happier. The local farms Read the Rest…
Valentine’s Day. Is this the holiday you love to hate, or is that just me? I mean, while I do swoon a bit over the concept of heart-shaped everything, my enthusiasm wanes somewhat with the over-commercialization of the whole thing. There is so much pressure to pack all of our collective love and romance into one day. THE day of love and romance. Like the other 364 days of the year can just forget about seeing anything slightly romantic when it’s their turn.
Did you know that the exact origin of Valentine’s Day is not entirely clear? I know, because I googled it. One theory is that it is actually a celebration of a Roman fertility festival. What?? This crashes headfirst with my very fond memory of painstakingly addressing 23 small Valentines so that I could distribute one to each of my classmate’s via their handmade mailboxes. I don’t recall Mom ever mentioning that the history of my little ritual may actually be based in s-e-x.
Don’t get me wrong. I really do like it all in theory. But, like so many holidays, the true meaning of it all gets a bit diluted by the over-commercialization of it. Not only are there red hearts everywhere, there are also not-so-subtle reminders that if I avoid those heart-ridden aisles, I may in fact be the the biggest love loser of all time.
While writing this, I came to the conclusion that I’m going to embrace this whole thing. In my own way. It’s a good time to remember that romantic love is only one kind of love. And that on Valentine’s Day we could show a little love to some of those around us. So, on this Valentine’s Day, I’m going to give the gift of an unexpected smile or compliment to someone I don’t know. For someone special in my life, I’m not only going to tell them I love them but also why. And, this one will be the most challenging for me, I’m going to give the gift of my patience if (when?) I encounter someone doing something stupid. This means a free hall pass for all of you drivers that cannot get it through your heads that the left lane is not the “drive at your own pace lane” or for that person in front of me at Safeway for not only wanting to pay for your groceries with a check, but also for when you fail to realize that you can actually start looking for your pen before your groceries are completely checked and bagged.
Who knows, maybe I’ll enjoy it all so much I’ll repeat it all again on the 15th.
So, maybe those advertisements are right. Valentine’s Day doesn’t have to be hard.
(If you have an inclination to bake a sweet for your Sweetie, you can’t go wrong with these sugar cookies. Click here for the recipe.)
It’s strawberry season here in our little neck of the woods, and I could not be happier. The local farms have their stands open and we’re practically gorging ourselves on the bounty. Which wouldn’t be a bad thing if we were just eating naked berries. If that were the case, we would be congratulating ourselves on our healthy diet. Instead, because we are making a daily habit of eating the berries layered up as shortcake desserts, the gorging behavior has crossed over into gluttony. Somehow we have rationalized that since it’s summer, and almost the 4th of July, we’re just doing our part to celebrate the season. I’m guessing if this behavior continues, my pants and I are going to have to have a little chat about who is to blame for the discomfort.
By simply using my star-shaped cookie cutter, buttermilk shortcakes take on a patriotic personality and will become the base for the signature dessert we will be serving at an upcoming 4th of July holiday celebration we are attending. In addition to the strawberries, I will add a few blueberries to ensure the proper nod to the red, white and blue.
I know there are many ways to serve this strawberry shortcake, but our preferred method is to layer the shortcake with ice cream and berries, with whipped cream on top.
This cake is a labor of love. By that, I mean it’s a lot of work. But I love carrot cake, so I put myself through the effort so that I can enjoy the end result. Cakes with a lot of flavor and texture are my favorite, which means this one tops my list.
Until now, I’ve always thought of this as a “winter cake.” Maybe because it’s a dark cake with lots of oomph to it, so it has always seemed like something you eat during sweater season. Or, maybe it’s because it’s my favorite cake, and the one I always want for my birthday, and my birthday is in December. But I had an “aha moment” last week that this would actually be a great Easter dessert. You know, carrots…bunnies…spring.
I’ve had this recipe in my file for years. Or, decades, to be more accurate. Someone I used to work with gave it to me. At some point, I couldn’t find it and went searching online for a similar recipe. The one thing I remembered about it was that it called for pureed and grated carrots. I couldn’t find the same recipe online, or even a recipe that used both pureed and grated carrots, so I was relieved when a year or so later I came across my old, faded copy of the recipe tucked away in one of my (many) recipe folders. My original copy was so faded that it was barely legible.
As I stated earlier, it’s not a simple cake to make. I find it’s best, and a little less overwhelming, to make it over two days.
Day 1. By baking the cake layers ahead of time, it allows you to refrigerate the layers overnight before frosting them. And, just as importantly, it allows you to get the really messy part out of the way long before you’re greeting guests at the door. As you can see from this picture, the effort that goes into the layers is a slightly messy undertaking.
Nice to have that out of the way on Day 1!
Day 2. The effort on the second day is less complicated. All that’s left at this point is to make the frosting and put the cake together. Because I know this step can be intimidating to some, here’s a great link from one of my favorite sites: Food52. If you’ve never checked it out, it’s a great site full of useful tips. In this case, it provides some great tips on mastering a layer cake. For this cake, I opted to make it a two-layer cake. By baking it in 2 pans, I eliminated the need to split the layers. Food52 provides a trick for cakes like this which is the concept of The Magical Crumb Coat. By applying a thin layer of frosting to purposefully trap the crumbs, and then refrigerating it for about an hour, I was able to get a clean “top coat” without any pesky crumbs.
For Easter, rather than try and make carrots out of frosting, like you see on so many bakery cakes, I turned to some of the creative people on Etsy for a cake topper. You can see some of my choices on my Pinterest board.
Like so many recipes that have been around forever, there are many versions of this one. And, maybe more importantly, often a heated debate about what the “real” version is and why anything other than that version is a blatant and offensive attempt at forgery. I may even go as far as to say that some will cry “sacrilege!” when it’s made differently than their favored way. All I know is that something as simple as cheese, mayonnaise and white bread can definitely be controversial.
Did you know that pimento cheese is one of the most popular sandwich offerings at golf’s Masters Tournament? I didn’t either until I read it on the AttaGirlSays blog.
All I do know is that I make pimento cheese like my momma did. Not that I actually called her momma, but the nomenclature seemed appropriate here given the Southernerness of this post. I never heard Mom defend her recipe or declare it as the authentic Southern version. It was just lunch to her. And I’m here to tell you, nothing screams “wholesome lunch” quite like cheese and mayonnaise served on white bread. If we were visiting our grandmother in Texas, chances are we’d get our pimento cheese sandwiches served with a side of Dr. Pepper. Move over kale. In our house, this is how we do lunch.
Maybe it’s my upbringing, but I can’t imagine eating pimento cheese on anything but white bread. The last time I was in Texas, I ordered a pimento cheese sandwich at what might be the equivalent of a food truck without wheels, and it was served on thick, white “Texas toast” bread. The bread was perfect but my sisters and I couldn’t help but notice that the pimento cheese spread was not as good as Mom’s. Like I said, everyone has an opinion.
When I was just a young’un, I would help Mom make the pimento cheese sandwiches for lunch. My job was to grate the cheese which, quite frankly, I never enjoyed much. I think, because Mom would always point out that I was to use the fine grater to grate the cheese, I found it to be a chore. And as a kid, I wasn’t all that fond of chores. But Mom was right. The consistency is just off if you don’t grate the cheese finely.
Until recently, it seemed that no one north of the South had ever heard of pimento cheese. Then I started seeing it in upscale restaurants where the sandwiches were fancied up by adding things like bacon. I’ve also seen it offered as a grilled sandwich. I thought the changes were just plain wrong until I actually tried a grilled version and, by gum, it does make a great (albeit gooey and messy) toasted sandwich. I’ve also seen something called “pimento cheese sandwich spread” in the grocery deli. So it seems this little gem has been discovered.
Well, this is not one of those foods that you’ll find under “healthy alternatives.” This is good ol’ comfort food. And dang it is good. But if you’re looking for a way to enjoy pimento cheese spread and pretend it’s a teensie bit healthy, it can be served on celery as an appetizer.
Sometimes, it seems, there can be a lot of joy and happiness in a martini glass. And this is one of those times.
I should go on record here stating that I’m not a big grapefruit juice fan. I like grapefruit — as a fruit — but am not equally fond of it as just juice. Until now. Also, of note, Jon is a big grapefruit fan, as is witnessed by the IPA beers that he prefers. So, under one roof, we have the entire like/could-leave-it spectrum covered.
I was introduced to the Grapefruit Martini by my dear friend Sheri one day last summer when she and I were left alone while our husbands attended the US Open. As midday gave way to afternoon, she looked at me with a twinkle in her eye and asked if I was up for an “experiment” — one involving grapefruit and vodka. Since my normal cocktail of choice is usually something like a Lemon Drop, I had to appreciate the fact that this would be considered an experiment for me. But, I was intrigued and very much game.
The key to this drink is the elderflower liqueur. For the experiment, Sheri had had difficulty finding the exact liqueur that the recipe called for, so we tested the recipe using 3 different substitute liqueurs suggested by someone at the liquor store. All made a good cocktail.
Months later when Jon and I were browsing our local liquor store (and I know that “browsing a liquor store” may not necessarily paint us in a very positive light), I recognized the name “St Germain” as the one that had eluded Sheri months earlier. We brought a bottle home and Jon applied his never-fail mixology formula to it. It’s all about proportions, people. The result? One of the most balanced cocktails he has ever shaken up. All of the flavors come together perfectly in this cocktail. Sweet, but not too sweet. Tart, but not too tart. Strong, but deceptively easy to drink. Each glassful should come with the warning: Respect the Drink.
And, as they say, the rest is history. We have made this cocktail so many times in the last few weeks the output can literally be measured in gallons. And we have served it to a variety of friends, all with very different tastes and preferences when it comes to their cocktails. Each time, this recipe has received both a resounding thumbs up and requests for refills. To put it plainly, this one is a keeper.
We have had so many requests for our Grapefruit Martini recipe, it was only logical that we would post it here.
How do you spell love? For me, I spell it C.A.K.E.
At least that’s what I did last week when Jon baked me a cake for my birthday. A two layer cake. From scratch. With homemade frosting. Be still my heart.
He declared his intentions a couple of days before my birthday. He was almost a bit hesitant when he told me, perhaps fearing that I was going to tell him it was a mistake to try and tackle a cake. I think it’s worth saying here that, in our house, I’m the baker. I’m the one that bakes for fun, bakes for special occasions, and bakes for the blog. I’m the one with a close, and personal, relationship with the KitchenAid mixer. While Jon knows his way around the kitchen and bar, baking is my territory.
Which is probably why I was so touched by his gesture to bake me a birthday cake.
He chose one of our favorite cakes, the Cranberry Layer Cake with Cream Cheese Frosting. Armed with a printout of the recipe, he set to his task just as he does everything: Methodically and with purpose. It’s one of the things I love about him. But it is in sharp contrast to how I approach baking.
While he wanted to do the cake on his own without assistance (or god forbid interference) from me, he did have a few questions as he went. And, it made me realize that this was a good test for not only the recipe and but also my instructions. His efforts, and the resulting (delicious) cake were a good testament to the accuracy and clarity of the instructions. But it also showed me that sometimes maybe I leave out some details because, for me, there are some that are just common knowledge. So, I’m sharing his questions, and the answers, here for anyone that might be more novice than expert.
We don’t have a proper sifter (like the kind both of our moms had). So, I just use a fine mesh colander.
When a recipe calls for a cup of chopped nuts, do you measure the nuts before chopping or after? This was a good question. And one I never considered much before. I like this answer:
“1 cup of chopped nuts” is measured after chopping.
“1 cup of nuts, chopped” is measured before chopping.
I’m going to ensure this is how I describe it in my recipes going forward.
If you forget to bring your eggs to room temperature ahead of time (which I do all the time), you can place them in warm water for a few minutes.
When you add ingredients, unless the instructions specifically say to keep the mixer running while adding ingredients, stop the mixer when adding. This question came up after an attempt to add flour resulted in a plume of white dust. And I have to admit it sort of made me chuckle. But it also made me realize that, unless you’ve spent a lot of time mixing ingredients, this isn’t as obvious to everyone as it is to me.
Jon said that, even though he’s watched me frost layer cakes dozens of times, he resorted to Google for help before taking that step on. He found this link to be particularly good.
This was one of my first posts when we launched our blog. I’m re-posting it because, get this, the first week of June 2015 has been declared “Negroni Week” — and I feel it’s my duty to give everyone ample time to prepare. Apparently, one of my all-time favorite cocktails is finally starting to catch on!
March 3, 2013:
The Hostess and I are in the middle of planning a trip to Italy with a large group of friends later this year. Actually, per usual, Debbie is doing all the planning and I haven’t done squat. But I digress.
When I think of Italy, my thoughts invariably turn to how much Campari I’ll drink while I’m in the country of its birth. Specifically, I’m a sucker for a Negroni, a gorgeous ruddy-colored cocktail that’s made of equal parts Campari, gin, and sweet Vermouth. I first discovered the Negroni in the late ’90s while reading Paul Harrington’s cocktail book that I’ve mentioned in several posts. I’d never heard of Campari prior to reading his book, and certainly had not tasted it. But Mr. Harrington spoke glowingly of the bitter Italian liqueur, and I was intrigued that Campari has been a staple in the bars and restaurants of Italy since the mid-1800’s. And Mr. Harrington also confessed to being a gin lover (essentially making him a kindred spirit) so the hook was set.
I decided that the best way to take the Campari plunge would be with the Negroni, a cocktail that first became popular in the 1920’s. It prominently features Campari’s complex flavors, and has the added benefit of being one-third gin, so it seemed like a great place to start.
I brought home a bottle of Campari, cracked open the top, and took a whiff. Hmm…interesting. Musty-syrupy-sweet, with maybe a hint of moist dirt. (Dirt? Seriously?) Not much of a clue as to how it was going to taste…
Forgoing a sip straight up, I poured a shot into my trusty shaker, added ice and a shot each of Bombay Sapphire gin and sweet (red) Vermouth, and shook up my first ever Negroni.
I poured the frosty reddish-orange concoction into my martini glass and pondered it for a minute, completely unsure of what to expect. The Negroni appeared vaguely Cosmopolitan-ish, so I was kind of thinking of something sweet and easy-drinking as I raised it to my lips and took a sip. Holy sweet Jesus! It was assertively slap-in-the-face BITTER, like nothing I’d ever tasted. And not at all in a good way.
I began to regret having bought an entire bottle of Campari, thinking “There’s no way I’ll ever use this up,” and I pictured the day in my distant future when I’d finally bring myself to pour out the rest of the bottle, dusty and unused. I went back to the cocktail book to see if perhaps I’d screwed up the ingredients…but the only thing I’d missed was adding an orange-twist garnish. I squeezed in a thick wedge of orange and ventured another sip, and then another. Gradually more flavors began to emerge from behind the bitterness. And by the time I’d emptied my glass and bitten into the orange wedge (which proved to complement the Campari perfectly) I’d decided the Negroni wasn’t completely awful. I didn’t love it. But a couple days later, when I was ready to try another one, I was surprised to find it rather tasty – especially with the big squeeze of orange.
They say Campari is an acquired taste and that you need to give it three tries, after which you either love it or you can’t stand it. I’ve now clearly fallen onto the “love it” side of that equation. Crave is not too strong of a word. Hell, during our Negroni photo shoot the other day (at 10:00 in the morning) I couldn’t resist drinking one of our props. That first bottle of Campari that I’d thought I’d never finish is a distant memory, and Campari has been a staple in my bar for over a dozen years now. Finding a Negroni on a restaurant’s menu is a pleasantly unexpected surprise, and I’ll nearly always order one to see how the bartender makes theirs. The classic Negroni is served “up” in a martini glass, but as often as not (and especially in Italy), it arrives on the rocks in a tumbler. It’s equally great either way. And I discovered long ago that I no longer need to use that thick orange wedge as my training wheels — a simple twist will be just fine, thank you.
This isn’t a novel idea, but it’s certainly how my mind works. My food tastes and preferences change with the season. Part of it is driven, certainly, by what’s available. But it’s also just a feeling. For instance, I only make pot roast in the winter. Even though all of the ingredients are readily available year-round, unless the temperatures outside are telling me it’s fall or winter, I just cannot bring myself to make a pot roast.
So, with spring comes a shift in what we’re making, eating and serving. The days are a bit brighter and the food is a bit lighter. And right now, in this kitchen, it seems to be the season of citrus.
As I was lying in bed last night, I was doing a mental roll call of all of the entertaining opportunities coming up in the next few weeks. May Day. Cinco de Mayo. Mother’s Day. The Kentucky Derby. First day that looks more like summer than winter. Not to mention that May seems to be the month of birthdays. As I was going down the list, I realized that I could serve Key Lime Pie at any one of those parties. Any, or all.
I’ve been making this Key Lime Pie recipe for years. The original recipe came from a magazine (Cottage Living) that is no longer in publication. I was initially drawn to it because it called for using crème fraîche as the topping, which sounded like a perfect complement to the tart lime. It was and is. I’ve made a few tweaks to the original recipe but for the most part it’s just as it was printed back in 2008.
Over the years, I have primarily made this pie in a glass pie pan. It always worked well and I really had no reason to change. That is until last week when I found the cutest little springform pan. That little pan had me at hello. And, honestly, the last thing I needed was another baking pan. Judge (the situation, not me) for yourself.
But that darn cute pan was just like those “adopt me” puppies on Facebook. Need quickly gets overrun by the heart screaming, “You must take it home with you!” Because cute trumps logic every time. And so now I’m the proud owner of a 6” springform pan. At least it doesn’t need to be house trained.
I made a full recipe and just divided it into two batches. Fortunately, this recipe can easily be cut in half to work in a smaller pan. Having two separate (and adorable) little pies worked out great because I was able to give one to our neighbors. Her e-mail response says it all: “Without a doubt the best key lime pie – EVER!” Thanks, Jan! I couldn’t have said it better myself.
It’s that time of year when, for many of you, warm sunny weather just can’t get here fast enough. So, we’re here to help. Straight from our home bar to yours, here’s a solution for making it feel just a little bit tropical right in your own home. During happy hour, anyway. We’ve perfected the recipe for a Tiki-bar staple:The Frozen Pineapple Daiquiri.
To set the record straight, we’re not really big on fancy, frou-frou cocktails around here. And we don’t drink much rum. But Debbie does, ever-so-occasionally, like to blend up something tropical. (She has an outstanding Piña Colada recipe that we’ll share with you someday). This week she was craving something pineapple-y. Specifically, a pineapple daiquiri. We already had limes, frozen pineapple, and cream of coconut on hand, so I dug through our bar and found a few bottles of rum. (Just because we don’t drink much rum doesn’t mean we aren’t prepared to provide our guests with that option. We’re not savages, after all…)
Debbie got a chuckle out of what I did next. I uncapped the bottles, lined them up, and took a sniff from each one. I wanted to find the one that smelled perfect for a daiquiri, and one of them (an unassuming bottle of Whaler’s Original Dark) had exactly what I was looking for: A warm, sweet whiff of rum that gave me an intense flashback of sitting barefoot on a bamboo bar stool, under a thatched roof on a sandy beach, breathing in the humid, floral-scented tropical air, and sipping a frosty umbrella-garnished rum cocktail. Just the kind of place where, if you can’t get there physically, the taste of a daiquiri should take you to in spirit. So I fired up the blender, poured in the Whaler’s, and after a few minutes of experimentation we were enjoying two perfect pineapple daiquiris. The key to the recipe, we decided, is using frozen pineapple rather than fresh. Frozen fruit in a blended drink results in a perfectly smooth and creamy cocktail that’s good all the way to the last sip (not much ice is needed, so the ingredients don’t separate as the ice melts). These pineapple daiquiris turned out so tasty that we couldn’t resist heading “back to the beach” a couple nights later.
If the blustery weather has an evening at your own private beach bar sounding good to you right about now, give our recipe a try. It may be the easiest tropical cocktail you’ll ever make. All you need is a blender, limes, a bottle of dark rum, a bag of frozen pineapple chunks, and some cream of coconut. Oh, and to really set the mood, stock up on neon straws, tiny cocktail umbrellas, and mugs that look like coconut shells or statues of Tiki gods. It’s like taking a spring break trip to Hawaii, minus the red-eye flights.
While I know the the true meaning of Easter isn’t the egg hunts or the candy-filled baskets, I have to admit I find all the cute bunny stuff a little hard to resist.
Easter is such a happy holiday. And a perfect time to get together with family and friends to celebrate. And, as much as I enjoy the holiday as an adult, I have to admit I miss the days when Easter was also the holiday when I got a brand new pair of patent leather shoes and a new hat. Now that was reason to celebrate!
If you’re hosting the celebration this year, here is a great Easter brunch menu. There are several things you can do a day or two ahead of time to make Easter morning more relaxed (and give you time to go look for some of those colored eggs left behind by the Easter bunny).
A day or two before Easter:
Do all of your grocery shopping, including buying any flowers you want to use on your table.
Prepare the crust for the quiche and keep it in the refrigerator until you’re ready to make the quiche.
Prepare and slice the fruit. (If you’re using bananas, don’t slice them until you prepare the salad.) Alternatively, give yourself a real break and buy the ready-to-go fruit at the grocery store.
Set the table.
Chill the champagne.
You can even make the scones the day before. They’ll keep well in an airtight container.
Listen to your mother’s voice in your head and clean your guest bathroom.
For our table, at each place setting I used Grandma’s teacups. These teacups have a very special history in the family. Every year, Grandma and a group of her friends would get together to celebrate each other’s birthdays. For their birthday each year, they would receive a teacup from the group. I’m not sure how many teacups Grandma accumulated, but I’m guessing she had over 30 of them. We now are the proud owners of several of them, as are other grandchildren. I was so happy to find a way to celebrate spring and honor Grandma on our Easter table.
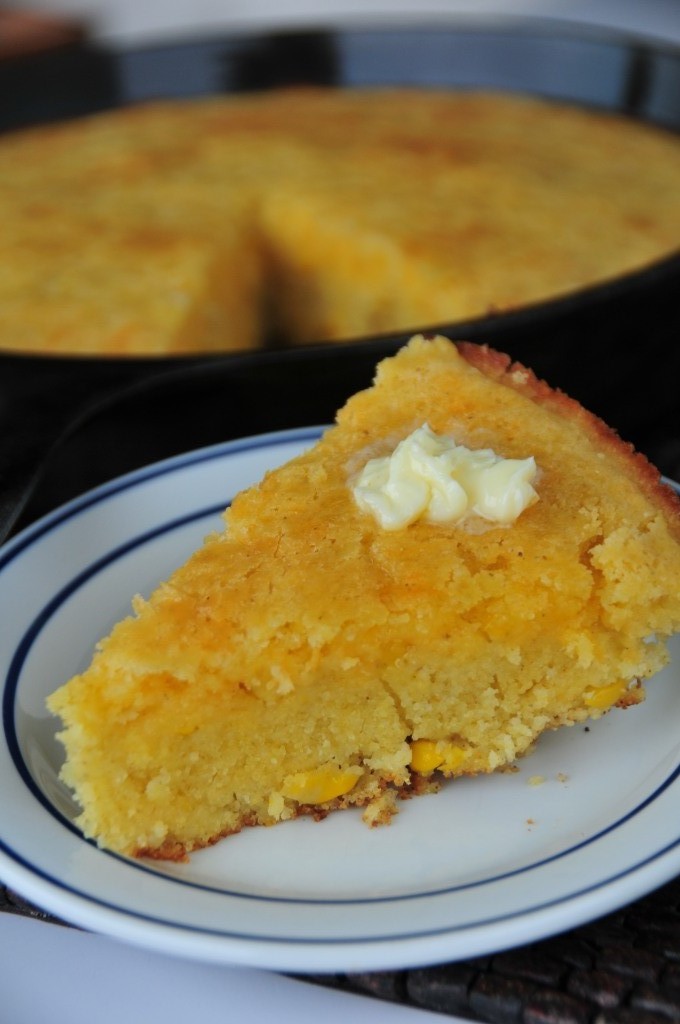
Biscuits. It hardly gets more southern than this. Biscuits might even be considered a downright staple in the south. If New York has their bagels, then the south has their biscuits.
My mom was from the south, and there were hints of her southern upbringing sprinkled throughout our lives. Like the fact that, for dinner, she would occasionally make fried chicken. Real fried chicken. The kind that is floured and battered and then fried in a cast iron skillet. Honestly, as a kid, I didn’t fully appreciate the effort that went into making fried chicken. The mere act of heating up an entire skillet of oil (Crisco, always, when I was growing up), and then skillfully frying it up to just the right doneness, is beyond anything I will even attempt in my kitchen. I’m not sure which is more intimidating: The idea of a skillet full of boiling hot oil on my stove, or the fact that the oil then needs to be dealt with afterwards (which in my childhood home meant it was saved in a can for future uses — ugh). Either way, it’s both a skill, and desire, I never achieved. Which is why this post is not about fried chicken.
I think the best part of those fried chicken dinners was the homemade biscuits. My mom had this green bowl that she used for making bread. It was the bowl that she used at Christmas to make her cinnamon rolls, but it was also used when she made biscuits. Funny how at some point in its life, that bowl was shiny and new. I have just always known it as a well-used, slightly blemished bowl. Just looking at that bowl, I can picture it in Mom’s kitchen full of the the sticky biscuit dough.
Biscuits are everywhere these days. The Colonel serves them with his meals. McDonalds makes them into breakfast sandwiches. The Pillsbury Dough Boy has his “Poppin’ Fresh” version. But, all biscuits are not created equal and those other biscuits can only wish that they were the real thing. So, while there are many opportunities to find a biscuit, let’s just say that very few options out there compare to an honest-to-goodness homemade biscuit. Once you’ve had a warm, flaky, buttery biscuit fresh out of the oven, you’ll understand what the imposters lack.
I have to admit, when it comes to making biscuits, I’m not much of a purist as far as southern traditions go. Maybe it’s because, while I have southern genes, I am definitely not southern. I was born in Denver and raised in Seattle. My biscuit-making process varies from the traditional that any southern baker is probably quite firm, and passionate, about. I use a food processor. I don’t worry about what flour I use. And, I use a rolling pin to roll out the dough. Any good, and true, southern baker, would most likely call any of this blasphemy.
But, what I do know is that this recipe makes some darn good biscuits. And that’s good enough for me.
This is not new news. I love soup. I love eating soup and I love making soup. For me, a pot of soup is one of the most communal things I can prepare in my kitchen. It is food that’s meant to be shared.
Growing up, when we ate soup it was from a can and it was called Campbell’s. I had two favorites: Chicken Noodle and Vegetable Beef. Even as I write this, I’m humming “Mmm, mmm good.” When I was a starving college student (okay, judging by my weight during college I think’s fair to say that I was never actually starving, but I was on a budget), or when I was living on my own for the first time, Campbell’s soup was dinner more times than I can count.
So, while my love of soup has stayed the same over the years, I seldom buy canned soup anymore. I get real pleasure out of making a pot of soup so I’d rather spend a few minutes doing the prep of chopping and peeling than just buying it ready-to-serve in a can.
This latest batch of homemade soup started with leftovers from the prime rib roast we had on New Year’s Eve. I used the bones to make the beef stock that became the base for the soup. And, while for me, there’s a lot of satisfaction in making homemade stock like this, I can say the (good) stuff that you buy also makes a mighty fine soup. If you’re inclined to make your own stock, then go for it. Otherwise, just by some beef stock at the store and call it good.
I had enough leftover prime rib scraps and meat off the bone to make the first batch of this soup. This last time, I used stew meat. While nothing compares to the beef from a prime rib, in this soup the stew meat (which was chuck) was a good choice. I let the soup simmer on the stove for a few hours just to make sure the meat was tender.
Make a pot of soup, buy a loaf or two of French bread, open a bottle of wine and invite some friends over. It will be one of the easiest dinner parties you’ll ever host.
For the most part, I’m a creature of habit. It’s the way I’m wired. Google “if it ain’t broke, don’t fix it” and you just may see my picture pop up. So the other day when the Hostess handed me a cocktail suggestion for a gin and tonic garnished with something other than a squeeze of lime, I was justifiably skeptical. Why, after all, would anyone want to mess with one of the world’s most perfect cocktail recipes?
But something was different this time. Enter the Blood Orange.
Blood oranges have always fascinated me. There’s just something about cutting into what looks like an orange, expecting it to look just like any other orange you’ve ever seen, and instead having it be this crazy dark-red color inside. I guess I like the surprise of it, how it goes against that whole “creature of habit” thing. So I decided to hunt down some blood oranges and give a whole new gin and tonic a try: A blood orange gin and tonic.
Good thing it’s February. Blood oranges are seasonal and are generally only available during the winter months (like the Meyer lemons I covet this time of year). Our local grocer had them on hand so I picked up a few and the experiment began. And my first attempt was not a success.
I followed the steps I use to make the Hostess’s favorite gin and tonic, substituting wedges of blood orange for the lime. The first thing I noticed was how pink the cocktail turned out. My next observation was that a blood orange isn’t nearly as sweet as its color suggests. Its flavor is more tart and slightly bitter, like a grapefruit, with maybe a hint of fresh berries, so I expected it to be a perfect complement for the bitterness of the quinine in tonic water. But my first cocktail was WAY out of balance — all boozy and bitter and not very enjoyable. Crap.
Turns out the answer was close at hand: I needed a lot more than just a squeeze of blood orange to bring things into balance. I made another round using a full 2 ounces of blood orange juice in each glass, and the result was amazing. The combination of blood orange, tonic water, and gin comes together in a way that’s every bit as delicious as it is gorgeous. Wow. The blood orange gin and tonic is crisp, light, refreshing, and not too sweet — a mid-day sipper that would be a perfect alternative to a mimosa for your next brunch. And, while many people think of the gin and tonic as being a summertime drink, this blood orange version makes it great year-round.
So much for not wanting to mess with perfection. Cheers!
Two things attracted to me to this recipe initially. One, the name. The original name was Lazy Mary’s Lemon Tart. Any recipe with the word “lazy” in it will get my attention. And, two, the filling was mixed in a blender. (I guess using a blender is how Mary got her lazy reputation.) More on why these two points are relevant later.
If you read this blog regularly, you’ll know I’m a fan of Joy the Baker. That’s where I was introduced to this recipe. In her blog, Joy substituted some fruit I’d never heard of (nor could I find at the store). I went into making this tart thinking I would substitute tangerines for the lemon but then reconsidered and decided it needed a little more punch than you’d get from tangerines. (I’ll just have to settle for drinking my tangerines.)
Meyer lemons are currently in season, so those little wonderful football-shaped citrus became my fruit of choice for the tart. (The original recipe called for using Meyer lemons as well.)
The pastry in the original recipe is great, although it’s enough like a pie crust to provide this crust-challenged baker with a moment or two of fear. I found, the second time I made it, it works best if you can chill the crust for several hours or overnight. And, for the record, if there’s anything lazy about making this tart, it happens after you make the crust. The crust has a few essential steps (as Joy pointed out in her blog, and I trust her because she is called Joy the Baker).
Then came the filling. Remember that lazy filling I mentioned earlier? Well, not only do you use a blender but the original recipe invited me to just throw all the filling ingredients into my blending contraption and whirl away. Meaning, cut the lemon into chunks and toss it in, peel, rind, pulp, seeds and all. And, I have to tell you this. I could not do it. I stood there, looking at my whole lemon, and could not fathom the idea of all its parts becoming the base for my delicious filling. So, I retreated and came up with Plan B.
I zested and then juiced the lemon. So much for being lazy. But, I did add the zest and juice to the other ingredients in the blender (including cream cheese, which wasn’t in the original recipe) and was quite pleased with the results. And, I have to admit, the effort of pushing the “puree” button on the blender was simple enough that I did feel slightly lazy.
The result? Scrumptious. The crust is a perfect base and the filling has a wonderful texture and flavor. The first time we served it to guests, I cut everyone a slice and we politely ate off the plates it was served on. The next night, I just put the remaining tart in the middle of the table and we all sliced off slivers and ate them until the thing disappeared.
We topped it with whipping cream, but the tart can stand alone with just a dusting of powdered sugar. As our friend pointed out, with spring just around the corner, this tart would be an ideal dessert for Easter with some fresh berries.
Because I found that there really is some effort that goes into making this dessert, I’ve changed the name to simply “Lemon Tart.” Sorry, Mary.
Happy Entertaining!
Get your butter and shortening very cold by putting it in the freezer:
Add ice to your water to get it good and cold:
Pulse the dough ingredients until it looks like this:
And then add water until the dough forms into a ball:
Place the dough in Ziploc baggie and put it in the refrigerator to chill:
Roll the dough and ease the it into the tart pan, and then trim:
Prick the dough with a fork and then place it in the freezer:
Before baking, cover with parchment paper and add pie weights:
Juice the lemon for the filling:
Put all the filling ingredients in a blender:
Easy way to remove the tart from the pan after baking:
Note: This is an updated version (with many more pictures) of our Valentine’s Day post from 2013. You can read the original post here.
It’s probably safe to say I know my way around a pastry. Cakes, cookies, cupcakes, brownies. You name it, and no doubt I’ve gotten to know one or two of them in my lifetime. Unfortunately, it seems I’ve spent more time consuming them than preparing them, but I like to think of it as field practice as I develop my expertise. So, if you’re like me and are somewhat of a pastry aficionado, you’re probably familiar with Red Velvet. It shows up frequently on menus and and in bakeries. There are countless nods to it on Pinterest and all over the internet. In addition to the classic Red Velvet cake, I’m now seeing recipes for things like “Red Velvet waffles” and “Red Velvet cheesecake.” I even saw Red Velvet Oreos at the store yesterday. Basically, if you can add cocoa and red food coloring to it, I guess it can be called Red Velvet.
The original recipe for Red Velvet Cake seems to date back to the 1800’s, although I’m guessing that, by name alone, it got a bad rap during the “red dye #6 scare” in the 50’s. However, Red Velvet seems to have survived time and the FDA and has kept its rightful place as a well-loved dessert. If you’re interested in the colorful (no pun intended) history of the cake, you can read it here.
When it comes to cake, I’m a firm believer that cake simply exists as a socially acceptable way to eat frosting. Call me a frosting enthusiast, but I’m always happy when there is just a little cake base with a lot of frosting on top of it. It seems that the original recipes for Red Velvet Cake called for an ermine or boiled milk frosting. Maybe I’ll try one of them someday, although quite frankly neither name does much to entice me. (Ermine? Really? What marketing genius decided that was the perfect name for a frosting?) Regardless, for my Red Velvet Cupcakes, I use a cream cheese frosting.
Even with enough frosting, if the cake is dry and bland, there’s just really no point in it. Velvet, as in Red Velvet, supposedly refers to the velvety crumb of the cake. It’s a moist, chocolate-y cake and, in this case, with a cream cheese frosting. The red is really just a little bling to make it the star of the party. One thing to be aware of. If you want a really bright red cake, you need to add a lot of red food coloring. I used food coloring gel, and even with using most of the tube, my cupcakes were a dark, not bright, red.
Something sweet and homemade. Seems like a perfect way to celebrate Valentine’s Day, doesn’t it?
Soufflés are to the culinary world what Mt. Everest is to the mountaineering world: The ultimate proof of skill, tenacity and a whole lotta spare time on one’s hands. Mastering either a soufflé or Everest seems like a pretty legitimate differentiator between an amateur and a bonafide, dedicated master. Personally, I’ve never had much desire to tackle either of them. Call it lack of ambition or just plain laziness, but the achievement of either attempt seems a little overrated to me.
However, I’m not without my own aspirations. And, perhaps while my efforts don’t come with the same bragging rights, I still find reasons to occasionally blast the triumphant trumpet and shout, “Ta-daaaaa!” Maybe it’s because I’m a take-it-or-leave-it fan of the soufflé, but I’ve never had much desire to master the art of making one. For me, my culinary mountain is not the soufflé but rather the humble mashed potato.
Growing up, we ate a lot of mashed potatoes in our house. We were a meat-and-potatoes family, and mashed potatoes seemed to be the tater of choice. (I don’t think Dad liked the “fuss” of a baked potato.) There was even a span of time when our potatoes came out of a box and were “mashed” by simply adding liquid to the dehydrated potato flakes. I think that was about the same time that Tang replaced the real orange juice in our house. Thankfully, later on, Mom left the space program and came back around to using real potatoes.
I think I got serious about making mashed potatoes when we started hosting Thanksgiving at our house. The first few years, I was so concerned about making good, lump-free gravy, I never even gave the potatoes a second thought. Because, after all, making mashed potatoes is simple, right? Even the name implies that all you do is mash them. But, then, as people gathered around the table, I invariably found myself cheerfully saying, “Hope everyone likes a few lumps in their potatoes!”
Short of using dehydrated potato flakes, I think I’ve tried just about every possible technique to make mashed potatoes. I’ve mashed them by hand using a potato masher, just like Mom used. I’ve used a hand blender and a hand mixer. But I never got the consistency that I was after. All I wanted was creamy, flavorful mashed potatoes.
Then I read Jenny Steffens Hobick’s blog about using a potato ricer. (You can read her blog post here.) I had read about using ricers before (Alton Brown highly recommends them as well), but quite frankly I just imagined it being another kitchen gadget taking up space in my kitchen drawers next to the hand blender and hand mixer. But I was intrigued enough to try a ricer. I bought the OXO Adjustable Potato Ricer, which I find easy to use. But there are many options out there. This particular ricer is adjustable in that you can turn the dial to determine the size of the puree, from fine to course. I found that the fine setting produces the best version of lump-free, creamy potatoes. (If you like a few lumps, then use the medium or coarse setting.)
I’m here to report that I’m a convert. I had anticipated that the ricing process would be slow and cumbersome, but it’s not. I cook the potatoes in chunks, and after draining off the water, I just put a couple of chunks at a time through the ricer. The whole process takes just a few minutes, no longer than mashing or mixing ever took. I then add the warm cream and butter, and it just takes a few good stirs with a wooden spoon to cream the potatoes.
There are differing opinions about which is the best potato to use (I use Russets), or whether you should peel the potatoes before or after you cook them (I do it before). I also find that heating the milk (I use half & half) and butter before adding it to the potatoes works well.
I’ve long said I’ve never met a potato I didn’t like. But, let’s admit it, some are better than others. And, now I’ve finally found a made-at-home mashed potato that is really, really good. And, while a boiled/mashed potato may not have the same sex appeal as a soufflé, it’s hard to deny that it’s pretty darn good eating.
Here are some good how-to tips on how to boil potatoes from The Kitchn. (You can read the full blog post here.)
How To Boil Potatoes
Prepare the potatoes: Scrub the potatoes clean. If desired, cut the potatoes into large, evenly-sized cubes.
Transfer the potatoes to a saucepan and cover with cold water: Cover the potatoes with an inch or two of cold water. Starting the potatoes in cold water helps them cook more evenly.
Stir in a teaspoon of salt: Stir the salt into the water so that it dissolves.
Bring to a boil, then reduce to a simmer: Set the pan over medium-high heat and bring the water to a boil. Once boiling, reduce the heat to a bare simmer to cook the potatoes. Do not cover. (Covering changes the environment in the pot and can make the potatoes turn mushy.)
Check the potatoes after 5 minutes: Cubed potatoes will cook more quickly than whole potatoes; smaller potatoes will cook more quickly than larger potatoes. Begin checking the potatoes after around 5 minutes of boiling; most potatoes will be done in 10 to 20 minutes.
Potatoes are done when tender: The potatoes are done when they are tender all the way through. You can test this by poking the potato with a fork, paring knife, or skewer. If the utensil slides easily all the way to the center, the potatoes are done.
Drain the potatoes: Drain cubed potatoes into a strainer or lift whole potatoes out with a slotted spoon. If you’re recipe calls for cold potatoes, you can run the potatoes under cold water or dunk them in an ice water bath to cool them down more quickly.
According to my good buddy Brian Williams, the Crock-pot just turned 75 last week. Ours isn’t 75 years old, but it looks like it’s at least 50. I was going to throw my Crock-pot a birthday party, but I am all out of Crock-pot birthday candles. So, instead, I decided to honor it with this post.
There was a time when it was all the rage to cook in a Crock-pot. Of course, this was also the time when it was fashionable to wear Daisy Duke shorts and Doritos were actually a novelty. Then, like so many great trends, the Crock-pot sort of lost its cool. Even though many of us continued to use our Crock-pots (The Underground Society of Uncool People), B-Dub said that the Crock-pot is now making a resurgence in popularity. When we were visiting our twenty-somethings son and daughter-in-law last fall, they used their Crock-pot (that was a wedding present) to make these meatballs for us. If it’s cool with them, I’m thinking it’s cool everywhere.
These Crock-pot meatballs are a great appetizer/snack for a party (say, for instance, when a large crowd gathers in your living room to watch the Super Bowl).
You can make a large quantity and then serve them right from the Crock-pot to keep them warm throughout the party. (A cooker, and a server!) These are so simple to make, it doesn’t even warrant a recipe. Buy frozen meatballs (there are even good vegetarian meatball options out there). Add the sauce of your choice. That’s one of the things I really like about this “recipe.” You determine the flavor based on what sauce you choose. We’ve used a roasted pineapple and habanero sauce (from Trader Joe’s) for a meatball with a little “sweet + heat.” Honey barbecue sauce will give you a, well, barbecue flavor while a teriyaki sauce will give you a sweeter meatball. Today I used Yoshida’s Marinade and Cooking Sauce. If you have some spare time on your hands, and feel the need to ditch the bottled stuff, you can make a barbecue sauce from scratch, like this Bourbon Whiskey Meatballs recipe or the classic Grape Jelly and Chili Sauce Meatballs.
Basically, to make meatballs in a Crock-pot, you:
Add the meatballs and enough sauce to cover. Maybe even give them a stir to coat everything well.
Turn the Crock-pot on high for about an hour. Then turn it down to low.
Heat the meatballs for about 3 hours. Maybe give them a stir while they cook. Or maybe not.
Add toothpicks and serve.
It’s just hard to imagine it could get much simpler.
I love a good Bloody Mary. There’s just nothing like a frosty pint glass full of spicy tomato-y goodness overflowing with a salad bar of garnishes. A well-made (and well-dressed) Bloody Mary is a thing of beauty. But I have a confession to make: I can’t make a good one to save my life.
Until now.
As much as I enjoy Bloody Marys, making a decent one myself has always been a kind of unachievable “holy grail.” And maybe a bit of an embarrassing shortcoming as an amateur mixologist. A big part of this is because Bloody Marys are traditionally enjoyed in the morning (often well before noon) and that’s just not the time of day when I do much experimenting with cocktail recipes. No judgment here…but for me, I kind of feel like I’ve committed myself to an unproductive day if the vodka comes out while the coffee is still brewing. So my efforts at perfecting a Bloody Mary recipe have been somewhat limited.
One of our friends makes an outstanding Bloody Mary. A LOT of ingredients go into his creations; he looks like a mad scientist hunched over the bar as he measures and tweaks and fiddles to get everything just right. It’s an intimidating process! So, while it seems like something I should know how to make, whenever one of our guests suggests a round of Bloodys to kick off the day, I defer and ask if they have a favorite recipe and, if so, if they’d like to stand in as guest bartender. Or we go out for brunch and leave the mixing to the professionals.
Not that I haven’t made a few attempts. The fundamental ingredients are pretty well-known: Vodka, tomato juice (or V8, which most enthusiasts seem to prefer), Worchestershire sauce, horseradish, various salts (garlic, celery, seasoned) and peppers, a dash of Tabasco, a squeeze of lime, and a nice, leafy stalk of celery. Additional garnishes can vary widely, and this is a cocktail that benefits from a “more is better” attitude. Green and black olives, dill pickles, peperoncinis, cherry tomatoes, jalapeño slices, spiced green beans, pickled asparagus spears, shrimp, oysters, bacon, the list goes on. No wonder the term breakfast in a glass is so fitting.
So how could it have been so hard for me to make a reasonably good Bloody Mary? Mine always ended up tasting like something was missing (how is that possible when I already threw in everything but the kitchen sink?). I still have detailed notes from several attempts going back more than 3 years. I tried Chipotle-infused vodka. I tried wasabi and Sriracha. I tried more of this and less of that, but with so many ingredients it was impossible to figure out which ones were out of balance. Frustrating.
So what, finally, was the answer in my search for the best Bloody Mary? I’ve simplified. Thanks to a tip from a local bartender (whose recipe is one of the best I’ve ever had), I’m using an amazing off-the-shelf seasoning mix! A little part of me feels like this is cheating. And maybe it is. But the whole concept of our blog is how to make entertaining easy and fun. So, by that definition, my Bloody Mary recipe is a complete success — because it’s easy, fun to make, and pretty darn tasty if I do say so myself. In fact, it’s so easy and fun that, for those days when a Bloody sounds just right, we’ll be setting up a “do it yourself” (or DIY, for those of you not spending all your time on Pinterest) Bloody Mary station at our bar. Try this yourself: Set out the ingredients, garnishes, and a bucket of ice, provide the basic mixing instructions, and let your guests channel their own inner mad scientist. No fuss, no intimidation, just perfectly-customized cocktails. All before lunch. Hmmm, that suddenly sounds like a pretty productive day after all…
Some people start the new year like a runner leaving the start line of a big race. A little start pistol seems to go off in their head and they are off and running, chasing resolutions and ambitions, intent on making it to the finish line before they lose their resolve. Me? Not so much. I find that after the bustle of the holidays, I’m more inclined to mosey into the new year. All I really want to do is declutter my house, take a deep breath, and get back to my normal, comfortable routine.
The holidays leave me with a bit of a hangover, both physically and emotionally, so I need a little detoxing. Hopefully a little less wine, more quiet time, and real meals that don’t include appetizer buffets. So, if I find that we are entertaining during the first weeks of the new year, like we’ve done this season, a bright neon sign flashes in my head saying, “Simplify.” So, simplify I did. We served some of our good, basic meals (like chicken pot pies and pasta with vodka sauce) because I was craving a little comfort…and there is a lot of comfort in good comfort food.
If you are having people to dinner and you need a simple dessert idea, here’s what I do. Serve some good chocolates with a good aperitif. My favorite combination is dark chocolate (See’s lemon and pineapple truffles are absolutely decadent) and Limoncello. Sometimes I even take the chocolates out of the box and serve them from a fancy candy dish. But not always. We keep the Limoncello (and the glasses) in the freezer so we can serve it ice cold. (Lukewarm Limoncello could be considered barbaric, so don’t do it.) And, speaking from experience, I can tell you this: You shouldn’t be surprised if you and your guests finish the bottle.
It’s New Year’s Eve, which means I’m busy pulling together the final details for our dinner party.
Our friends offered to bring a standing prime rib roast (who am I to turn down a generous offer like that?), so that will be the star of this show. Giving the prime rib the star status it deserves, the rest of the dinner menu is being created around it. Including the green bean casserole. I’m serving it because our friend loves it. (Seems like a fair trade-off. You bring the prime rib and I’ll make green bean casserole.) And, while I love me some prime rib (occasionally), the richness of it should not be overlooked when planning what side dishes to serve with it. Fortunately, I just happen to think that mashed potatoes are not rich.
So, when it came time to think about dessert, I wanted something perfectly celebratory and special but not something that would feel like a big ol’ belly bomb of a dessert. Mousse seemed like a good choice. White Chocolate Mousse, in bite size proportions, even that much better.
I found this recipe in one of my cookbooks. I’ve challenged myself this year to actually use my (many) cookbooks rather than always relying on the internet for recipe searches. I liked the ingredients of this recipe but found the original steps a little confusing. Don’t be intimidated by what looks like a lot of steps. It’s just my attempt at laying out the recipe in such a way as to simplify and clarify the steps for you.
I think this dessert can be served in a couple of ways. After a big meal, like the one we’re having, I’m going to serve the mousse in appetizer spoons. Basically, one-bite desserts, so it’s a taste but not too much. But I could also see serving it in Champagne coupes or martini glasses with the raspberries on top.
We’re re-posting one of our most popular holiday recipes (originally posted in November of 2012). Since Nanaimo Bars are an annual tradition for us, it seems appropriate to once again share them with you. Happy Entertaining!
Every family has one, it seems. That thing that defines the holidays for them. Or at least the thing that they couldn’t imagine having the holidays without. For me, that thing is Nanaimo Bars. And, I find that I can make any day a holiday with a Nanaimo Bar.
The family cruiser, circa Nanaimo Bar discovery
Nanaimo, British Columbia is located on Vancouver Island. When I was a kid, we spent our summer vacations in a small cabin cruiser exploring the San Juan Islands. On longer trips, we’d head across the border up to the Canadian waters. Nanaimo was one of the ports that we’d frequently find our way to. Once we got docked at the marina, Mom, my little brother and I would walk into town. Mom was particularly fond of some bakery that was located there, which was worth the walk up the hill for the bread alone.
Back then, at least to me, Nanaimo was a small town. All I really knew about it was that it was one of the places we docked that was actually located in a town as opposed to so many places we went where there wasn’t much beyond the dock or gas pump that defined the place. That, and we always seemed to catch salmon when we were close to Nanaimo.
But, what the town is really known for, in my family and throughout British Columbia, is Nanaimo Bars. According to local legend, about 40 years ago a Nanaimo housewife entered her recipe for chocolate squares, named after her hometown, in a magazine contest. I guess this blog entry is proof that the housewife’s recipe won. Years later, in 1986, Nanaimo’s mayor held a contest to find the ultimate Nanaimo Bar recipe. I’m not sure where my Mom got the recipe. She started making them long before the recipe contest or the birth of the internet, where now if you Google “Nanaimo Bars” you will get hundreds of results. And Mom’s recipe is slightly different than the recipes I found online.
These little squares of chocolate-y scrumptiousness became an annual Christmas tradition in my family. To this day, every time I think about Nanaimo Bars, I am reminded of the Christmas that I arrived home from college a couple of hours after my two brothers. Which was just enough time for them to do what brothers do best. Come up with a devious plan meant only to inflict mental anguish and torment on their sister. They hid the Nanaimo Bars, leaving only crumbs in the pan for me to find. My predictability only played into their Machiavellian plan. I walked through the front door, gave quick hello hugs to everyone, and then raced to the refrigerator. Upon finding the empty pan, I cried. Ah, nothing screams “Merry Christmas” quite like abuse from your siblings.
The Hostess, surrounded by her tormenters, circa “The College Years”
After Mom passed away, I got her handwritten copy of the recipe. I now make them every year for Christmas, too. And sometimes I make them whenever I need a little holiday in my life. This year they helped us ring in the New Year. And I’m thinking they may make our Valentine’s Day a little sweeter, too.
Although I was always told it’s not polite to say “I told you so,” some situations just seem to call for a little finger wagging/feeling all I-told-you-so, don’t they? As an example: Remember when I strongly suggested you make some homemade cranberry sauce? And, then we gave you a recipe for Cranberry Margaritas that used a dollop of the cranberry sauce? And, yet, some of you didn’t actually make the sauce? Well, now here is one more recipe that takes advantage of leftover cranberry sauce. See, I told you that you’d want to have some of it on hand.
This is the final installment of Cranberries Gone Wild here at the Entertaining Couple.
I saw a recipe similar to these on Pinterest and was intrigued. But my initial thought when I read the original recipe, which was made in full-size muffin tins, was that they would make for a pretty big bite of pastry and cheese. (I envisioned the guests dealing with crumbling bites and flaking pieces of puffed pastry.) So, I decided to make ours in a mini muffin tin and truly make them bite size. Also, the recipes I saw online said to bake the bites with the cranberry sauce, but I like adding it after they’ve come out of the oven instead.
If you haven’t used puff pastry before, this is a good recipe to start on. It’s super simple and somewhat forgiving. I don’t want to say it’s fool-proof because that just seems to be asking for trouble. But trust me when I say any intimidation with the puff pastry can end here.
To press the dough down into the muffin cavity, I use a little tool called a tart tamper. If you don’t have one of these, something like a measuring spoon (1 tablespoon size) might work. You just need something to get the dough tamped down into the cavity because it will puff as it cooks.
Normally when I make the cranberry sauce, I only use about 1/4 teaspoon of the red pepper flakes. But, in this recipe, the sauce can stand a little heat, so I used about 1/2 teaspoon.
Also, if I’m being completely honest, I have to admit I’ve never been a big fan of Brie cheese. But, with this recipe, the Brie isn’t overwhelming and is balanced nicely by the cranberry sauce.
This afternoon I’m making these Brie cranberry bites for the third time this week. It’s a quick and simple recipe to make, which isn’t always the case with appetizers. I’ve been making them ahead of time, keeping them refrigerated and then just baking them right before I serve them. And they are tasty! Which, at the end of the day, is what it’s all about, isn’t it?
The Hostess is on a serious cranberry binge. Cranberries have recently taken over our kitchen. And our blog. Cranberry scones, cranberry layer cake, homemade cranberry sauce, those berries are everywhere. If cranberry addiction was something that could get you checked into the Betty Ford Clinic, right about now I think I’d be looking into how to schedule an intervention. But instead, I’ve decided to jump on the cranberry bandwagon myself. The other day I took some of Debbie’s homemade cranberry sauce, shook it up with a little tequila and a few other ingredients, and ended up with something amazing.
I present to you: The Cranberry Margarita.
This margarita, for me, is a perfect example of what the term balance means when applied to the craft of the cocktail. Cranberry is the primary flavor but it’s not overpowering. Although there are a lot of different flavors going on in this drink, they all play well together: It’s just tart enough to not be too sweet, sweet enough to not be too sour, it has the tiniest hint of spiciness, and it is so smooth that even your guests who swear they “can’t stand tequila ever since that one time in Mexico“ will enjoy this margarita.
You can use canned cranberry sauce, either whole-berry or jellied, but this margarita is at its very best when made with Debbie’s homemade cranberry cognac sauce. Her cranberry sauce contains Grand Marnier, red pepper and other spices, and orange juice — which, coincidentally, are all perfect flavors when paired with tequila.
Years ago we experimented with cranberries in a blended margarita, with reasonable success, but I really, really prefer this new version that’s hand-shaken and served on the rocks. Go on your own cranberry binge and break out a batch of these cranberry margaritas at your next happy hour.
If variety is the spice of life, then these scones are providing plenty of spice around here. This is my third (or maybe fourth?) rendition of what started as a basic scone, and I haven’t been disappointed yet. Seems like no matter what combination I throw at (or into, to be more accurate) the recipe, the results are great.
This version came about because I had leftover fresh cranberries last week. We’ve been sort of on a cranberry kick lately, and to provide fair warning, there are more cranberry recipes to come. And to think that for a good part of my life, I just thought of cranberries as the berry that becomes the juice that is served with vodka. I’m so happy to discover that the little red berries have a much richer, and tastier, purpose on this earth.
As with previous scones, I started with what is now becoming my tried and true recipe for scones, and then just added chopped cranberries to the dough. As with the blueberry scones, when I got to the “mix just until the flour is incorporated and the ingredients all come together in a ball” stage, I added just over 1/2 cup of chopped cranberries and then gently worked them into the dough, taking care not to overwork or warm the dough. Then I shaped, cut and baked the scones like I normally do.
I also added a little cream cheese to the glaze, just to add a little zing and enhance the flavor.
Last night the Hostess and I made another appearance as guest bartenders at Salon Rouge, one of our favorite local businesses, for their annual Holiday Open House. It was our third year consecutive year, so I guess it’s now officially become a holiday tradition for us. While the mission of our blog is to teach our tips and tricks to others, we also know that it’s good experience for us to occasionally “walk the talk” and see how well our advice works outside the comfort of our own home. Plus, we’re both regular customers of the salon so we’re happy that they give us this opportunity to help them out.
Each year Rachel and Karin, the owners, ask us to come up with a “signature cocktail” for the event. As in past years, we needed something red (partly to be in the spirit of the holiday season, but mainly because of the “Rouge” in the salon’s name). The past two years we’d served drinks (Pomegranate Martinis and Cosmopolitans) that were already in regular rotation at our home bar, but this year we decided to come up with something new. The Hostess took to the interwebs and found several ideas to run past me. Since we’d played with infused simple syrups last summer, I really liked one recipe that featured a simple syrup infused with cinnamon sticks and cloves. Plus, two of the key ingredients were cranberry juice and champagne. Red and festive? Check!
We experimented and made some adjustments to scale things up to “punch bowl size” in order to easily serve a large group. When serving cocktails from a punch bowl you need to consider a few things. First, you need to be prepared to replenish the punch from time to time so that the bowl stays close to full (there’s nothing sadder than a nearly-empty punch bowl crying “The fun is about to end”!). Second, you want the punch well-chilled without having to add a ton of ice, since melting ice will quickly water down the top couple inches of your punch. And third, in the case of a champagne punch, it’s best served “up” — you don’t want to ladle chunks of ice into your guests’ glasses. Debbie solved the ice challenges with a spectacular cranberry “ice ring” that she made in a Bundt pan, and we pre-chilled all of the ingredients so that the punch was cold to begin with. An ice ring is perfect for a punch bowl cocktail as it melts much more slowly than crushed ice. Debbie’s cranberry ice ring added a festive flair as, over the course of the evening, it slowly gave up its cranberries and they ended up floating on the surface of the punch.
Everything in the punch bowl was alcohol-free so it was easy to serve virgin cocktails to kids and non-imbibers: We simply filled their glass halfway from the punch bowl and topped with sparkling cider. And the rest of the crowd loved watching how we’d start by putting a dash of Grand Marnier into their glasses (“What’s THAT??“) followed by the punch and champagne. Adding the bubbly to the glasses at the last minute, instead of directly into the punch bowl, made sure that everyone’s drink was fresh and sparkly.
So enough about the process. Can I just say how incredibly GOOD this punch is? Tart and tangy cranberry and light, refreshing champagne, layered over warm spices and rich-orange Grand Marnier. I mean, seriously. I’ll probably never again smell potpourri without craving a champagne flute full of our holiday punch. Keep the ingredients for this recipe on hand from Thanksgiving through New Year’s Eve and you’re good to go for all your holiday entertaining.
Okay, here we go again. A new recipe (yea!) that, yet again, I can’t seem to share without telling you the story behind how it got from idea to reality. The scenario behind today’s recipe repeats itself on a pretty regular basis around here. In this case, I received a recipe from a good friend of mine (“You have to try this recipe! It’s so good!” my friend wrote.) I promptly put the recipe for Cranberry Cake away in the place where I keep such things and vowed to try it soon.
With Thanksgiving rapidly approaching, it seemed like the right time to try the cake. But I couldn’t find the recipe she had sent me. (Note to self. I need to improve my filing system.) So, I did a quick search online which provided two different recipes that I thought sounded good.
Of the two cranberry cake recipes I had, I was leaning towards the one that was called a layer cake since it meant there would be frosting involved, and I’m a big fan of anything with frosting. However, I didn’t actually look closely at the recipe until it was time to start making the cake. At that point, I realized that the recipe called for using a white cake mix. Not that I’m all holier-than-thou regarding the use of cake mixes, but I didn’t have a cake mix in the pantry and didn’t want to make a trip to the grocery store. (See! Not judgmental, just lazy.) So, instead of a mix I used the vanilla cake recipe that I have been using for cupcakes, and then added orange zest, chopped cranberries and walnuts to the batter.
You need to make this cake. I’m not kidding. You need to make this cake. The taste combination of the sweet cake and tangy cranberries with the sweet/tangy cream cheese frosting is perfect.
If you’re looking for an alternative to pie on Thanksgiving, give this cake a try. Sure, there may be those that complain that a cranberry layer cake isn’t a traditional Thanksgiving dessert. But I’m guessing those naysayers will be outnumbered by those who, after their second or third piece of cake, will tell you that they are quite thankful you chose to serve cake rather than pie.
Blogging is a virtual thing. Probably more than any other aspect, that’s what I’ve come to realize and appreciate about this gig. We sit, in our house, and blog and cook and photograph, and then share everything with all of you electronically. It is both a bit mind-boggling and challenging. For someone who blogs about inviting people into your home to create community, because that’s what I crave, it’s at times ironic that we do it all in complete isolation.
Which is perhaps why, when we got to meet a fellow blogger live and in person, I was practically giddy. Joy the Baker (Joy Wilson) has just published her second cookbook, Homemade Decadence, and she was in Seattle doing a baking demonstration and book signing. (If you’re unfamiliar with Joy, check out her blog at joythebaker.com.)
Jon and I, along with about 70 other groupies, crammed into The Book Larder in Seattle, a bookstore that classifies itself as a “community cookbook store.” This is the kind of small, local bookstore that Meg Ryan owned in You’ve Got Mail until that horrible Tom Hanks came along and changed everything. This is the kind of little guy that you root for always.
In front of her captivated and mesmerized audience, Joy prepared a pumpkin pie. A pie! For some, a pie is possibly one of the most intimidating desserts to make. The mere thought of making a pie crust from scratch has reduced more than one somewhat competent cook into a sweating, cussing, anxious heap of frustration. And that was in the privacy of her own kitchen, not in front of an audience. Oh, wait. That was me.
And, yet, Joy the Baker performed her pie making skills in front of an audience, all the while chatting with us as if we were sitting in her kitchen and had been friends like forever. She was, in a word, just simply adorable. And I don’t think I was the only one in the room developing a serious girl crush on her.
The audience oohed and ahhed and whispered amazement to their neighbors. We all knew the difficulty of the task she was undertaking and that with just a tiny slip up, we could potentially witness grave failure. We wouldn’t have been more spellbound had she been suspended 100 feet above us, dangling by her teeth from some thin wire, slowly performing pirouettes.
If you’ve been following this blog for a while, you know I’ve had more than one tragic attempt at making pie crusts from scratch. (Click here or here if you care to relive my somewhat less than successful attempts.) More than a bit discouraged from my past attempts, I had pretty much given up. But, I have to tell you. After watching Joy, somewhat effortlessly, turn butter and flour into a masterpiece, my spirit is rekindled. I’m getting back on the flour-dusted pie horse and giving it another try. Besides the fact that I’m probably 20 years older than Joy, I’ve decided when I grow up I want to be just like her.
My history with frosted sugar cookies goes waaayyy back. Almost to the beginning of time. Well, at least the beginning of my time. I learned the art of, and appreciation for, making sugar cookies at my mother’s knee. Of course, in this case, her knees were in the kitchen. And, given that she had five kids and a husband to feed and a house to keep, I’m guessing her knees, and probably her back, ached. But that’s a tale for another day.
Every year, at Christmas, Mom would make sugar cookies. She’d don an apron, make and roll the dough into a nice circle, and then cut shapes with her metal cookie cutters: The gingerbread man (always a favorite because it was big), the reindeer and the angel (both which required special skill when handling because of the thin parts that were vulnerable to cracking), the Christmas tree and the Santa Claus. Before putting them in the oven, she’d let me help by carefully adding the colored sprinkles. At least that’s my recollection. No doubt I got sprinkles all over everything and she got to clean up the mess.
At some point, I got my own collection of cookie cutters and my own cookie sheet. Miniature replicas of Mom’s. I think the cookie cutter shaped like a little dog was my favorite. I never had an EasyBake oven. I got to bake my cookies in the real oven.
One of my forms of rebellion as a teenager was to take cookie-making up a notch. Declare my independence and do things different than my parents. I discovered the fun of frosting the cookies rather than just using sprinkles. Same cookie cutters, just with a different finale. I would make a big batch of frosting, divide it into several bowls and, using food coloring, prepare my palette. Mom had this metal Mirro cake decorator, with various tips, that I would use to decorate the cookies. One year, I spent hours decorating a couple dozen cookies. Then my brothers came home and the entire batch disappeared. It was probably my first experience with the concept of disproportionate effort versus reward.
I continued the tradition through the years. Like my mom, every year for Christmas I’d make cookies. When the kids were growing up, the annual cookie decorating was the one event we never missed. They, too, always preferred the biggest cookie cutter. It provided the broadest canvas for their frosting artistry. And, in turn, provided the biggest score when they got to eat one of “their” cookies.
With my burgeoning collection of cookie cutters, I was able to expand to year-round cookie making. (Perhaps the ice cream cones I made one year for a 4th of July party were some of my favorites.)
This year for Halloween, I got the idea to make mummy cookies. I had seen pictures of mummy cupcakes, so I figured I could do the same with cookies. (One of those, “How hard can it be?” moments.) A trip to JoAnn provided the edible eyeballs (as I called them, they are actually Wilton Candy Eyeballs). You just gotta love a world where you can purchase edible eyeballs. Since these were for a party, I used a 3 1/2″ round cookie cutter because I wanted them to be big and, due to their large size, imply one serving per guest. For the frosting, I used a good, basic vanilla buttercream. After baking and cooling the cookies, I got down to the business of decorating. I used a dab of frosting on the back of each eyeball to adhere them in place (Jon’s brilliant suggestion). Then, using a standard basket weave decorating tip, I just sort of randomly ran stripes of frosting across the cookie. To answer my own question, it wasn’t hard at all.
While I love making frosted sugar cookies, honestly, my favorite part is eating them. I may have been slightly miffed at my brothers the year they scarfed my cookies without a second thought, but honestly I understand it. It’s really not that different than how I consume them.
You know how irritating it can be when some people sit around and talk about how different things used to be, back in “their” day? Well, I think today I’m one of those people. I’ve spent the last few days thinking about Halloween, and I keep reminiscing about how simple it used to be.
Take costumes, for example. When I was really young, Mom would buy one of those cheap but readily available masks, which was always the core of my costume. You know which ones I mean. Those molded plastic ones that looked harmless enough until I actually put it on. That’s when I would realize that the one piece of innocent looking elastic that held it in place was ridiculously tight. The mask would fit so snuggly against my face that I could barely breath or see. That was until one end of the elastic came loose, rendering the whole thing useless. The masks always came with some simple, cheap costume, which made the whole process of dressing up a cinch. As I got older, I was able to be a little more creative and design my own costumes. I would like to formally apologize for the year I went as a hobo. I meant no disrespect to any class of people. I was 8. I thought it was fun to wear a collection of old clothes and carry a little handkerchief tied to the end of stick. But today, in these “politically correct” times, kids have to worry about things like that.
Perhaps the thing I miss the most is the innocence of trick-or-treating. I, along with my brother or a group of friends, would strategically wander through nearby neighborhoods, amassing our candy booty as we went. Given that, on a good night, we probably hit over 50 houses, there is no way my parents knew all the people we collected candy from. They didn’t have to. Those weren’t the things that parents had to be worried about back then.
And then there’s the whole pumpkin carving thing. Remember when carving pumpkins meant you just grabbed one of your mom’s kitchen knives and hacked away at it until you had a jagged, 3-toothed grinning Jack-o-lantern? Now with the pumpkin carving tools and patterns that are available, one feels a little old-school if armed only with a knife and an imagination. But, I’ll admit it. In this case, I’ve fallen prey to the hype.
Our friends hosted their annual pumpkin carving party this week. The invitation said to bring a cleaned-out pumpkin ready to carve. They created workspaces by covering several tables with inexpensive plastic tablecloths. There were several obligatory (and sharp) kitchen knives being brandished about, usually by someone with a cocktail in their other hand. (Thankfully, and surprisingly, no one lost a finger.) But, also on hand were an arsenal of official pumpkin-carving tools, including these little battery-operated saws. Which, quite frankly, didn’t work very well. We broke two of them before we figured out how useless they were. But we hacked and carved to our heart’s content, and the end result was equal parts fun, gratifying and impressive.
While all things Halloween may have been simpler when I was a kid, the party was a great example of how this holiday hasn’t outgrown its ability to be simply fun.
Fall. People either love this time of year or they don’t. I fall into the “love it” category. Someone recently referred to it as a “transitional season,” which I think is an interesting concept. The context in which they used the term leads me to believe that their point was that, during the fall months, we transition from a season where we spend most of our time outdoors to a pre-hibernation season and spend our time indoors. Our habits and routines change with the shorter days and cooling temperatures. For me, this is probably most evident in my kitchen where the oven gets called back into action after its summer vacation.
One of my annual fall traditions (habits?) is to make pumpkin bread. Betty’s Pumpkin Bread, actually. My good friend, Wendy, gave me this recipe years ago. Long enough ago that it preceded the internet and e-mail and electronic communication. The recipe was given to me on a 3 x 5″ index card that said “From the Kitchen Of” across the top, the recipe handwritten in Wendy’s beautiful script. Betty was her Mom, and this was her recipe. I now make this pumpkin bread every year, and I think of Wendy, and her mom (whom I never met), every time I do. And it reminds me of the amazing ability that recipes have for bridging time and distance between people. I love that, although Betty has been gone from this earth for a long time, something of hers lives on in my kitchen. How great this thing called legacy is.
The only change I made to Betty’s bread is the addition of chocolate chips. It makes me think that Betty was more practical and less indulgent than I. Otherwise, the recipe is just as Betty made it. This recipe will make two loaves, which is a good thing. One loaf doesn’t last long around our house. I made a loaf yesterday and at this rate, it won’t see the sunrise on Friday.
Fall has arrived, and as the cooler weather and earlier evenings drive us indoors, I’ve decided it’s time to change the lineup at the Entertaining Couple’s bar. Don’t you worry, this post isn’t about how to make some trendy, clichéd “fall cocktail” like a Cinnamon Apple Martini or a Pumpkin Pie Cosmo (come on…does anyone really drink these things?). Nope, the direction I’m heading is all about complementing the change of seasons with a classic cocktail, one that has some history to it. This is the time of year when people start looking forward to a mid-winter trip to the tropics, with visions of sunny beaches, to shake off the longing for the summer that’s now far behind us. So the time is right to add a tropical cocktail to the mix: The Caipirinha.
I’m actually a little surprised it’s taken me this long to write about the Caipirinha. It’s one of my favorite drinks — especially when I’m in the tropics (or when I’m creating a tropical atmosphere at home) — and it’s a super fun cocktail to make. Plus, it’s the national cocktail of Brazil, which (to me, at least) makes it seem exotic and sexy. A Caipirinha that’s faithful to the original recipe is made with cachaça, a Brazilian liquor distilled from sugar cane. Cachaça is similar to rum, but a bit less sweet, a bit more “raw,” and a bit more challenging to acquire a taste for. Here are some pronunciation tips. Say “kye – purr – reen – yuh” for Caipirinha, and “kuh – shah – suh” for cachaça. Easier than it looks, right?
I had my first Caipirinha many years ago in a Brazilian restaurant in Denver. I’d heard (and read) about the Caipirinha but had never seen one on a menu before, so I was excited to finally try one. And it was awful. The cachaça’s flavor reminded me of how paint thinner smells. Blehh. I wrote the Caipirinha off as something I didn’t like. But a couple years later, I spent a week on business in São Paolo and figured it was only fair to try a Caipirinha in its home country. What a difference! I’m not sure if the cachaça was better (probably) or if the Brazilian bartenders were more skilled at making Caipirinhas (again, probably), but whatever, I quickly became a fan. Now, instead of reminding me of paint thinner, cachaça makes me think of sun, beaches, and tropical good times. (It also helps that, in recent years, good-quality cachaça has become widely available here in the United States.)
Cut half a lime into four slices
Add some coarse brown sugar
Grab your muddler…
…and muddle gently until juicy
Fill glass with ice and cachaça
Join glass with shaker
Shake and serve
We’ve also found Caipirinhas in parts of the Caribbean; those are almost always made with local rum and they tend to be a bit sweeter than the Brazilian version. (Purists will tell you that, if made with rum, it’s called a Caipirissima, while if you use vodka you’ve made a Caipiroska — which, incidentally, is Debbie’s favorite version. Whatever you call it, these variations taste great as well).
I think the Caipirinha is the perfect antidote for the wintertime blues that are just around the corner. Instead of dreading the change of seasons, throw a Tiki party: Crank up the heat, turn on your favorite tropical music, slip into your flip flops, splash on some coconut oil, and shake up some Caipirinhas!
There are very few things I enjoy as much as a fall day. A real fall day, when the temperatures are cool, the leaves are turning color and there’s a freshness in the air. You won’t see me objecting when the weather sends a memo that says “Today is a day made for hunkering down and cozying up.” I am very happy to oblige and stay indoors, pull on a sweater, build a fire, and prepare something to eat that warms from the inside out.
Probably one of my favorite things to make, for us and for guests, is soup. Besides the wonderful aroma that comes from a pot of soup simmering on the stove, it all seems so communal and welcoming to me. There’s just something about it all that says “share.”
According to one website, soup is probably as old as cooking itself. Something as simple as combining a variety of ingredients in one pot to make a nutritious, filling and satisfying meal, over the centuries, has fed the rich and the poor, the sick and the healthy around the world. The different types of soup evolved with different cultures and local ingredients and tastes.
I mean, Campbell’s would not have used “Mmmm, mmmm, good” as their slogan unless it was, right?
I’ve been making this chicken corn chowder for so many years, I’ve sort of lost track of what inspired me in the first place. But I can tell you what inspired this particular pot of soup was a trip to a local farm stand and the fresh, local corn I found there.
The other thing I like about this recipe is that it’s a great way to use leftover roasted chicken. We’ll roast a chicken one day and then make this soup the next. But a whole, roasted chicken from the deli at the grocery store works just as well.
We don’t eat a lot of bacon, so I always need to buy some when I’m making soup that uses it in the stock. I’m so happy now that I can buy bacon by the slice at the meat counter in many grocery stores because it means I can just buy as much as I need. But, since they usually have more than one type of bacon, it means having to choose. I have found over the years that the type of bacon you use can alter the taste of the soup. For this pot of soup, I used an alder smoked bacon, and the soup had a wonderful smoky flavor to it. Any bacon will work but if you are looking to infuse a certain flavor into it, think about which kind of bacon you buy.
Serve with a simple salad and a focaccia bread to make it a real meal.
Around our house, when we have some bit of information to share with each other, we’ve gotten in the habit of often asking, “Do you want the good news or the bad news first?” Sometimes it’s best to hear the good news first because if it’s really good news it seems to lessen the blow of the bad news. But other times it’s nice to hear the bad news first and get it over with. Of course, all things are relative. Our bad news is usually something like, “The bad news is the take-out restaurant was out of Kung Pao chicken.” Which is usually followed by, “The good news is they had spring rolls 4 for a dollar so I got 8 of them.”
With this recipe, I feel the need to ask, “Do you want the good news or the bad news first?” Since I can’t actually hear your response, I’ll have to answer for you and I’ll say “The good news.”
The good news is this recipe makes a really appetizing appetizer. And it’s vegetarian, so doubly good news for a lot of people.
Now for the bad news. It takes some time to make them. It took me about an hour to make a tray of 36. And, the other bad news, which is sort of tied to the good news, is that 36 of these little buggers disappeared in about 5 minutes, so I probably should’ve made another couple dozen. But, with all that bad news dropped at your feet, the other consideration is that you can make these ahead of time and then just bake them right before the party. So, I’m going to file that last little tidbit under the “good news for a host or hostess” category, because you know I love recipes that can be prepped far enough in advance that I have time to do the cleanup before guests arrive.
Just a couple of hints/tips when making these. The recipe calls for chopped spinach, which means the frozen stuff. And you want to “drain” the liquid after the spinach has thawed. This is always a bit of a challenge for me because I usually forget to thaw it ahead of time so I have to microwave it at the last minute. I’ve found the best way to do all of this is to cut a slit in the box, place the whole box in a bowl, and then microwave it for a couple of minutes (or until thawed). I then just squeeze the box until all of the liquid is out of it. Not necessarily pretty — but pretty darn effective.
The other note is that you want to use enough filling so that each bite isn’t just noodle but not so much that you can’t roll them up or that they won’t stay rolled. I found that about 2 tablespoons is the right amount.
This bite-size lasagna is a great cocktail hour or football game snack. I’ve taken these lasagna bites to two different parties at my sister-in-law’s house. In both cases, she had guests bring appetizers and she and my brother provided the martinis (their signature cocktail). I love this concept for a party. And, given the party atmosphere at the both of the parties, everyone else seemed to love the concept as well. This is a great appetizer to take to a party like that. Even though it took me about an hour to make them, this was my only contribution, so it wasn’t overwhelming. You serve them warm out of the oven but they don’t require any sort of hot plate to keep them warm. And, they appeal to a wide variety of tastes.
Sometimes, something hits you and it’s so darn obvious you can’t believe it hasn’t been utterly clear before that point. So it was with my realization that I come from a long line of southern women. Well, I always knew about my heritage. But what I finally realized is that heritage runs deep and shows itself in all different aspects of my personality.
Three generations of southern women
Because I grew up in the Northwest, I had only considered the south as something extraneous; my roots, if you will, but nothing more significant than that. But then I started realizing how deep those roots grew. I first started thinking about all of this when my cousin sent me this funny bit about things that southern women say. Until that point, I hadn’t really considered that not everyone skedaddles when they leave in a hurry. But I still don’t understand how on earth someone can explain that a painting is not hanging straight if they don’t say it’s cattywampus. And, perhaps most perplexing to me is that my liberal use of the term “goober,” when describing persons of an irritating nature, is not commonly used nor understood.
Then, last week, it came to me. There was more to this southern thing than just catchy phrases. Southerners love to feed people. It’s what they do. Southern women have traditionally been caretakers and they nurture and give through comfort food. When someone is in distress, southern women feed ’em. When people are celebrating, southern women feed ’em. Food is the center of a southerner’s community. And, all I can figure is this must be where I get my propensity to feed people.
That was the epiphany I had as I was making cupcakes for a baby shower. This wasn’t a shower that I was actually invited to. I’ve only met the mother-to-be a couple of times, but her dad and stepmom are some of our closest friends. When I heard they were throwing their daughter a baby shower, I practically blurted out, “Can I make cupcakes for it?” After that moment, and several times during the making of said cupcakes, I couldn’t help but wonder why I felt compelled to participate in this shower. Then it hit me. I love to feed people. I give through food. There was going to be a crowd gathering to celebrate the arrival of a new baby, and I wanted to feed ’em.
And, here’s the part of this story I probably love the most. Even though the baby is a girl, rather than choosing a traditional pink-themed shower, the mom-to-be instead opted for a nautical, blue and yellow theme in honor of the years she spent boating with her parents. That made my job easy. And fun. Something lemony would provide the yellow while the blue/nautical was easily taken care of after a quick shopping trip through the aisles of Etsy.
I thought a lemon cupcake and lemon frosting would be too lemon-y, so I instead made Vanilla Cupcakes with a Lemon Curd Cream Cheese Frosting. I used what is quickly becoming my go-to recipe for vanilla cupcakes, with just a couple minor modifications. The frosting recipe once again came from Stacy at WickedGoodKitchen. That girl knows her frosting! She describes this frosting as having the “texture of mousse and tastes like lemon cheesecake.” How could I not try that? I tweaked it ever-so-slightly, and the results were a light, creamy, lemony frosting.
It’s been a while since I baked a cake for Jon’s birthday. And, when I say “a while,” I really mean I can’t actually remember the last time I made him a birthday cake. But before you judge me, let me just say that September is when we typically take a vacation, so the last few years we’ve celebrated his birthday somewhere far from home and far from the kitchen where cakes are made.
But this year, his day called for a cake.
Two things inspired my decision to make an Apple Spice Cake. First, the season. I had apples from our neighbor’s garden that needed a purpose. The day was a cool, fall day, so baking something spicy and cinnamon-y just seemed right.
My second inspiration came from this picture of Jon and his brothers, circa 1965. This photo actually appeared in Sunset magazine. That’s what happens when you and your brothers are beyond adorable, your mom was a state Dairy Princess and you live next door to a Sunset magazine photographer. Long before selfies and YouTube videos, this was the trifecta of celebrity.
Surprisingly, I had a bit of a challenge finding a good apple spice cake recipe. I liked the name of one from Paula Dean (“Uncle Bob’s Fresh Apple Cake”) but based on the reviews it needed some tweaking. So, I started there, changed things up, and landed with this one. Paula’s recipe was for a Bundt cake, but I wanted a cake I could frost, so I baked mine in 2 – 8″ pans instead. (I used 8″ instead of 9″ pans so that each layer would be taller to minimize the cake to frosting ratio.)
This is a dense, substantial and flavorful cake. You can actually see, and taste, the chunks of apple in it. (I have made similar cakes where I’ve grated the apples rather than dice them, and I may do that next time.) But it’s not an overly sweet cake. So, I thought it called for a frosting that was sweet, but not too sweet, and maybe with a little tang, similar to what you would use for a carrot cake. I went with a Cinnamon Cream Cheese frosting, and it was the perfect topper for this cake.
Then, I got a little carried away. I wanted to decorate the cake somehow and decided that one of the birthday banners like I’m always seeing on Pinterest and Etsy would be perfect. The easy part was finding one and printing it on my printer. I love that people just provide these things, free of charge. It seems amazingly generous to me. This particular one came from www.simplyklassichome.com. Locating one and printing it took maybe 6 minutes. And, I thought, “Oh, this is so easy and quick!” Then I spent another 45 minutes cutting the letters out and adhering them, then getting them on the twine with just the right amount of spacing, and then tying the banners to the straws. Some things really are a little more difficult than they look. Patience isn’t one of my greatest virtues, but fortunately tenacity and stubbornness are two things I’m known for. I’m glad I made the (small) effort. The banner really finished the cake.
If it’s not someone’s birthday, go ahead and make this cake anyway and find another reason to celebrate. That’s the beautify of life. Every day gives us something worth celebrating.
It all started with a trip to one of the local farm stands a couple of weeks ago. It was the end of blueberry season, but they still had flats of beautiful, ripe, big blueberries. As I debated about whether or not to buy some, a woman proclaimed that they were “the best blueberries in the world.” She had bought some the week before and had come back for more. How could I not buy some after a ringing endorsement like that?
So, there I was, at home with a flat of blueberries. And they were good, I’ll give her that, whatever her name was. I was happy to freeze a good portion of my berry stash, but it seemed a shame to not also find a way to use them fresh, too. I had been wanting to try adding fruit to our scone recipe, so this seemed like opportunity knocking.
The great thing about all of this is I was able to use the Glazed Lemon Scone recipe with just one small alteration. I reduced the zest slightly so that the lemon flavor wouldn’t compete with the blueberries. When I got to the “mix just until the flour is incorporated and the ingredients all come together in a ball” stage, I added about 3/4 cup of the blueberries and then gently worked them into the dough, taking care not to crush the berries or overwork and warm the dough. Then I shaped, cut and baked the scones like I normally do.
The result was the same great texture with the added flavor (and wonderful blue dots) of the blueberries. De-lish. This is a good example of a time when I shouldn’t be blogging when I’m hungry. I am now craving one of these scones.
If I make these again and use some of the berries I have in the freezer, I think I’ll add them frozen and not let them thaw. I think thawed berries would be a little too messy.
We ate two scones immediately and put the rest in a Ziploc bag after they’d cooled. Jon ate these scones every day until they were gone. He said that, even after five days, they were still fresh and moist — the best scones he’s ever had.
There has been a whole lotta blackberrying going on around here lately. Sometimes, everything comes up roses. At this particular time, it seems everything is coming up blackberries.
Fortunately, I love blackberries and all of their deliciousness. It doesn’t take much effort on our part to find a variety of ways to take advantage of their abundance. First, there was spinach salad with fresh blackberries. Then, every morning for the last two weeks, our daily smoothies have gotten a boost of antioxidants because I’ve added a handful of blackberries to them. Now Jon is working on a blackberry Caipirinha cocktail (recipe coming to a blog near you, soon!). And, of course, blackberry cobbler has come to more than one dinner party in the past couple of weeks. And, yet, we still have blackberries. And stains on many of our kitchen towels as proof.
Driven by my never-ending love affair with ice cream, I made some lemon ice cream. My need to use some more of the berries turned the lemon ice cream into lemon blackberry ice cream. In a word, yummers. (That is literally the word that popped into my head when I was eating the ice cream. Forget the fact that it’s not actually a word. In this case, it’s not only a word, it’s the perfect word.)
The recipe that initially got me excited about making lemon ice cream called for using water, but I decided that wouldn’t give me the creaminess I was envisioning and craving. So, instead, I basically used the same custard base for the ice cream that I use for other ice creams but added lemon zest and juice. I reduced the amount of whipping cream and vanilla. And for the berries I used the same process as I do with raspberry ice cream: During the last few minutes of freezing I added muddled blackberries. If recipes weren’t all about taste, I would make this ice cream again just for the color.
Something had to happen. These beautiful, ripe tomatoes, gifts from neighbors with bountiful gardens, had been sitting on our counter for a few days. From the posts on Facebook and comments from neighbors, it seems gardens have been overrun with tomatoes this year. This year’s harvest, that had been so generously shared, gave me a revelation: There is no need for me to toil over a garden all summer. We just have to live next door to people who do.
But now I had a pile of tomatoes that were being neglected. The guilt was killing me.
And, then it hit me. A Tomato Tart.
Although I have eaten these delightful tarts before, I had never actually made one. Thankfully, there are about a gazillion recipes for tomato tarts on the internet, so I had plenty of resources to choose from. Surprisingly, it seems the only other person in the world, besides me, who hasn’t made one of these is Julia Child. Go figure.
The recipes seemed to fall into two camps. About half of them used a puff pastry while the others called for using a simple, store-bought pie crust. And, let’s be honest. We all know exactly what those store-bought crusts are because we’ve all used them on more than one occasion. My decision to make a crust from scratch was based on (a) I didn’t have a puff pastry or pie crust in the freezer (and certainly didn’t want to go to the store) and (b) I have a homemade crust recipe that I’ve used several times before for quiche. Since I converted from the store-bought crusts to the homemade version with the quiche, logic told me I could do the same here. But, if you’re hesitant to make a crust from scratch, then by all means go ahead and use a store-bought one.
I think the hardest thing about making this tomato tart was slicing the tomatoes, which should tell you something. It was super simple to make and came together very quickly. And the results were scrumptious. Like pizza but different and in some ways better. If that’s possible.
I made a tomato tart two days in a row. I wanted to retest the recipe and I had more tomatoes to use. The first time I made it I didn’t have any pie weights, so my crust suffered a little shrinkage as it baked. It didn’t really seem to affect the outcome of the tart, so I categorize it as “forgiving.” The second time I made it I found about eight inches of unused chain scraps in the garage and used them as weights during the blind bake, and it helped. Now I just need to get some real weights. Or more chain.
The tomatoes I had from our neighbor’s garden were about 2″ across. A friend of ours makes his with cherry tomatoes, which would be good, too. I think the key is that the tomatoes are ripe and flavorful.
We just polished off tart #2. Without a crumb of evidence left behind. After eating this two days in a row, we’ve concluded that, if a food can have a sweet spot for eating, the sweet spot for the tart is about 20 to 30 minutes after it’s come out of the oven. You want to let it cool and set a bit. And you want the cheese to cool enough that you don’t burn your mouth when you bite into it. We found that the flavors seem to really come together well after it has rested for a few minutes. But, after about an hour, it all starts to look a little flat and tired. This is just something to think about when you’re planning your party timeline.
This tomato basil tart would make a wonderful appetizer. I can see serving this when people are over for cocktails/Happy Hour. It would be delicious with a crisp white wine. Or, serve with a salad for lunch or a light dinner.
When we first launched our blog, one of our earliest posts was about blackberries. Specifically, it was about my dread of having to help Mom pick them as a child, my new found appreciation of the “chore” as an adult, and the glorious outcome that is blackberry cobbler. You can read that post here.
A lot has changed since that post. Back then, the only people that visited our blog were my in-laws. (They are still our most avid fans.) We were just starting to navigate the unknown world of blogging and what it takes to have a blog. Today, we think of our website as a real blog. We must be official because we have pages on both Facebook and Pinterest. We have a Twitter account and an Instagram account. And, we have real followers and analytics that allow us to track how many of you visit us on a daily basis.
Over the last couple of years, some of the most common feedback we’ve gotten is that many of you appreciate detailed instructions in the recipes, and pictures — not just of the end result, but also of what it’s supposed to look like at various steps as we make it.
But, some things have not changed. Like the untapped blackberry bramble in our neighborhood. Every year, I cannot believe the bountiful harvest we get from that undiscovered thicket. (Of course, when neighbors ask where it is, I have to admit we’re a little vague about its whereabouts. “Oh, you know, over there in that direction.”) And my thrill of coming home with our harvest and making blackberry cobbler has not changed either. We know that several of you have made this cobbler, and have shared your prize-worthy efforts with us, which makes the whole thing that much grander.
So, in honor of where we are today, what we’ve learned along the way, and the blackberries that will soon become cobblers, here is an updated post complete with more pictures. Including this adorable picture of Olivia, helping my wonderful friend Kim (Olivia’s grandmother) make the cobbler. I don’t know which part of this I love the most: The fact that a toddler is helping to make our blackberry cobbler recipe or that she’s standing on the counter as she does so.
And this bears repeating. Even though I have made this cobbler now countless times, every single time I pour the sugar/water onto the cobbler, I think “This is not going to work.” I just can’t fathom that the liquid will be absorbed and that I won’t end up with a soupy mess. But it does work. Amazingly well.
As I write this, we have a crab pot in the water and we’re whiling away some time, which seems to be what fisher-people do. It’s not an episode of Deadliest Catch, but still. We like to amuse ourselves and think of it as Man v. Nature. And in this case Nature has a slight advantage. We use our inflatable kayaks to set our pot, commercially known as the Lil’ Crabber, which in case it’s not obvious is called that because it’s made for kids. We were afraid our full-sized crab pot would cause the kayak to capsize. Jon has had good luck crabbing in the past, but as with any type of fishing, there are simply no guarantees. We are fortunate that we live in a place where we can paddle out about half a mile from the dock, throw the Lil’ Crabber in the water, and (sometimes) have fresh Dungeness Crab for dinner. Fruits of the sea. Exclamation point.
Personally, I find crab meat so utterly delectable that I am happy eating it with nothing more than a little melted butter or a dash of cocktail sauce. For me, it’s definitely not one of those foods that requires a lot of dressing to make it appetizing. But, with that said, at times even something so wonderful can benefit from a little change of pace, if for no other reason than to add a little variety to things.
My hot crab dip is very popular. It’s classic in that it uses cream cheese as the base. It’s best served warm, so I make it in small ramekins and warm/broil them as needed. Which is usually after the previous one disappears. Served with crackers or slices of bread, this makes a good, and decadent, appetizer.
Just a note, this hot crab dip recipe works equally well with canned crab as it does with fresh, for those sad times when the Lil’ Crabber comes up empty.
Or, in this case, cupcakes. I know they are a little trendy right now, but I’m very fond of cupcakes. Like Jon says, they are fun because everyone gets their own cake.
For this particular birthday party, cupcakes seemed like a better choice than cake. For one thing, it was at someone else’s house, and I didn’t want to haul plates and forks. Nor did I want to show up with my contribution to the party and require that they provide plates or forks. So, cupcakes seemed like the perfect no-imposition dessert. Secondly, it was a large party (about 20 people), and it would take a really large cake to feed that many. Although, lesson learned on this one. I underestimated how much dessert everyone would eat. I only took 2 dozen cupcakes, even though the recipe made more than that. Everyone had a cupcake and several people immediately wanted seconds. Next time I’ll take the whole batch.
Since we’re smack dab in the middle of summer, I wanted the cupcakes to be summery. With raspberries in season, I decided a vanilla cupcake with raspberry frosting would be a perfect birthday party dessert. I’ve been wanting to try something that I had seen on Wicked Good Kitchen a while ago. Her recipe was actually for a strawberry frosting, but I figured raspberries could easily be substituted. In her recipe, she had used freeze-dried berries for the frosting. Intrigued, I promptly ordered some from Amazon. You pulverize the berries into a powder (I used a clean coffee grinder), and then use the powder in the frosting. The benefit, or so I read, is that you get all the flavor of the berries without introducing a lot of unwanted juice or liquid, which can drastically change the consistency and texture of the frosting. I acknowledge that by using freeze-dried berries I wasn’t actually taking advantage of the seasonal berries. But, it’s what gave me my inspiration. And, I used a fresh berry on top of each cupcake.
For the cake, I used a recipe that had been touted the “best white cake recipe {ever}”, and after making it I think I have to agree. She said it would quickly become my favorite recipe, and she’s right. With the exception of adding more vanilla than the original recipe called for, I didn’t change anything about it and the cupcakes turned out perfectly.
A recipe for Lemon Zucchini Bread showed up in my feed from Pinterest this morning. Which was very timely since I had two zucchinis sitting on the counter, begging for some sort of indication that they would have a more glorious final act than aging slowly until a dishonorable discharge to the compost pile. As you might guess, the zucchinis were gifts from our neighbors. It’s that time of year when all the successful gardeners are walking around the neighborhood looking for good homes for their zucchinis. Zucchinis are summer’s version of good tidings. I am pretty sure that if Jesus had been born in the summer, the third wise man would’ve shown up at the stable bearing zucchini instead of myrrh.
The recipe sounded good and it was a nice variation from the standard zucchini bread I’ve made in the past. Problem was, while I had plenty of zucchini, I didn’t have cake flour or canola oil, both of which the recipe called for. I dug out my mom’s recipe for zucchini bread and it uses regular flour and vegetable oil, so I strapped on my “what the heck” attitude, greased my loaf pan, and gave my modified version of the recipe a test run.
What I am sharing with you today is an answer to three problems you may have. One, you have your own abundance of zucchini (grown or adopted). Two, you love desserts more than vegetables. Three, the last green vegetable you ate was the peas your mom made you eat when you were 10. If any of those apply to you, then this is the bread for you. It isn’t actually overly sweet, and the lemon is subtle and good. And I would challenge anyone, if they didn’t know it’s made with zucchini, to find any hint of the veggie. The zucchini makes the bread moist and, in my book, qualifies this bread as a serving of vegetables. Double win. Oh, and it was easy to make. Proverbial cherry on top.
This lemon zucchini bread would be a great thing to serve at your next Book Club meeting.
The loaf of bread is quickly disappearing. We’re eating it the way people who live alone eat something like this. Just a little slice off the end each time we walk by it, not bothering with a plate or napkin. That means that crumbs will be all that’s left of the loaf of bread by Wednesday. I am so happy I have more zucchini requiring some attention. Talk about a vegetable finding its rightful place in the universe! From garden to wonderful Lemon Zucchini Bread.
During the summer months the Hostess and I live in what I’m beginning to think of as “Lavender Country.” There’s something about our sandy, well-drained soil, our clammy-cold spring weather followed by warm dry summers, and maybe even our area’s proximity to salt water and sea breezes that lavender plants seem to love. They spread like weeds in the yards throughout our neighborhood. The few tiny sprigs we planted three years ago have grown and multiplied into an army of bushes the size of Smart Cars. There are lavender farms in the area and tourists flock to them during mid-summer to admire the purple fields and gawk at all the uses the farmers have dreamt up for their crop. There’s lavender tea, lavender ice cream, lavender scones and muffins, lavender lemonade, lavender skin creams, potpourris, incense, soaps, oils, bug repellents, pillows, sachets, the list goes on. And, frankly, I’m more than a little embarrassed to admit that I know what potpourris is. Not to mention a sachet. So I’ll skip the frou-frou stuff and instead talk about a use for lavender that I can really get behind: As the key ingredient in a Lavender Martini.
About a year ago we started noticing lavender martinis on summer cocktail menus, and somewhere along the way the Hostess picked up a tin of culinary lavender so that we could try making one ourselves. With the lavender in our own yard now in full bloom we decided it’s high time to work on our lavender martini recipe. I started with the easy part — making a simple syrup infused with the culinary lavender. Sidebar: I have no idea what makes lavender “culinary.” The stuff in the tin looks exactly like the dried flower buds that we sweep up by the pound this time of year. I suppose if I wore a hairnet and disposable gloves while cleaning our patio (I mean, while harvesting our crop) our lavender might qualify as culinary as well…
Anyway, the lavender syrup was super easy to make. As I crushed the flowers the aroma gave me a childhood flashback to the soap in my grandmother’s bathroom. This memory only got stronger while the syrup was simmering on the stove. Once the syrup cooled I tasted it to get a sense for the flavor I’d be working with, a little concerned that it might be overpowering. I was pleasantly surprised by a not-too-pungent herbal flavor that tasted a lot like how our garden smells this time of year. My goal was to create a cocktail that would highlight the lavender flavor while still keeping it subtle and balanced — the lavender martini had to taste like lavender, but not so much that it would remind people of soap. Or, worse, a sachet.
I started by looking at how chefs cook with lavender, and especially at which other ingredients and flavors work well with it. Lemon was common, so I figured my recipe would benefit from some fresh lemon juice, but for the first taste test I shook up nothing but plain, unflavored vodka and a couple teaspoons of my lavender syrup. I then made a second round including a squeeze of fresh lemon, mixed up a third using a lemon-infused vodka, and a fourth with the addition of a little Cointreau. I lined up several small glasses, sat down with Debbie, and the tasting began. A couple versions were surprisingly crappy, while one stood out as being better than the others (the lemon juice made a big difference). But even the best one wasn’t quite what I was after, so we plunged ahead with a few more attempts. The secret ingredient that finally brought everything into balance proved to be a hint of vanilla. I considered making a new batch of lavender syrup with a few drops of vanilla extract, but decided to keep things simple and just use a bit of vanilla vodka instead.
We sampled the final recipe again a few evenings later, and then took the “quality assurance” step of inviting some guest-tasters over for happy hour to get their impartial opinions, which resulted in even more tweaking. This was definitely not my easiest cocktail recipe! But I’m really, really happy with the lavender martini that resulted. Shake one up and let me know what you think!
Summer. At its best, it is easy, leisurely and relaxed. And, it seems that everyone is on an endless vacation. At least the pictures make it look that way. In reality, it’s just another season in this thing called life and all that comes along with it. The good news is that even when life is hectic, it seems that summer offers occasional moments of reprieve, when we really can just dial it back a notch. And, while summer seems to be the season of entertaining, I like the fact that it’s a simpler type of entertaining. It’s all about patios, barbecues and buckets of beer. Pretenses and formality are left at the front door. I’m a fan of any dinner party where flip flops are the appropriate attire.
If you’re a regular follower of this blog, you’ve heard us say more than once that summer food ranks right up there on the list of our favorite things. Fresh, local food prepared seasonally. For me, it just doesn’t get much better than this.
This salad is the perfect side dish for any summer meal. It takes advantage of fresh produce, and (most importantly) it’s a breeze to make, so it fits right into the dialed-back, relaxed type of entertaining that summer is all about. And, as I’ve discovered this summer, it’s easy to take along to a picnic or potluck. Recently, I did all the prep in the morning, brought it along in the cooler and just added the avocado and vinaigrette right before serving it for dinner. The recipe can easily be doubled to feed a larger group. And, it’s pretty. It’s like a bowl full of summer food confetti.
But, perhaps, the best part is this is a crowd favorite. People really, really like this salad.
I originally found this summer salad recipe on this great blog (With Style and Grace), which is a wonderful source for gluten-free recipes if you’re looking for one. My version is just slightly altered. I think on her blog, Lisa credits Martha Stewart for the recipe. And, I’ve seen similar versions of it on Pinterest, Facebook and Foodgawker. Whatever the source, it’s a keeper. File it under “The Salad To Make When I Need a Simple, Delicious Solution, Oh, and When Corn and Tomatoes are in Season.”
To everyone who has asked for this recipe over the past few weeks, here it is! Happy Entertaining!
Occasionally on Facebook or in e-mails I see one of those lists that contain things that “kids born today” will never experience. Like VCRs or walking across the room to change the TV channel. At the risk of totally dating myself here, I’d like to add something else to the list: Hand-crank ice cream makers. Oh, sure, kids today have to occasionally stand in line at Molly Moo’s or Coldstone, so I guess they’ve suffered some anticipation angst in the name of ice cream. But like so many aging adults, I just have to say it’s just not the same as when we were kids and had to make the stuff the old-fashioned way.
My memories of making homemade ice cream are always centered around a little town in the southeast corner of Kansas, where my grandparents lived. Inevitably, and much to my dad’s chagrin, it seems we always visited my grandparents smack dab in the middle of summer when the heat, to say the least, was stifling and downright miserable. So, it seemed that the proverbial lipstick on the Kansas pig was homemade ice cream. (“It’s hot, buggy and godforsaken here, but, hey, we can make ice cream!”). Grandpa would pull out the old manual crank ice cream maker while Grandma mixed up the ice cream fixin’s. The outer bucket of the freezer was filled with ice and rock salt, which served as the freezer. The kids got in on the act by clamoring for their turn at manning the crank. For those of you who have never done it, the fun and appeal of turning the crank wears off after about 2 1/2 minutes. Which is unfortunate given that the ice cream had to be churned, constantly and at a pretty good pace, for about an hour before it was ready. After enough whining and hopeless cranking, the kids were excused of their duty by some woeful-looking adult who would sit, one hand on the crank and the other holding a cold beer, sweating and silently cursing the advent of ice cream. With the burden of responsibility lifted from our tiny shoulders, we were free to do what kids do best: Prance, hover and incessantly chant, “Is it ready yet?” for an hour while the grownups did all the hard work. God I loved making ice cream back then.
Years later, my dad purchased an electronic version of the old hand-crank machine. I’m sure this seemed like a newfangled contraption to him. The outer bucket was plastic, instead of wood, and electricity provided the cranking. But it still needed ice and rock salt to freeze the ice cream. Dad would always put some old towel down under the bucket to protect the deck or sidewalk from the salty sweat that apparently was produced by the melting ice during the crank. Sounds similar to the adults cranking the handle in Kansas, doesn’t it?
Fast forward a few decades, and here I sit enjoying my homemade ice cream from my little Cuisinart. (Talk about newfangled!) No sweat, no toil. No cranky adults. No prancing around in my grandparent’s sweltering, airless backyard. But still a little anticipation of the sweet reward that is homemade ice cream.
Growing up in the Seattle area in the 50’s and 60’s, we were all familiar with a guy who was famous for his clams. Sort of a local celebrity. Although he had a last name (Haglund), we all just new him as Ivar, as in Ivar’s Acres of Clams (his restaurant). While I’m guessing few of us actually ever met the guy, we all knew him. He sponsored the annual fireworks display in Seattle for many years, so even if you didn’t eat at his restaurant, you were fond of him for the spectacular show he provided. Although he passed away years ago, his landmark restaurant on the waterfront, and other subsequent spin-offs of the original, are still in business around Washington.
Ivar was known for his clams (especially the fried ones). Tourists would eat the fried clams and French fries and then feed leftover fries to the seagulls. (That’s how you could always tell who the tourists were. No local would ever feed a seagull.) But he may have been most famous for his clam chowder. It was darn good, as thousands of seagull-feeding tourists and locals alike will attest.
I would never try and compete with something as iconic as Ivar’s clam chowder. Nor would I ever enter one of the many chowder competitions that are held here and around the country each year. But our recipe is good. Really good. This is one of those recipes that people love (assuming they like clam chowder, that is). I’m always happy (and flattered) when people ask for seconds of anything, and they always ask for seconds of this chowder.
Like any soup, it takes a little bit of prep to get everything in the pot. But after that, it’s simply cook and serve. Pair our chowder with a salad and you have a great summertime meal.
Until this last round of chowder, I had always used the little cans of clams, fresh clams if we happened to have any, and bottled clam juice. And then I discovered the mondo, over-sized can of clams at Costco. It’s about 3 pounds and has a lot of clams and almost exactly 3 cups of liquid. I may stock up and keep a couple of those cans in my pantry.
I’ve never been much of a “fruit and vegetable” gardener. I’m one of those people who loves the idea of growing their own produce but sort of lacks the motivation to do much about it. And, living in a place where we’re surrounded by farmland, and a string of roadside stands with an abundance of local produce, I have even less motivation to take on a garden at home. But last year, we inadvertently became farmers, thanks to the tenacity of one lone, wild strawberry plant that appeared in our flower garden. Jon asked if he should pull it. My response was, “If it wants to be there, who am I to persuade it otherwise.” Over the winter, that lone strawberry vine seemingly rounded up a couple dozen of its friends to make a verifiable strawberry patch right there in our front yard. It makes me smile to think that, without any effort on our part, these little plants took it upon themselves to show up and produce. Even though our crop can hardly be called a bounty, we now have enough strawberries for strawberry shortcake several nights a week.
Our little spontaneous strawberry patch is working out quite well. Because, as it turns out, there are few desserts that I love more than strawberry shortcake. But even though it’s one of my favorites, it’s a seasonal dessert for me. I only make it in the summer when the berries are local, fresh and super sweet. (And in this case, local occasionally means grown in our own garden.) In a word: Yum.
Our version of strawberry shortcake is a spin on the classic. We make it by starting with a layer of good textured cake, then add vanilla ice cream, berries and whipping cream. I don’t know when or why I started adding ice cream to the mix, but now I can’t imagine serving it any other way. I used to use Krusteez Scone Mix for the shortcake. It was easy and good. But, we’ve recently started using Lemon Pound Cake, and we’re hooked. As one guest said recently, the subtle lemon flavor of the cake, combined with the sweet strawberries, is the perfect flavor combination. We agree.
You have many options for the cake part of this dessert: From scratch, from a box, or something pre-made from a bakery or from the freezer section. Whichever way you choose, just do it. There are strawberries out there being called to their rightful place in this universe as a dessert at your next party.
And, honestly, isn’t strawberry shortcake what summer is all about?
It was one of those afternoons where I feeling pretty snorty about my entertaining prowess. The table was set, the salmon was marinating, the rug in the guest bathroom had been shaken. The pound cake was baking in the oven. I still had an hour and a half until our guests arrived and all I had left to do was take a shower and get dressed.
Our planned dessert for the evening was strawberry shortcake, and I had decided that a nice pound cake would be a good base to the strawberries. I was working off of two recipes: One that is supposedly from the Ritz Carlton Tea Room and one from an old copy (from 2007) of Cooks magazine. I have always liked Cooks because of the detailed definitions they provide from their multiple attempts to get a recipe right. It was fairly easy to combine the Ritz recipe with the process provided by Cooks. Even though Cooks warned that making a pound cake was “no cake walk,” after seeing how beautiful my batter was, I had all the confidence in the world that I was, contrary to the alert, indeed enjoying a cake walk.
And then it happened. About halfway through the bake time, the cake fell. And it fell hard. I was using a Bundt pan and, at that moment, it looked like a little ring of failure. The outside and inside edges of the pound cake were still where they were supposed to be but the middle was completely deflated. I think what I said at that moment was, “Oh, #%i&!” Since it still had over 20 minutes to bake, I decided to just let it bake. I mean, at this point, how much worse could it get?
So, there I was. An hour and a half until our dinner guests arrived with our dessert now looking like a bad tire blow-out. Surprisingly, I didn’t panic. Even when Jon asked, “Nowwhat are you going to do?” Since our strawberry shortcake consists of shortcake, ice cream, strawberries and whipping cream, I figured that, even minus the cake, I still had the makings of a dessert of berries on ice cream. Fortunately, I hadn’t printed menus.
After the allotted time, I tested for doneness with a skewer, because no toothpick was long enough to reach the crevice of my cake. I let it cool for a few minutes in the pan and then turned it out onto the rack to cool completely. And, here’s where the sad story ends. In its inverted position, it looked perfect! You couldn’t tell that it had fallen. At that point even if it was a mess when I cut it, I’d just put a bunch of pieces in each bowl, cover them with enough ice cream and berries and no one would be the wiser. But, even when I sliced it, there was no hint of its condition. It was a Christmas Day miracle in June.
Even though it all turned out well in the end, I was still perplexed by the whole thing and wanted to try and figure out what had happened. I’m not quite sure why I thought to do this, but I checked the Best By date on the flour. I’m guessing that the 2 1/2 year old cake flour may have had something to do with my baking disaster. Note to Self: Only use fresh ingredients. And, it’s better to check for freshness before you use an ingredient, not after.
I’m happy to report that I made the cake again this week (with fresh all-purpose flour), and the cake was a success.
It’s easier to get all of the ingredients prepped first. Zest and juice the lemons, whisk the eggs, and sift the flour before you start mixing everything. In the end, this recipe uses the ingredients suggested by the Ritz recipe (with just the addition of vanilla) but follows a lot of process defined by Cooks.
The results? Cake heaven. This pound cake has a perfect texture. Seriously, even the first cake in all of its deflatedness it was wonderful to eat. The subtle lemon flavor is a perfect offset to the sweetness. And while the recipe doesn’t actually call for a pound of each ingredient (like its original namesake), it does have a good amount of butter and sugar. Perfect taste and texture. What more could you ask for in a cake?
This is one of those cakes that disappeared quickly, one little shaved-off slice at a time.
For as long as I have been making cornbread (the early days using the stuff out of the blue box notwithstanding), I’ve been making it in one of the cast iron pans that my mother-in-law gave me. I’ve also been modifying the recipe and leaving out the chilies because I’m not a fan of food with heat. Which means that Jon, who loves anything spicy, has been eating plain cornbread for years.
Then, the other night (when I should’ve been sleeping), I had a thought. Couldn’t I solve the problem of the haves and have-nots by making the cornbread as muffins and adding chilies to some and leaving the others plain? (I know. Not exactly rocket science here. But it was a new thought to me so therefore counts as something novel.) The next morning, I gave it a try. I didn’t have any canned chilies, so I used some sliced jalapeños that Jon had in the refrigerator. I used my small muffin tin, so the muffins would be bite size. I first placed the slices of jalapeño on a paper towel to drain away any extra juice and then placed one slice in each muffin. The first batch I lined with paper liners, but found that too much of the muffin stuck to the liner (thus resulting in the urge to scrape the liners across your bottom teeth, creating a rather unbecoming sight for all). So, the second batch I just put a little Crisco in each cup before adding the batter.
The result? Same great cornbread as the original in tasty (and sometimes “hot”) bite-sized morsels. The muffins were moist, flavorful and just the right amount of sweet. Oh, and did I mention cute? Everything that a little muffin should be. This recipe would be a great addition to a barbecue menu.
If you’re a regular reader of our blog, you know how the Hostess can go on and on during this time of year about “summer food.” She really, really loves fresh, locally grown produce, and her summertime meals make ample use of the vegetables, berries, and seafood from the seasonal harvest.
Debbie’s love of summer flavors carries over to our cocktail recipes. I’ve heard her exclaim, on numerous occasions while sampling fresh-picked fruits, “Wouldn’t this make a great cocktail?” So it didn’t surprise me a couple summers ago when, after we’d cut into a fresh, sweet watermelon, she suggested that I should come up with a recipe for a watermelon martini.
It’s always a fun challenge to try to come up with a cocktail from a new ingredient, and this time was no exception. I started with two parts vodka and one part Cointreau (that combination never lets me down as the basis for a good fruit-based cocktail). The trick was finding the perfect balance of flavors for the watermelon-based mixer. I started by muddling some watermelon, and was amazed at the amount of juice that comes out of a relatively small amount of melon (hmm, I guess that’s why it’s called a watermelon).
The watermelon juice was tasty, but the watermelon’s mild flavor wasn’t robust enough to keep from being overwhelmed by the liquor without a little help. I’ve learned that a squeeze of citrus helps to smooth out a fruit-based cocktail, and in this case lime proved to be the best choice. The tartness from a little fresh lime juice enhanced the watermelon’s flavor without covering it up. Kind of like the way watermelon candy tastes good because it’s tangy, even though natural watermelon is sweet, not tart. A tiny amount of agave nectar brought the cocktail’s flavor together perfectly. Success!
We’ve served quite a few rounds of our watermelon martinis the last couple years, and I dare say it may be our best summer cocktail. It tastes like biting into a fresh-picked watermelon. The vodka and Cointreau give it a smooth finish and they complement the watermelon’s flavor perfectly. This cocktail is refreshing and not too sweet, so you’re craving a refill even before your glass is empty. It’s summer food in a martini glass! Just remember that the watermelon martini is a full-strength cocktail, so be a responsible host and don’t over-serve!
People who follow our blog know that when it comes to putting the food on the table, the Hostess and I have different roles. In general, Debbie runs the kitchen, while I handle the bar and the grill. We do our entertaining as a team, and when it comes to making the food and drink, our duties don’t usually overlap much. But when we make our slow-cooked pork baby back ribs, everything changes: This is a recipe where we each do some of the preparation, and some of the cooking. The collaboration results in something pretty spectacular!
Let me be clear – I’m the one who does all the grilling around here. And I thought I had a pretty decent process for my pork ribs: Low and slow on the grill, all day long from dawn ‘til dinner. That was, in my experience, the only way to get them fall-off-the-bone tender. But a couple years ago the Hostess came across a recipe that she wanted me to try. Initially I resisted (no surprise there – I’m pretty stubborn about making a change…unless it was my idea). But eventually I came around and we gave her recipe a try. The new approach involved cooking the ribs in the oven (heresy to a grilling purist!), letting them stand overnight in the fridge, and then finishing them for a couple hours on the grill the next day. The result? WOW. These ribs blow me away every time we make them. They are SO tender, juicy, and flavorful. Plus, they’re way less work than my old recipe. (Less work for me, anyway.) Read on for how we make ’em.
First we clean the ribs (this is my job because it grosses the Hostess out). We usually buy ribs in vacuum-sealed 3-rack packages because they’re easy to find and are cheaper than buying individual rib racks that have been prepped and cleaned by a butcher. The downside of saving a little money is that the ribs almost always come out of the vacuum pack with the membrane still on them. The membrane is a tough, thick, filmy skin-like layer that coats the inside of the rib rack. Not everyone goes to the trouble of removing it…but if you don’t, it shrinks and toughens as the ribs cook, it blocks smoke and other flavors from penetrating the meat, and you’ll eventually have to pick around it when you’re eating! The pictures below show how to easily remove the membrane.
Warning: The following page contains graphic “meat handling” content that may be unsuitable for viewing by those who are squeamish (or who’d prefer not to know what their food looks like before it reaches the dinner table).
Slip a thin knife between bone and membrane on the first 2-3 bones
Get a good grip…
…and peel away, all in one piece!
Once I’ve cleaned the pork ribs, my work is done until the next day. I turn them over to Debbie to work her magic. She adds a generous amount of thinly sliced garlic, roasts them in the oven for a couple of hours, seasons them, and then puts them in the fridge overnight.
Peel a bunch of garlic cloves
Slice garlic and scatter on the ribs
Out of the oven, 2 1/2 hours later
Smear the garlic and add seasoning
Here’s a good basic pork rub
A quick note on pork rubs: Some people prefer to make their own rub, and there are many recipes on the web for doing just that. A typical rub contains sugar, paprika, salt, pepper, and chili powder. We’ve found several store-bought rubs containing those ingredients that we think work great.
The next afternoon it’s time for me to get back to work. While I used to enjoy my up-at-dawn grilling process, this new approach really is easier and it doesn’t tie up the whole day. What’s not to like about that?
Next day – soaking the hickory chips
Grill is prepped and ready!
Ribs on the grill, hickory chips on the coals
Now we wait! We’ll add more hickory chips when the smoke stops
The beauty of our new pork rib recipe is that I still get to smoke the ribs on the grill, but it only takes a couple hours instead of all day, and the result is unapologetically, finger-licken’ good. These are the most tender, tasty, perfect ribs you will ever eat. The meat practically falls off the bone and into your mouth all by itself. Channel your inner caveman and dig in!
Adding some barbecue sauce. 30 minutes ’til we eat!
I think this dessert has been around for a long time. But I had never had it until I was at my cousin’s house in Houston when she hosted me, my sisters, my aunt and my other cousin for brunch. Given my cousin’s perfectly Southern and lavish home, which is a perfect reflection of her, I assumed this dessert was one of those that required a lot of effort (or had even been made by a caterer). It was SO good, I eagerly accepted her offer of a second helping with barely a hint of embarrassment on my part. I got the name of the dessert from my cousin, and then looked for a good Strawberry Napolean recipe online.
I had avoided working with puff pastry basically my entire life. I had it in my mind that without a marble slab and a lot of finesse, the pastry wouldn’t puff that way it’s supposed to. Maybe I had it in my mind that it was French. Whatever it was, there was just something about it that I found intimidating. But that’s how good this dessert is. I was determined to get over my fear and master the puff pastry. And, much to my delight, it was, well, easy! So, if you’re like me and you’ve avoided recipes that use puff pastry, here’s your chance to bake like a professional baker with none of the fuss. If you’re still doubtful, maybe the fact that earlier this week I used a box of puff pastry that had been in my freezer for about a year and still had perfect results will nudge you over to the “I can do this” side.
Just thaw and unwrap the sheets and cut along the fold lines.
Bake in the oven and they puff just like their name says they will.
Slice each pastry down the middle to make two halves.
You’ll end up with six pieces. Pick the two prettiest ones to use as the tops.
The combination of the puff pastry, fresh fruit and custard is undeniably lip-smacking delicious. This is one of those desserts that comes together rather easily but makes you look like you know your way around a wooden spoon.
The milk and pudding thicken when whisked.
Whip the cream until soft peaks form.
Gently fold the cream into the pudding/milk mixture.
Layer the custard and berries (and don’t be stingy with the custard).
Drizzle a little icing on top and then cut, serve, and take a bow.
While the original recipe calls for strawberries (hence the name Strawberry Napolean), I’ve found that any berry works well. For the Fourth of July, I used both blueberries and strawberries for a wonderful and patriotic spin on the original.
Did every kid, at some point growing up, have a lemonade stand at the end of their driveway?
I did. And, given that this was one of my earliest business ventures, I like to think that those hours spent selling a cup of lemonade for a nickel fostered an everlasting entrepreneurial spirit in me. But, in looking back on it, I’m amused at the business aspect of it all. My mom bought all of the ingredients that went into the lemonade that I sold, yet allowed me to keep all the profits from it. I guess what I learned is always make sure you have a generous venture capitalist with zero expectations of an ROI.
Lemonade is one of those things that has been around forever. Supposedly it originated in Egypt around 700 AD. Can’t you see those cute little Egyptian kids selling lemonade from a stand for a coin? And lemonade continues to be a favorite beverage today. Talk about lasting popularity. Tang didn’t fare so well, even if the astronauts drank it in space.
Today, lemonade is popular in its original form, or with some fizz added, or served with ice tea (an “Arnold Palmer”). It’s also found its way into many cocktails, including several of ours. Lemonade is an easy way to refresh a crowd. So, if you’re hosting a barbecue or brunch, lemonade is a sure way to please many. You can make it fresh from scratch using this simple recipe. Or, you don’t feel like juicing a mound of lemons, you can buy one of the natural bottled brands like Simply Lemonade. And, and easy way to spice it up is to just provide some vodka on the side for guests to add if they choose. We like to serve vodka in those little airline-size bottles, in a bucket of ice, next to this generation’s version of a lemonade stand.
Growing up, our family was not what you would call foodies. My mom didn’t spend her time in the kitchen preparing anything that remotely resembled fussy foods. That is such an understatement, I really don’t even know how to correct it. I think one of the fussiest things Mom ever made was some salad she must have seen in a magazine. She took a half of a pear (canned, no less), placed it on a leaf of iceberg lettuce and topped it with a dollop of Miracle Whip, some grated cheese, and a maraschino cherry. And, long before the concept of “plating” was in our vernacular, this was actually one thing that Mom would assemble on each of our plates and then serve to us, all seated around the table. Invariably, as she passed the plates, the pear half would go sliding around the plate like an Olympian on ice skates. All my young mind could come up with, when served this, was “Whaaaattttt?” Maybe because it was so long before I had learned what an appropriate response “WTF!” can be in a situation like that.
But what we did eat were good, basic meals. Well, usually good. The not-so-good really wasn’t my Mom’s fault. We were kids and just didn’t like all foods. Period. That, and you might say that my dad was a little particular about what he ate (my second understatement of the day). I can’t imagine a situation where he would’ve eaten anything fancy with a seasoning like curry, or that had him eating something exotic like asparagus. Heck, this is a man who wouldn’t eat at Kentucky Fried Chicken because he didn’t think they cut the chicken pieces correctly.
If you’ve been following this blog, you know many of my recipes are my mom’s. And, most are described as simple and good. No fuss or additional make-it-fancy ingredients at all. Not that things like radishes would necessarily be categorized as fancy. It’s just that I don’t see them as necessary in some recipes. And that’s true of her potato salad. Like so many of Mom’s recipes, this simple potato salad is still how I prefer things. When Mom made it, she would meticulously blend her mayonnaise with the mustard before adding it to the potato and eggs. I have found that mixing it all together, in one big bowl, works just fine. Hard to imagine being less fussy than my mom, but there it is.
This is a summer staple around our house. It has made an appearance at more barbecues and summer dinners than I can count. And I think of Mom every single time I make it.
Summer is here, and the proof is in the eating. It’s strawberry season, which means it’s salad season in this house. Honestly, I look forward to strawberry season every year because it means we’ll start eating this salad — a lot. To say that we love this spinach salad is an understatement. And, whenever we have served it to guests, it’s been a big hit every time. I figure any time you can eat/serve spinach to rave reviews, it’s a win/win situation.
This is a versatile salad. You can serve it as a starter or side salad, or it can be a main dish spinach salad by simply adding diced roasted chicken. It will work with any mixture of fresh berries, which means you can make it with whatever berries are in season. Blackberries, blueberries, strawberries and raspberries are all wonderful options in this salad. For the dressing, we use a raspberry vinaigrette, but I’ve seen similar recipes that use a poppy seed dressing, which would probably be delicious as well. And, while we use a nut mix (Sahale Snacks – almonds with cranberries, honey and sea salt), I think you’d get the same good taste by using almonds and some dried cranberries. See, versatility in a salad bowl!
I use the spinach in the bag, the stuff that’s already washed. Makes this salad super easy to make, which is one of my favorite things when I’m trying to get dinner on the table for 2 or 10.
The inspiration for this recipe comes from a salad I had a few years ago at the Nordstrom Cafe. It was so tasty and fresh, I wanted to make something similar at home for us and guests. Because the ingredients were so simple and basic, it was easy to replicate. I think you’ll find it’s an easy, and delicious salad. And, did I mention that it’s healthy, too?
Question: “What do you take to a dock party where you’re asked to bring your favorite international appetizer to share?”
I’d considered taking a tray of carrot sticks and dip with a sign that read, “Jamaican Carrot Sticks.” But then thought maybe the Entertaining Couple should try a little harder.
Thanks to my man Tyler Florence, I had a good starting point on how to make these sandwiches. The first challenge was that we don’t own a pressure cooker, and his recipe used one to prepare the pork roast. So, instead we cooked the pork in our crockpot. Historically, I’ve sort of avoided using the crockpot for any real cooking. Which is sort of ironic given that we own two of them. But I figured if a pressure cooker was good enough for Tyler, then a crockpot had to be good enough for me. (And please don’t send me letters. I really do know there is a difference between the two.) I adapted Mr. Florence’s recipe as I went, making adjustments for the crockpot versus the pressure cooker. Before putting the roast in the crockpot, I seared the pork in a pan on the stove. This not only locked in the juices but also allowed us to avoid a colorless cooked-in-a-crockpot-looking roast. The pork was perfectly seasoned and tender after just a couple of hours, so we were well on our way to a Cuban sandwich.
The sliders were good. Not great. And the only reason they weren’t great is because they were cold and a traditional Cuban sandwich really does need to be grilled. So, we probably won’t do these sandwiches as sliders again (which means I’ll have a new quandary if asked to bring an international appetizer somewhere else). But we will definitely be making these grilled Cuban sandwiches again. These sandwiches are a great thing to serve when you have guests for lunch. You can make the pork ahead of time and just assemble/grill the sandwiches when it’s time to eat. They are de-LISH-ous! Jon ate a grilled Cuban sandwich for lunch several days in a row and commented on how much he enjoyed them each day. (And the pork can be used to make other meals as well.)
Happy Entertaining!
Ingredients for a Cuban sandwich
First layers: mustard, Swiss cheese, dill pickles…
…then add ham and roasted pork, plus some salt and pepper
This is one of my favorite cocktail recipes. It’s one of the very first drink recipes we added to our blog when we launched it nearly two years ago. When so many of our returning guests arrive at our house, the first cocktail they ask for is my classic lemon drop. But sometimes, when the mood feels just right to throw them for a bit of a twist, I’ll switch it up and hand them a Raspberry Lemon Drop Martini instead.
Our recipe for the raspberry lemon drop martini came about when a friend showed up with a bottle of Hangar 1’s Fraser River Raspberry vodka. I’d never tried any of Hangar 1’s products before and, on a whim, I substituted their vodka for the usual Absolut Citron in my lemon drop recipe. I didn’t really know what to expect, and the result was a stunner. The berry-sweetness of the raspberry-infused Hangar 1 vodka proved to be the perfect complement to the tartness of the lemon. I tweaked the proportions a bit to find the right balance, and our delicious raspberry lemon drop martini was the result. This is a cocktail I don’t hesitate to serve to anyone who enjoys a good adult beverage. It even wins over the guys who might initially shy away from its pretty-in-pink color thinking it’s going to be too sweet for their manly palates. And in spite of its harmless appearance, this drink commands respect as it packs the wallop of a proper martini!
Our raspberry lemon drop martini is particularly good on a sunny patio on a long, lazy summer’s day. The Hostess says she gets the lyrics to Hot Fun in the Summertime stuck in her head whenever I fill her glass with one of these!
Note: While we’re huge fans of Hangar 1‘s products, we are not compensated in any way by them (nor, for that matter, by any other products we mention elsewhere on our blog.) We choose products that consistently give us great results. When it comes to cocktails we’ve found that it’s often necessary to be brand-specific to achieve that “just right” flavor.
Memorial Day is the official kick-off to the summer season. At least in most parts of the country. Here, in the Pacific Northwest, it’s more of a suggestion that summer will be along soon, when it’s good and ready. It’s like Mother Nature is sending a memo saying “Mark Your Calendars. Summer will be here in just a few short weeks.”
We’ve had a string of warm, sunny days, so we do what we do here and act like it’s summer regardless of what the calendar says. We all know that there are many days of grey, clouds, and drizzling rain ahead of us before summer is here to stay. Regardless, the flip flops have been dusted off, the Weber barbecue has assumed its rightful place on the patio, and the boat has been cleaned from stem to stern. And we’ve started eating summer food.
While the start to crabbing season is still about six weeks away, we celebrated the anticipation of summer by making crab cakes. These are always so good when we can use fresh crab, but they are really delicious with the canned stuff as well. (Just make sure you always use lump crab meat. That’s the difference between a good, meaty crab cake and something that resembles those godawful salmon patties my mom used to make using canned salmon, crushed Saltines and an egg.)
I like to make these for dinner parties because I can do all the messy stuff ahead of time (mix, shape and refrigerate the crab cakes) and then quickly fry them when it’s time for dinner. Easy but super decadent.
Thank you to our friend, Karen, for sharing her grandmother’s recipe with us. It’s always a favorite with our guests. We’ve added an easy recipe for tarter sauce, just in case you want to sauce things up a bit.
Sometimes, in life, it’s the simple things that can make the biggest difference. With food, this can be especially true. A dash of a seasoning or an addition of one ingredient can take something from good to fabulous. And I’m here to tell you that, in this particular scenario, all it took was a basket of those little cherry tomatoes to take the yum factor up a notch me.
I’ve always been a fan of Jon’s homemade pizza. And I’ve thoroughly enjoyed being on the eating side of the evolution of it. We started with a simple margherita pizza and it evolved to a full-blown, multiple-toppings type of pizza. But when we went back to a basic pizza and then added simple roasted tomatoes, I was left asking for pizza on an almost weekly basis.
We had neighbors over for dinner recently and made this pizza for them. Pizza, along with an easy green salad, made for the perfect meal. It was one of those evenings that, for me, is what entertaining is all about. A no-stress preparation. Easy, fun and lively conversation around the table during dinner. And a meal that, while uncomplicated to pull together, is met with adulation (aka, enthusiastic praise). Not that I go into any dinner party expecting it, but it just makes me so happy when guests leave full and asking when they can come back for more.
So, it’s time to go dust off that bread maker (you remember that thing you bought and then quit using because you got tired of making bread shaped like a bread maker pan). Try this pizza. You’ll be glad you did.
Bartender’s hint: If you happen to end up with leftovers, a friend showed us a terrific way to re-heat leftover pizza: Microwave your leftover slices for about 30 seconds to take the chill off; then place in a large frying pan or skillet over medium heat. Heat for 4-5 minutes, and serve. The crust will be perfectly crispy, not soggy the way re-heated pizza usually ends up.
I’m not what you’d call a morning person. And by that I mean that not by any stretch of the imagination, nor by what anyone who knows me well would say, would I be considered anything remotely close to a morning person. I find very few things as luxurious and decadent as a slow-paced morning. Which may be the reason I don’t often host a brunch at the house.
But I gladly got out of bed and did just that last weekend. My oldest sister and brother-in-law came up for the day, and to allow for their drive home (a few hours), a midday meal was the most accommodating. And I may not be a morning person but I can be rather accommodating when I try. My youngest brother and sister-in-law came, too, and it was simply a splendid reason to get up early.
Doing a little prep the day before allowed me to sleep in an extra few minutes. (Yea!) I made the crust for the quiche (and refrigerated it overnight) and set the table. Jon cut the flowers and I got them arranged in a vase.
By the time I rolled out of bed Sunday morning, my to-do list was pretty manageable. Besides making the quiche (which is my old, stand-by recipe), and washing/cutting the romaine (which we served with a lemon dressing), my morning priority was making the scones. And I should note that, prior to Sunday morning, I had never actually made scones from scratch before. I was a little nervous about the whole thing, especially since I didn’t have a “Plan B” if the scones were a flop. I did my best to carefully follow the recipe and am so happy to report that the scones turned out perfectly.
When any of the siblings are together, inevitably the conversation comes around to Mom. She passed away many years ago, but we all still miss her every day. So it was nice to be together, using her good silver and the antique butter pats that she gave me one year for my birthday, and remembering our mom.
And then our brunch became a tribute to all moms and the upcoming day that honors them. Biological moms, adoptive moms, mother-in-laws, step-mothers, grandmothers, women who nurture and are motherly by nature, and those who are moms of our furry friends. We know our world is better because of you. To all of these moms, we wish you a Happy Mother’s Day.
My love affair with scones began at the state fair. I don’t think I ever missed the fair and loved the years I got to go more than once. “Fair scones” served with jam, and riding the old, rickety roller coaster were my two favorite things about the fair.
Packaged “fair” scone mix can be found in many grocery stores. I’ve made them a few times, but they were never as good as the ones at the fair. I’ve also eaten my share of dry, tasteless and mediocre (okay, bad) scones at various bakeries and coffee stands. So I guess I got it in my mind that, unless you knew what you were doing, it wasn’t easy to make good scones unless you worked at the fair in the scone booth and wore one of those crisp, white dresses. I found the whole concept of homemade scones intimidating and out of my realm of possibility. That is until this recipe came into my life and changed my mind. Thank you My Baking Addiction for the great recipe.
The original recipe was for orange scones. I made them, according to the recipe, and they were delicious. I was practically giddy about how my scones turned out. I wanted to make them again to ensure that successfully making great scones at home wasn’t just a one-time fluke. I had used my last 2 oranges when I made the scones the first time but I had 2 lemons. So, I decided to try the recipe substituting lemons for the oranges. Again, yum-ME!
These scones have a perfect texture and flavor. Jon says he thinks it’s the best scone he’s ever eaten. Just a bit of a warning, though. If you’re skittish about using your hands when preparing food, this may not be the recipe for you. This is a roll-up-your-sleeves and get-into-the-dough kind of recipe. But it’s well worth it.
Serve these for brunch with some raspberry jam. And don’t expect to have any leftovers.
Grate the zest onto the sugar
Mix the zest and sugar
Grate the butter
Gently mix in the butter
Add the wet mixture
Mix until clumpy
Gently work the dough…
…until it holds together
Shape it
Cut it
Bake until edges are golden brown
Glaze by dipping
Let the glaze set
Serve with raspberry jam
A few tips for making these scones:
You want your cold ingredients cold when you start and to stay cold throughout the process. The frozen butter worked great even if it is a little challenging to grate. I used a box grater (because that’s what the recipe said to do and that’s what I had), but I’m going to purchase a flat grater that I can place over the bowl so I can grate the butter directly onto the flour.
Because you want your cold ingredients to stay cold, you need to work rather quickly. Don’t start the process and then go do something else. Work the process, start to finish, and don’t dilly dally.
Don’t over-mix or over-bake.
The original recipe said to bake the scones about an inch apart. But I’ve read that it’s actually better to bake the scones so they are touching each other. It encourages them to rise rather than spread. I may try that next time.
When I look at my collection of recipes, I feel very fortunate to have so many from friends and family. Those special recipes that come with some history and story. This is not one of those recipes. It didn’t come from some great aunt that made it for me when I visited as a child. Rather, this recipe started out as one thing and ended up as Cinnamon Swirl Bread.
The original recipe was for a yeast coffee cake with chocolate chips that I thought sounded interesting (I couldn’t remember ever making a yeast coffee cake before) and that could be made to serve in the morning to overnight guests. Conceptually, the recipe seemed good. But once I started it, I realized that the recipe was actually a little awkward and I was making adjustments as I went. The end result was sort of a clunky mess. BUT, what did come out of it all was a dough that I actually thought of as “lovely” (which is noteworthy only because I seldom use that word, much less when discussing bread dough).
Given my clear emotional response to the dough, I decided to try the recipe with just a cinnamon and sugar filling, rather than the one that had been in the original recipe. And here we are. Enjoying the scrumptiousness of Cinnamon Swirl Bread.
In the recipe, I give you two options for how to roll the dough. The original recipe had me roll it, bring the ends together and then twist it. I do it this way when I make the Cinnamon Swirl Bread only because I like the random, wonky swirl I get. But it’s a step easier to just roll it up. You can choose to do it whichever way you prefer.
The smell of freshly baked cinnamon bread in your kitchen may be reason enough to make this bread. But I have to tell you that this bread rises (no pun intended) to its true glory after it has been toasted and buttered. Which means you can bake it ahead of time and then toast it in the morning for guests. Go ahead and serve it on your good plates. It’s worth celebrating.
Someday, this may be the center’s of someone’s fond memory of breakfast at your house.
Happy Entertaining!
An instant read thermometer is your friend to get the temp right
Whisk the eggs and sugar until light yellow and slightly thick
So you’re thinking of throwing a Cinco de Mayo party this weekend? Really want to impress your guests with something way better than the usual neon green too-limey/too-sweet store-bought margarita mix? Here’s a margarita recipe (or five!) that will leave your friends begging for your recipe. Each of our party-tested margarita recipes tastes SO much better than what you’ll get from that jug of José Cuervo brand mixer. (And if you’ve already purchased said jug of mixer, see the first recipe for a tip on how you can still get great results using a store-bought mix).
Put on your party sombrero and count them off with me —
Uno! Top Shelf Margarita. Want the ease of using an off-the-shelf mixer? Cut back just a bit on the amount of bottled mix and leave room for a splash of Grand Marnier alongside the tequila. Then, squeeze in an orange and a lime, and you’ll have a golden-smooth, top quality margarita that tastes handmade.
Top Shelf Margarita
Dos! Blended Gold Margarita. If you’re having a big crowd and you need to serve your margaritas by the pitcher, this recipe is for you! Track down a few cans of frozen margarita mix (Bacardi makes a great one), ignore the recipe on the can (use ours instead), and crank up your blender!
Blended Gold Margarita
Tres! Shades of Taos. This is our premium, hand-crafted, all natural margarita. Nothing but fresh squeezed fruit, a dash of agave nectar, Cointreau, and your favorite tequila. The margarita that legendary stories are made from.
Shades of Taos Margarita
Cuatro! Tangerine Margarita. Another super-tasty hand-crafted margarita with an ultra-smooth tangerine-y twist to it. This is our newest margarita recipe and it’s quickly become Debbie’s favorite. And several friends have reported back rave reviews after “quality testing” our recipe at their own parties.
Tangerine Margarita
CINCO! Pomegranate Margarita. If you really want to break from the norm, this recipe is way different. Festive deep pink color, delicious tangy pomegranate flavor, and a smooth finish of blanco tequila that leaves no doubt you’re drinking a margarita in spite of its outward appearance.
Pomegranate Margarita
If you have questions or are looking for more suggestions, please leave a comment below and we’ll get right back to you.
I really get excited about “classic” cocktails. Especially the cocktails dating back to the pre-Prohibition era that have loads of history associated with them. The Kamikaze cocktail is not one of those. The Kamikaze earned its status as a classic in a whole different way, by becoming everyone’s favorite bar shot back in the 80’s. I’d venture to bet that the Kamikaze has been responsible for more hangovers and frighteningly poor decisions than pretty much anything this side of tequila. And, honestly, given this cocktail’s name, should the prospect of a Kamikaze-soaked evening coming to a spectacularly bad ending really surprise anyone?
All of which is really a shame, because the Kamikaze is actually an outstanding cocktail. It’s closely related to the Gimlet, the Daiquiri, and the Margarita, three lime-based classics that have stood the test of time. The only real difference between each of them is the base spirit (vodka in the Kamikaze; gin, rum, and tequila, respectively, in the others). The Kamikaze starts crisply tart and sour yet finishes slightly sweet, making it an easy drink to enjoy. And, to over-enjoy. As the Hostess may have done once, many years back, when she spent an evening ordering round after round of “Kazu-mockies”.
Regardless, I think it’s time to give the Kamikaze a fresh start. Shake it, sip it, serve it as a cocktail rather than a shot. Next time one of your happy hour guests is open to trying something “a little different” and is looking to you for a suggestion, shrug off the Kamikaze’s reputation as a throwback to the Spring Break beer-and-shots crowd, and hand them a Kamikaze cocktail served “up” in a martini glass. It’ll be a hit. Even if it does bring back a memory or two they’d rather leave repressed.
What is it about zucchini. It seems that every fall some well-meaning neighbor (the one with the big vegetable garden) brings us a gift of a home-grown zucchini. They are always ginormous things (we have friends whose pet dogs are smaller than some of the zucchinis). I know we have received this gift because gardens always produce more zucchinis than one person knows what to do with, so they are passed on to neighbors and become someone else’s problem to solve.
This has been going on since the beginning of time. I remember my mom, who never grew a zucchini in her life, grating zucchini to freeze for “future baking.” So, that’s what I do. Grate it, freeze it and forget it’s there. And, judging by the Ziploc baggie full of grated green that I found in the bottom of our freezer, that’s what happened this time. It was dated September ’11. It had just sat there in frozen limbo, for over 2 years, waiting for a purpose.
I didn’t actually see the date on the bag until after I had defrosted it. At that point I was committed to making muffins so I just hoped that we wouldn’t die from some horrible people-killing scourge that grows in frozen zucchini after 2 years.
If it looked a little sad and dilapidated when I took it out of the freezer, it looked utterly pathetic after it thawed.
Ewwwww.
Two years of freezer frost created a lot of water when thawed. So to take care of that problem, I just opened one end of the baggie about an inch and squeezed until all of the liquid was gone.
And, here we are. Two years and two hours later enjoying a delightful zucchini chocolate chip muffin made from a homegrown zucchini. I have to admit, this isn’t a bad way to get a serving of veggies.
Sometimes simple is best. And, for me, that’s how I feel about Egg Salad Sandwiches. Three ingredients, plus a little salt and pepper, are all I need in my egg salad. Which may be why I make them so often for lunch. This sandwich only takes a few minutes to make, and most of that time is the time it takes to boil an egg.
We have a favorite deli in Colorado where Jon orders a Hell’s Kitchen sandwich. It’s egg salad with a slice of crisp bacon and a splash of cajun hot sauce. I’ve made this sandwich at home for him. I just start with my perfectly simple egg salad and add a little meat and heat. That’s the beauty of egg salad. It can easily be dressed up or made simple to satisfy a variety of tastes.
I think the key to this recipe is to use good mayonnaise. There are just some things where you shouldn’t show your frugal side.
If the thought of dicing eggs with a knife seems a bit cumbersome to you, you can do what I do and use the egg slicer. After you do the initial slice, turn the egg a quarter turn, slice again and you’ll have diced eggs.
There’s a reason I waited so long to make these Caramel Layer Chocolate Squares. And, I almost didn’t tell you about it because in doing so I’m going to disclose how lazy I really am. But here it is. I didn’t want to unwrap a whole package of caramels. I’m not a patient person and the task of taking the caramels out of those little cellophane wrappers is just a little slow and tedious for me.
My mother-in-law gave me this recipe. A long time ago. And I’ve had it in my file ever since waiting for the right burst of energy that would motivate me to take on the caramels. So, when I saw caramel bits at the grocery store, the first thought I had was, “I’m going to make that recipe!” Seriously. Didn’t make them for years because of the effort involved in caramel unwrapping but made them as soon as Kraft provided me with an easy way out. It makes me fear I’m about to qualify as a card-carrying member of the Lazy People Club.
Her recipe called for baking it all in the microwave. At the risk of completely contradicting myself and my earlier comments about preferring to take the simplistic route, I have to admit I’m really not a fan of baking in the microwave. Not sure why exactly. While I don’t have the patience to unwrap a bag of caramels from their wrappers I do prefer to bake something in the oven even though it takes 3 times as long as doing it in the microwave. Apparently what I lack in patience I more than make up for in contradictions.
If you’re like me and tend to think that a recipe has to be made from scratch to be good (meaning that it doesn’t call for a cake mix), this is one time when you should make an exception. It comes together quickly and bakes up to be a real crowd pleaser. If you don’t really consider yourself a baker, but you’re on the hook to bring the dessert to some potluck or dinner, this is the dessert for you. Easy to prepare and you can almost count on someone asking for the recipe.
The Bartender embarrassing himself at a corporate Easter function long ago…
If the Easter Bunny does his job this weekend, chances are you’ll have a surplus of dyed hardboiled eggs in your refrigerator that are looking for a second purpose. I suggest deviled eggs. (We’ve re-posted this article from a year ago because I just can’t get enough of this picture!)
When I make deviled eggs, I slice the eggs widthwise, which makes little egg cups. I think this makes for effective eating because you get some filling with each bite. And, if you slice a teensy bit off of the bottom of each egg half, they will sit upright on the plate. This all came about because I don’t own one of those cute little deviled egg plates with the perfect egg-shaped indentations, and I didn’t want the eggs sliding all over the plate.
I also use a pastry bag to pipe the filling into the eggs cups. Not because I’m trying to be fancy, because fancy really isn’t my style. But I found when I used a spoon, I was always trying to get the dollop of egg stuff into the little cup without making a mess or using my fingers. The pastry bag just seems simpler to me. And simple is my style.
Even before Pinterest came along, I was a collector of things that inspired me and recipes I wanted to try. Instead of pinning recipes and ideas to a board, I would tear them out of magazines or print something from some website and tuck it into my file folder. Or folders. I have always had stacks of recipes that I wanted to try. About once a year, or when the folder would be to that bulging and unmanageable stage, I would go through and try and organize my stash in some way that made sense. The organized state of it all would last about a month and then it would return to a jumbled mess. Even as I write this I realize that I’ve managed to suggest that all of that is in the past, when in reality I still keep a lot of paper copies of recipes and ideas.
During one round of organizing a while back, I realized I had several versions of a dessert called a Lemon Icebox Pie. From what I’ve been able to determine, icebox pies originated in the South (like so many great foods do) sometime in the 1930’s. Supposedly since these pies required no, or little, baking, they were a solution for southerners who still wanted a dessert even on a hot, summer’s day. But the popularity of these pies spiked in the 1950’s and 1960’s when no-bake pies became sort of the rage. And I don’t know when the pre-made graham cracker crusts became available, although I do remember Mom using them when I was a kid.
Because I’m such a fan of all things lemon-y, this particular no-bake pie was appealing to me. Although it’s a good thing I didn’t become too heavily invested in the no-bake concept, since this particular recipe requires the pie to be baked. As I said, I had several different recipes, so this is a cobbled together version of 2 or 3 recipes from my folder with the main inspiration coming from a restaurant in New Orleans (Clancy’s). While most recipes just call for refrigerating the pie, Clancy’s freezes their dessert. I cut our pie in half and tried it both ways. While both ways are good, our guests voted unanimously for the frozen version. You can chill according to your personal preference but I suggest if you freeze yours to allow it to sit at room temperature for about 10 minutes before serving. I used the topping that I always use on my key lime pie, which is super easy and a nice finish to a pie like this.
We had a bag of Meyer lemons in the refrigerator and I love their flavor, so that’s what I used for the recipe. But I’m assuming any lemons would work just as well.
The result is a not-too difficult to make pie that is a light, fluffy dessert and a perfect combination of tart and sweet. Given the history of this dessert, I kind of wish I had one of those hour-glass/curve-hugging dresses from the 50’s to wear when I serve it. I’d wear pearls, too.
Press the graham cracker mixture into a pan.
First zest then juice your lemons.
Whisk the egg yolks and sugar until thick and pale yellow.
Bake until set.
Cool, add the topping and then refrigerate or freeze.
The original recipe for Hummingbird Cake was submitted by a reader and first appeared in Southern Living magazine in 1978. It was included in an article titled, “Making the Most of Bananas” with a great lead in about the virtues of bananas. Since then, it holds the title for the magazine’s “most requested recipe.” Back in the day, this cake recipe also supposedly won numerous blue ribbons at various county fairs.
I made Hummingbird Cake recently for dessert during our girls weekend retreat. It’s a good cake for a large group because, due to its sweet and rich flavor, a little goes a long way. A 9″ cake easily fed our group of 10 with plenty left for the next day. (Which was breakfast for some.) It makes a moist cake and all the flavors mix well without being a “tropical” cake that you might expect from the ingredients.
The only changes I made to the original recipe were to make it a 2-layer cake rather than a 3-layer as the recipe directed, mainly because I only had two round pans. I also used my frosting recipe rather than the one the recipe provided.
Not sure where the name comes from although some speculate it might be because it is a sweet cake and maybe there’s a correlation between the cake’s sweetness and the nectar that hummingbirds are drawn to. I don’t know if that’s true or not, but our friends made several wisecracks about how many hummingbirds were sacrificed in order to make the cake.
This is a nice springtime dessert, if for the name alone.
A friend asked me recently what my “signature dish” is. That one stumped me. I had never stopped to consider that I might have some food that I’m known for.
And, then it occurred to me. I’m known for my grilled cheese sandwiches. At least with the discerning “under 12” crowd. And a few adults that love a good cheese sandwich.
I don’t remember exactly when I honed my technique. I do know that in college, and in the lean fiscal years after, I made all my grilled cheese sandwiches with Velveeta. I’m happy to report that my taste in cheese has improved slightly over the years. Now my cheddar cheese of choice is Tillamook (spoken like the Pacific Northwest girl that I am).
Over the years, I have gotten a lot of practice at making these sandwiches for kids of all ages. I like to think that I’m personally responsible for saving several children from a life of complete malnutrition and starvation when their picky eating habits limited their choices. And, I think I’ve also provided a cure to more than one hangover on weekends when the night-before-party often warranted a good grilled cheese sandwich the next day.
To say that mastering a perfect grilled cheese sandwich is easy is rather an understatement. It’s really not difficult. It just takes a little bit of know-how and patience.
Steps to the Perfect Grilled Cheese Sandwich:
Select a good cheese.
Slice the cheese thin, and then layer it a bit. This will enable it to melt the way you want it.
Butter the outside of the bread, on both sides.
Cover the pan when you’re cooking the sandwich.
Set the heat so it’s hot enough to toast the bread but low enough to slow cook the sandwich so the cheese gets perfectly melted and oozy. On my stove that’s medium-low. You’ll probably need to let the sandwich cook several minutes on each side.
You can add a variety of ingredients to these sandwiches: Ham, bacon, tomatoes, or tuna fish salad. Whatever you like can easily be melted into this sandwich. Because, as they say, variety is the spice of life.
Serve with a bowl of tomato soup and make it a meal.
The internet is the greatest invention. Ever. Not only can I find anything I’m looking for, no matter how abstract or odd my search, but I can find things I didn’t even know I was looking for.
So it was with Truffle Fries. I didn’t even know that the Truffle Fries Circus was in town until one day, while on Pinterest. I was just happily skipping through the rabbit hole that is Pinterest when I stumbled upon Everyday Occasions (jennysteffens.blogspot.com). Lovely blog, BTW. She had a recipe for Parmesan Truffle Fries that caught my eye. Given that I’ve never met a potato that I didn’t like, my attraction was fairly immediate. I then did a search on recipes and, lo and behold, my search returned a plethora of recipe options.
But, here’s the thing. I’m not really a fan of deep frying in my kitchen. The mess and anticipated lingering smell just deflate me. That’s the beauty of these fries. Some of the recipes are BAKED! So, hardly any mess, and the only smell is the luscious scent of truffle wafting in the air. I remember my mom making homemade fries, including the step where she cut up the potatoes and soaked them in water. It always seemed like such a sweet labor of love. I love my friends and family but I’m also a fan of shortcuts in the kitchen where I can get away with them. So, based on the recommendation from Jenny’s blog, I opted for frozen potatoes rather than trying to slice up a Russet. I looked for frozen fries that were a good natural, organic type. I used the Ore-Ida Country Style French Fries with Olive Oil and Sea Salt, and they were perfect.
I like my truffle flavor subtle, not overpowering. Which is why I like this recipe. You get a taste of the truffle without being hit over the head with it. If you want a stronger taste from the truffle oil, just add a bit more. Our local grocery store had a limited selection of truffle oils to choose from, and in the end I chose a “flavored” olive oil instead. I was pleasantly surprised by the taste. I’m sure no well-respecting Italian would be caught dead with a “flavored” oil in their kitchen, but it works well for this recipe.
Armed with the basics from my recipe search, I tried these Parmesan Truffle Fries out on some guinea pigs, I mean friends, that were in town for a few days. Big, big hit. This recipe is the kind any host or hostess hopes for: Easy to prepare and meets with rave reviews. Who knew that oven-baked French fries could taste just like they’d come out of a deep fryer?
Prep time is about 3 minutes, or as long as it takes to open a bag of frozen potatoes, grate a little parmesan and heat the oven.
The basic ingredients
Grated parmesan cheese
Drizzle a little oil in the pan
Add the frozen potatoes
Add parmesan cheese
Dinner is served!
This is going to be one of my new go-to recipes. It’s a perfect side dish for a steak or burger. Add a good beer or nice glass of Merlot, and dinner is served!
“Money can’t buy happiness. But it can buy tequila, and that’s almost the same.” (Jose Cuervo advertisement)
There’s just something about tequila. People either love it or hate it. If they aren’t fans, it usually has something to do with a bad experience involving (a) Mexico and (b) spring break. And, for most, that was many, many years ago. A fateful night with tequila can have a very long lasting effect.
Those trips to Mexico, or just one too many shots at any time in any place, have ruined tequila for many a well-meaning person. At one point in my life, I was one of those that was living a life of self-proclaimed tequila abstinence. That was until the Bartender and his good pal Jose Cuervo convinced me to fall off the tequila-free wagon and give it another try.
Since then, our tequila horizons have broadened widely as we’ve explored various top shelf tequilas and a variety of cocktail recipes that made me realize that the cactus juice has a place in my life, as long as I embrace it with a little bit of moderation and decorum.
Which brings me to the purpose of all of this:
There’s a bit of an obsession going on around our house with tangerines. Maybe it’s because it’s wintertime and our grocers’ shelves are stocked with Clementines and Cuties (which are extra-juicy seedless tangerines). Whatever the reason, I am seriously celebrating the citrus. I have been eating them for snacks and tossing them in our salads. And then there was the mousse. Oh, and the tangerine lemon drop martinis. Now, just to ensure the scurvy is held at bay, we’ve managed to find a way mix tangerines with tequila.
Not that I needed another favorite cocktail. But this may be the best margarita I’ve ever had. If you’ve been a bit hesitant about tequila, say for the last decade or so, here’s a great way to slip back into it. Our tangerine margarita is subtly fruity and deliciously smooth, so just heed the warning that you’ll often hear the Bartender say: Respect the drink.
If there ever was a good reason to rekindle your relationship with tequila, or to spice up the tequila affair you’re already having, this margarita is it. So, join in, and enjoy. And invite some of your friends to come along.
Happy Entertaining!
Hostess’ Hint: If you’re wondering how to select the best tangerines, here is a link with All Things Tangerine including tips for buying.
St. Patrick’s Day is a tough holiday for me to understand. Sure, I’ve read about who St. Patrick was, what he did, and why he’s so deeply revered. And the Hostess and I have several good friends who are Irish, including one in particular who is passionately so. I get that the Irish are a fiercely proud (and gregarious) bunch with a tremendously rich heritage. But to me, the celebratory rituals of St. Patrick’s Day (drinking copious quantities of Guinness, Jameson, and green-dyed beer while surrounded by people wearing goofy green outfits and feasting on cabbage), make about as much sense as honoring St. Nicholas by eating candy out of your socks or celebrating the day of Resurrection by hunting for eggs that were laid by a rabbit.
Oh wait. I guess our tried and true traditions are more about the celebration than about making sense. If we have a reason to celebrate what’s important to us, that’s good enough for me. Anyway, at the risk of offending those of you who truly understand and honor the great deeds of St. Patrick, I’m taking the low road this year and using his day to shamelessly plug our Irish Coffee recipe. This versatile and tasty drink is perfect as an afternoon pick-me-up on a cold and dreary day. It’s equally good accompanying a rich dessert after a big meal. And it looks great, too. So, this year, as you’re wearing your bright green beer goggles and your “Kiss me, I’m Irish” tee-shirt, and you’re teetering towards that final toast of the evening, go with the drink that has a little caffeine kick to it: Channel your inner Leprechaun and hoist an Irish Coffee to St. Patty!
Everyone seems to have a favorite food. We’re a community who loves our food and labels it accordingly. Oh, this is my favorite chocolate. Try my favorite cheesecake. Or, you’ll love my favorite bean soup. And, then, there’s pasta. People love pasta and are passionate about their favorites. Over the last several years, it seems many of our friends and guests have dubbed this dish as their favorite pasta. When we talk about what to serve for dinner, some will say to us, “Will you make that pasta?” It’s the favorite pasta with no name. We’ve even gotten to the point where we call it “Favorite Pasta” rather than by its much more formal name: Penne with Creamy Tomato Vodka Sauce.
When I think about it, I think this recipe is part of the reason that we started the blog. After serving it to various groups that came here to visit, I had so many requests for the recipe, I started thinking that maybe there was an easier way to share recipes than by e-mail. I guess it was that whole necessity and mother of invention thing. A little ironic, then, that the concept of the blog may have started with this recipe but it’s taken me a year and half to get it on here and shared with all of you.
The red pepper flakes add a nice, unexpected flavor. As our friend Brian says, “It’s zippy.” In a good way. And this comes from a self-described spice wimp. But if you want a little less zip, just cut down on how much of the red pepper flakes you use.
Simple ingredients that you may already have on hand.
After the meat has browned, add the tomatoes, vodka and spices and simmer to let the juices cook down.
Add the cream and simmer.
Cook the pasta in a separate pot and then add to the sauce and toss to coat with the saucy goodness.
This recipe is simple but delicious. It’s a recipe that can be prepared after work for a weekday dinner party. It comes together easily and yet looks and tastes like you made a big fuss. And, in some ways, don’t we want our dinner guests to feel like we fussed a bit, just for them?
I love pizza nights! Well, more specifically, pizza nights when we make homemade pizza for dinner. Okay, actually what I really mean is I love pizza nights when the Bartender makes homemade pizza for dinner. In our house, Jon (aka the Bartender) is the pizza maker.
Normally, when we’re entertaining, I have kitchen duty while Jon tends to the bar. And the music. And anything that might have broken that needs fixing. But last week, even with a house full of guests, I got to take the dinner shift off because pizzas were on the menu. (And, how clever of me to plan the menu in this way.) So, while I sat, drinking a glass of wine and chatting with our friends, Jon feverishly worked in the kitchen making 3 batches of pizza dough (enough to feed a group of six). It’s not that making the dough is hard. It’s just that it takes some time to let it mix, rest and rise. He started the first 2 batches before we left for an afternoon of snowshoeing and then got the third batch going when we got back to the house. While I was enjoying my time of leisure with nary a care, I must admit I felt a little guilty when our friends started making noises about needing cocktails (which, as I said, is also Jon’s jurisdiction) at about the same time that he was elbow-deep in shaping the pizza dough. But Jon impressed me when he actually delegated the bar tending responsibilities to one of our guests. Turns out he’s accomplished at both pizza making AND delegating.
In the past, we have always just made Margherita-style pizza with its three simple toppings (tomatoes, fresh basil, and fresh mozzarella). But this night, to appeal to the tastes of a broader audience, we provided a big selection of toppings and let everyone make half a pizza to their liking. I have to say, I thought the pizzas were perfect. The dough worked equally as well with simple toppings as it did piled high with a little bit of everything. All I can say is look out Papa John’s…there’s a new pizza daddy in town.
And it was an easy dinner to make for six people. Oh, wait, I guess by that I mean that it was easy for me. But, for the record, I did set the table.
Depending on where you live, throughout much of the United States this has been a winter for the modern-day record books. One that most people are looking forward to saying “goodbye and good riddance” to. I have to admit that I’m the lone exception. In the Colorado mountains where the Hostess and I spend our winters, the higher angle of the sun and above-freezing temperatures ushered in by the month of March bring about (in me, and a handful of like-minded ski bums) feelings of melancholy. I’ve always been one for whom changing seasons trigger emotions: Excitement for what’s coming, and a bit of remorse for what’s passing. And March’s arrival and the snow’s accelerating departure mean that the season of skiing that I so look forward to every year is entering its final few weeks. So even though it’s almost time to put away the snow shovels and break out the golf clubs, this time of year always leaves my heart feeling a little heavy.
Don’t get me wrong. I can be just as excited as the next person about the coming of spring (see this post from last year). And as an amateur bartender, I love that the change of seasons also means a change of cocktails. Just as the Hostess always tells me that people shouldn’t wear white between Labor Day and Memorial Day, there are cocktail aficionados who believe that certain drinks are best reserved for the long, dark months of winter, while others go better with warm weather. So I do get excited that it’ll soon be time to break out some warm weather cocktail recipes and shuffle some bottles from the back of the bar to the front. Kind of like spring cleaning…but way more fun.
But let’s not rush these things along just yet.
A few weeks ago I wrote about how the Old Fashioned is a perfect mid-winter’s cocktail. And before this winter completely slips away, it’s only fair that another one of my whiskey-based favorites — the Manhattan — gets some headlining space on our blog. I do like cocktails that have stood the test of time, and the Manhattan dates back to the late 1800s. It has an air of class and sophistication, yet it’s quite easy to make. Once you’ve selected your favorite rye or bourbon and the appropriate martini-style glass, it’s simply a matter of measuring out the right proportions and mixing up your cocktail. The one trick I’ve learned is that, as much as I like using my shaker, the Manhattan is best when stirred, not shaken. Otherwise you end up with a frothy, foamy drink that’s not visually appealing (someone once said the receding foam reminded them of “pond scum”). Personally, I like to make the Manhattan in a Boston-style cocktail shaker; I mix and chill the ingredients by slowly pouring them back and forth a few times between the two shaker halves before straining into a chilled glass. The result is a clear, crisp frosty-cold cocktail that’s hard to resist.
I must admit that, after a winter spent sampling various bourbons and ryes while perfecting my Old Fashioned recipe, I’ve really come to like and appreciate these darker spirits. And this March it feels as though, as I prepare to say goodbye (for a few months, anyway) to my seasonal ski-bum lifestyle, I’m also saying farewell to some new friends like Mr. Woodford and Mr. Templeton. So time’s a-wasting. Stir up a Manhattan and join me in a toast to the end of winter before the last of the snow is gone!
This is a pretty bold proclamation, but I think these are the best chocolate chip cookies in the world. I mean, I know this is almost sacrilege, given that the chocolate chip cookie is an American icon and so many of us have our own definition of the best one. If you don’t like nuts in your cookies or if you think chocolate is an inconsequential part of a chocolate chip cookie, then this probably isn’t the recipe for you. However, if what you want in your cookie is lots of nuts and chocolate in each bite, keep reading.
This recipe is adapted from a wonderful cookbook called The Pastry Queen. The name alone probably tells you what you need to know about the recipes. The author, Rebecca Rather, owns a bakery in Fredericksburg, Texas. If you’ve never been there, you’ll get a sense for the town from her recipes. Scrumptious Southern baking at its finest.
The book was given to me years ago by my sister-in-law Lisa. While browsing through it the first time, I came to a screeching halt on the recipe for chocolate chip cookies. I think Rebecca had me at “one tablespoon vanilla,” because I’m sort of a believer in adding an extra splash of vanilla to recipes. After I made these cookies the first time, I’ve never gone back to any other recipe. (And god knows I’ve tried my fair share of them.) I’ve tweaked the recipe ever-so-slightly over the years. These cookies turn out perfectly every time and are always a hit with everyone who tries them.
We recently took a tray of them to a potluck and they disappeared quickly. For all of you who asked for the recipe, here you go!
I’ve made these cookies countless times. For something different, and thinking in terms of creating more cookies than the original recipe, I tried using my small ice cream scoop (just over an inch in diameter). The smaller scoop makes the cutest little chocolate chip nibbles with the same delicious taste as their larger counterparts. The recipe contains baking times for both large and nibble-sized cookies.
These cookies freeze wonderfully well. I actually freeze some of them as soon as they cool so I can keep a stash in the freezer for the Bartender (who will only share them with our guests after some arm-twisting).
I read something recently that said that the new trend is having breakfast for dinner. Boy, I never really thought of my dad as a trend setter, unless you consider his early adoption of matching a striped shirt with plaid pants as trendsetting. But I can tell you that Dad was making breakfast for dinner 50 years ago. Growing up, I can count on one hand the number of times my mom was too sick to get out of bed. And when Mom was unable to perform her Mom Duties, our little household got turned on its side because the responsibility for feeding the kids fell to my dad. The thing he knew how to make was breakfast, so breakfast is what we had for dinner. I grew up thinking that having eggs, bacon and pancakes or waffles for dinner was a royal treat.
Okay, so the eggs or bacon weren’t cooked to order. And, there’s a good chance that a box of Bisquick was the reason we got pancakes or waffles. But let’s not lose sight of the fact that this was a time when the kitchen was the woman’s domain, and yet Dad was actually in the kitchen, cooking.
Love this picture of Dad. I think he was more comfortable in the cockpit than in the kitchen.
Breakfast for dinner is a tradition that we proudly carry on in this house, although it doesn’t take one of us to be lying ill in bed to justify it. Unlike Dad, who really only had one meal in his culinary bag of tricks, we make breakfast for dinner by choice. Granted, it’s usually after we look in the refrigerator and realize we only have eggs and milk. But, still, it’s a choice that we always seem almost giddy over. Yea! Breakfast for dinner!
The reality is, there just never seems to be enough time in the morning to have a nice, sit down breakfast. Even when we have nothing but time, unless it’s the weekend, we just don’t seem to bother with anything more than a smoothie or a bowl of cereal for breakfast. Yet we look forward to a “big” meal at dinner. So, here’s the funny thing. Even though a meal of eggs and bacon and something off the griddle seems like a pretty involved thing, it’s actually pretty quick to pull together. Maybe this concept is gaining in popularity (“new trend”) because people miss having a big farm-style breakfast, so they’ve rescheduled it for a time of day that doesn’t require setting the alarm an extra 45 minutes early. Wouldn’t that be just like us? Reschedule something like breakfast to accommodate our schedules. The result? Breakfast for dinner! So, whether it’s a convenience (like when we don’t have anything else in the fridge,) a means of survival (as in my dad’s case), or a trend, breakfast is a nice alternative to the traditional dinner menu. So, go ahead. Make breakfast for dinner and give everyone a treat. But, if this does turn out to be a trend, I’m going to give my dad full credit for it.
Here’s our suggestion for a real breakfast treat. Waffles. We’ve long ago shifted away from waffles made from a mix. Like homemade pancakes, waffles from scratch really don’t take much more time than those made from a box. And they are so much better. This recipe is for a Belgian-style waffle, which means they are a little sweet and cake-like. They are good served with fresh berries, syrup, or, as in this case, a pureed berry sauce. The whipping cream is optional. Regardless of what you top them with, they are oh-so-good. For dinner or otherwise.
If I’m being totally honest, I have to admit that sometimes I feel like the Scrooge of Valentines Day. It’s not that I necessarily dislike the Hallmark-inspired day. It’s just that sometimes if feels like there’s a lot of pressure to participate in it all. It’s the forced romanticism I tend to bah-humbug. I like to think of love and romance and sweet gestures as a daily thing, not a cram-it all-into-one-day sort of thing.
With that said, truth be told I like all of the hearts and red and pink and cute little “Will You Be Mine” Valentines. In grade school, I loved the handmade mailboxes and Valentines secretly dropped into them by classmates. But now, I just like the thought of saying “I love you” as being my idea and not something that’s scripted for me one day of the year.
Want an any-day-of-the-year, from-the-heart way of saying “I love you” to all those special people in your life? In my book, nothing says it like chocolate. With raspberries. Made from scratch. Go ahead and swoon.
This dessert started with one of my Mom’s recipes: Raspberry Torte. It’s one of the cherished few that I have that is in her handwriting (on a 3 x 5 index card, of course), and I’ve held onto it all these years. But I’d never actually tried it until now. We were taking dessert to a dinner party and I decided to make Mom’s recipe. But when I started looking at the details, I wasn’t sure it would actually turn out. And then I realized it didn’t have any chocolate in it. So, I turned to the internet and started googling. I found a recipe on Cooks.com that sounded pretty good but ended up tweaking it quite a bit. The end result was a nice, dark chocolate sponge cake with a raspberry mousse topping. And the best part is that, even at 7000 feet (where we live in the winter), the cake turned out perfectly! (That’s not something I can say very often. Thanks to the altitude, most of my cakes fall in the center.) And the raspberry mousse is simply delectable.
It’s official. Six more weeks of winter. At least according to that cute little rodent turned meteorologist, Punxsutawney Phil, who saw his shadow yesterday. Not sure why once a year we trust a groundhog to do the weather forecasting, but that’s his, and his shadow’s, prediction for this year. Depending on your perspective, the news about 6 more weeks of winter is either cause for celebration or time to drown your sorrows. Either way, here’s a suggestion to help you make the most of the rest of winter.
Contrary to tribal folklore, men really do appreciate something besides a bag of chips for football game snacks. It’s just that if they are asked to bring a snack, chips may be what they think of. So, here’s a way to impress your buddies on Super Bowl Sunday. Or any day, for that matter. Show them you’re the Grill Master with these Pulled Pork Sliders.
P.S. Women like these, too.
Pork shoulder, rubbed and ready for grilling…
Start by adding a little hickory smoke…
Tick…tick…tick…you can’t rush perfection!
Smoked and ready to finish overnight in the oven
The next morning: Time to shred! It smells SOOOO good!
Don’t be intimidated by the number of steps in the recipe. The only mistake you can make is to try to rush things with a grill that’s too hot. Low and slow is the key to grilling stardom. The real beauty of slow-cooking a pork shoulder is that it gives you an entire afternoon to lounge around drinking beer while simultaneously accomplishing something really incredible! What’s not to like about that?
Around this house, mornings seem to happen at one of two speeds. We’re either relaxed and leisurely and can hang out until mid-morning in our pajamas, or rushed and hurried as we race to the mountain or get people on the road towards home. I love when guests sleep over and we have a leisurely mornings and can enjoy and big, involved breakfast. But when we have places to get to, a bowl of granola is a great dine and dash breakfast.
I can make this granola in the time it would take me to get dressed and drive to the grocery store. And then it keeps well for a couple of weeks, so it’s definitely a great option for a no-fuss breakfast.
There is a great restaurant in town, Winona’s, that is a favorite with both locals and out-of-towners. On weekends, there is usually a line out the door with people waiting for a table. Supposedly this granola is from that restaurant. I put air quotes around supposedly because, unless the owner actually hands me the recipe themselves, I’m never 100 percent sure that it is a secret recipe or not. I think I got a little jaded back in the 80’s when someone had supposedly gotten their hands on Mrs. Field’s secret cookie recipe, only to find out that no one had ever actually unlocked the vault to her secrets. But, this much I do know. Winona’s has great food, including their granola. And this is great granola. So, maybe they are one in the same.
Serve with fresh berries and yogurt and you have yourself one fine, fast meal.
It all started a year ago when a friend of ours showed up at our house with a bottle of Hangar 1 Maine Wild Blueberry vodka. The Hostess and I go way back with Hangar 1’s excellent hand-made infused vodkas. We love how a splash of their Fraser River Raspberry vodka turns our Lemon Drop into something uniquely special. And I, being a bit of a spice-lover, really, really like their chipotle-infused vodka in a Bloody Mary. So the bottle of blueberry vodka practically popped its own cork as it came through our front door.
Surprisingly, though, we didn’t immediately warm up to the blueberry flavor. The vodka tasted great straight, so it seemed obvious that it would be a welcome alteration to any of our popular vodka cocktails. I immediately set about experimenting (tough job, I know), and the timing was perfect as we had a houseful of thirsty lab rats, but in the end I wasn’t hugely satisfied with any of the results. And the bottle ended up languishing in the liquor cabinet as I reverted back to serving our “usual” cocktails to our guests.
Last week, though, while ruminating with friends on various vodka infusions (and by ruminating I might actually mean consuming), the Hostess recalled our (now dusty) bottle of blueberry vodka and had an epiphany: Maybe, instead of trying to force the blueberry flavor to complement one of our existing cocktail recipes, I should instead concoct something new from scratch: A Blueberry Martini that would highlight the flavor of the Hangar 1 vodka. Brilliant!
You probably read that and thought, “Um . . . duh!”
Yeah, well, remember that I’m a techie at heart and can be a stubbornly linear thinker, so it sometimes takes a pretty big slap upside my thick head to get me thinking outside my box. Plus, once that’s happened and I’m on a roll, I tend to think that the brilliant idea was mine to begin with. So I’m hoping to get brownie points from the Hostess for actually acknowledging, here in public, that the Blueberry Martini was indeed her idea. But enough about me and my quirks. For the recipe of our newly-launched Blueberry Martini, I took inspiration from the flavors of our Lemon Blueberry Muffins and combined muddled blueberries with a squeeze of fresh lemon juice to achieve a not-too-sweet balance. And I think we nailed it! My recipe successfully debuted during the Hostess’s recent “Girls Weekend” so it now has the Entertaining Couple’s official seal of approval. Plus, with all the anti-oxidants that are packed into blueberries, you can slurp these down practically guilt-free. Give one a try, and leave a comment to let me know what you think!
Of course I understand how someone might have asked, “Why exactly do you need 10 pounds of tangerines?” And that person would have been asking without even a hint of exaggeration, because I literally had 10 pounds of tangerines in the refrigerator.
To answer that question, let me just say I’m not sure it’s a matter of need. Maybe more like a slight urge to hoard, because I know good tangerines are seasonal and there will come a day when I won’t be able to just buy them whenever I want.
So, then I needed to do something with my stash. What a happy coincidence that we had a group of friends coming for the weekend. Since one of our dinners was beef stroganoff, I was looking for something light for dessert. A quick surf of the net yielded several recipes for tangerine mousse. A perfect solution to use some of the tangerines and provide just the kind of dessert I was picturing after a big, heavy meal.
This is a wonderful dessert. It’s light and airy, with just the right amount of tangerine-ness to give it flavor. At the risk of sounding like Dr. Seuss, let me say you can serve it in a spoon or you can serve it in a cup; you can eat it sitting down or you can eat it standing up.
Zesting and Juicing
If I was slightly intimidated by the process before I started, I quickly discovered it came together pretty easily. Turns out it’s not that difficult to properly dissolve unflavored gelatin or whip egg whites just so. And, I was able to prepare it in the morning and clean up my mess before our guests arrived without leaving any hint of the tangerine carnage. I served it in my vintage champagne glasses, but you could use any cup or parfait glass or martini glass. And I think the porcelain spoons are a great way to serve it on a buffet or for a walk-around party.
Baby, it’s cold outside! And the snow has been falling pretty much non-stop for the last several days. Around here, that is all cause for celebration.
When you live in a mountain resort community, snow is a good thing. And it’s a reason to be outside. It’s like a big white playground, just begging kids of all ages to come out and play. Sometimes snow can just be so much fun.
If snow is for all ages, then the refreshments should be, too. Hot chocolate appeals to all of us, young or old. But there’s something wonderfully adult about this hot chocolate. It’s a little bit of decadence in a cup, that you can wrap your hands around and enjoy marshmallow tip to chocolate-y bottom. And if you’re really feeling like a grown-up, go ahead and add a shot of Peppermint Schnapps. It all makes for a perfect combination of play hard/relax hard.
This is one of those times when I am super excited to share something with you. In this case, it’s because this is one of those recipes that every host/hostess should have in their bag of tricks. Why? Well, the list is long. Gather ’round and let me tell you all about it.
First, it’s good. Or, better stated, it’s absolutely delicious. But since I really only post recipes that I think are good, this probably isn’t the most newsworthy aspect of it.
What I really like about this quiche is you can take the basic recipe and make it work for you, as well as for those lucky folks around your table who get to share it with you. Want to make your own crust? Here’s the recipe. Can’t be bothered with a homemade crust? Then use one out of a box. It will still be good. Prefer more egg-to-crust ratio? Just choose the deep dish quiche versus the one made in a tart pan. Same recipe, just double the ingredients. Like onions with your eggs and cheese? No problem. Just add some onions when you brown the meat. And, here’s the really great news. You can use sausage or bacon, or, if you need a vegetarian option, you can use veggie sausage.
Usually when I hear things like “veggie sausage” I am reminded of when I was a kid being forced to eat things I didn’t like, and then trying to discreetly hide the skeevy food item under my mashed potatoes. But this is different. My sister-in-law started making this recipe with MorningStar Farms sausage, and I have to admit, it’s great. The only adjustment I make when I use it (which is most often, actually) is that I add some oil to the pan when I brown the sausage to keep it from sticking. I’ve had some guests (with very discerning tastes) not even realize they were eating meatless sausage.
Lastly, this quiche makes for a stress-free meal. You can buy the cheese in a ready-to-use bag so you don’t even need to bother with a cheese grater. Oops! Forgot to thaw the spinach? No problem. Just microwave it and you’re back in business. You can put it all together and let it bake while you chat with your guests. It easily feeds 8 (if you’re using a tart pan; here’s the pan I use) or maybe even 10 if you’re using a pie dish. Either way, it’s an easy way to feed a group, and I always like having those types of dishes available to me. Seriously, what’s not to love?
I’ve been making this recipe, or some variation of it, for years. Twenty-five years ago it seemed that I was hosting a bridal or baby shower about once a month, and this quiche, along with a fruit salad and some muffins, became a became the standard menu at each of them. Since then, this quiche has made appearances at all different types of brunches and lunches. Regardless if the occasion is fancy or casual, this dish fits right in. Oh, I also make it just for the two of us. More than occasionally. If you are still thinking that real men don’t eat quiche, I am here to tell you that they do. With gusto.
Our blog is now partway through its second year, and in looking back at my cocktail posts I realized that nearly all of my recipes have featured bright and cheery drinks made with “clear” liquors, namely vodka or gin. But now that we’re in the dead of winter the time feels right for cocktails to turn a shade darker, to become a bit more brooding and moody. This is the time of year when beer drinkers notice a preponderance of dark, bold “winter warmer” seasonal brews on the shelf. Wine lovers put away their Sauvignon Blanc in favor of Cabernet. And cocktails made with the darker spirits – whiskey, rum, Scotch, and the like – are headlining the menu of your local watering hole. So, too, has the darkness fallen across our home bar.
I’ve recently been dabbling with a drink that hearkens all the way back to the early 1800’s: The Old Fashioned. While to some, the name of this cocktail may conjure up images of their great Aunt Edna and her bridge club, I contend that today is the right time for this historic libation to become a staple at your home bar. Premium bourbons have been increasing in popularity for quite a while now, and while the preferred way to serve these is usually straight up, with a splash of water, or on the rocks, there are those who enjoy how the addition of a few subtle ingredients can serve to smooth, complement, and highlight their favorite brand while not masking its flavor. The bitter-sweet-orangey foundation of the Old Fashioned, in my opinion, performs admirably in this supporting role. Think of this cocktail as a shot of bourbon with training wheels.
As with so many classic cocktails, there are endless variations on the Old Fashioned, beginning with whether the base liquor should be rye, bourbon, Canadian whisky, or even brandy (for you Packers fans). Any of the above will work just great, so it all comes down to your personal preference. From there, recipes consistently use sugar, bitters (typically Angostura), water, some type of citrus fruit, and a cherry garnish. I’m a big advocate of liberal use of fresh citrus in my cocktails, so my recipe includes muddling a chunk of orange along with the sugar and bitters to bring out the citrus highlights. And while some like plain water, I’ve decided I prefer that my splash of water be carbonated.
Cut up an orange
Add a teaspoonful of sugar
Shake in a few dashes of bitters
Then muddle it all together
I’ve become a huge fan of the Old Fashioned. It’s a fun drink to mix, it’s a drink most people have heard of even if they’ve never tried one, and (thanks, probably, to Mad Men) it’s developing a certain coolness factor. It’s a cocktail so historic that it even has its own glass named after it. I’ll go so far as to say the Old Fashioned has become my “go-to” drink on these dark and cold winter days when it feels a little too right to start happy hour at 3:00 in the afternoon. The intrigue (and the danger) of the Old Fashioned is found in its layered flavor. It starts with the big robust slap of nearly-straight whiskey. Then, a subtle bitter-orange sweetness begins to assert itself. And by the last sip, the flavor has become so soft and mellow that it’s impossible to not want a refill. And another. And so on, until you’re curled up in a corner clutching your glass and begging for another round while someone phones you a cab. Yep, the season of darkness is upon us.
With New Year’s Eve upon us, our thoughts turn to reflections on the passing year, hopes for the coming one, and, of course, Champagne. But I must confess, as one who enjoys mixing and serving cocktails almost as much as I enjoy drinking them, the act of merely popping and pouring a bottle of Champagne (or a nice domestic sparkling wine, for those of us who aren’t snooty) feels like it lacks something. I personally love the anticipation of making a cocktail: Laying out my bar tools, selecting perfectly-ripe citrus fruit, lining up the bottles, and my most favorite part, hearing the clatter of a scoop-full of ice hitting the bottom of my shaker. Serving Champagne deprives me of all of this.
Until now.
French 75
One of the things I love about cocktails is that many of the great ones come to us with a colorful past. Through the ages, people have tweaked and fiddled with spirits and ingredients as they sought to create great-tasting drinks, and the best recipes live on today with interesting names and stories. Recently, good friends of ours introduced the Hostess and me to a Champagne-based cocktail known as the French 75. This concoction, dating back to World War One and named for a devastatingly-powerful 75mm cannon developed by the French army, is to me the perfect cocktail for a festive celebration: A nice pour of Champagne for those guests who simply must have a glass of bubbly to complement their New Year’s toast, combined with a bit of preparing, measuring, and shaking that satisfies my inner bartender’s desire to create something rather than just filling glasses straight from the bottle. Plus there’s an added bonus in that it uses three of my favorite ingredients, namely gin, Cointreau, and fresh lemons. And finally, this cocktail gets the Hostess’s seal of approval as being both “sexy and glamorous.” Wow! What’s not to love?
I suggest making a resolution to break ever so slightly from the norm during your New Year’s party. Offer up this cocktail as an alternative to a plain-Jane glass of bubbles. Just remember to caution your imbibers that, like the vintage gun it’s named for, the French 75 can deliver quite a wallop.
P.S. One more thing to love about this cocktail is that it most definitely does not call for expensive Champagne. On the contrary, it’s a spectacular way to serve the bottle of Cook’s that your buddy’s going to pick up on sale on his way to your party!
I’m all in favor of a big feast of turkey, or roast beast if you happen to live in Whoville. Even with the prep and all, I like the whole tradition of putting a big, festive meal on the table. But, truth be known, what I’m really a fan of is the leftovers. Which is why I will cook a turkey the size of Rhode Island, even if I’m only feeding a few.
If your guests are staying longer than a day, leftovers can solve the meal quandary for days. This is one of those situations where a little planning can go a long way in simplifying your entertaining.
One of my favorite ways to use turkey leftovers, and feed several people, is to make turkey noodle soup. While making your own broth isn’t difficult, when we have house guests, I usually go the simple route and just use store-bought chicken broth. Mainly because some people find the sight of the carcass stewing in water a little unappetizing. That, and I don’t want to mess with one extra step if I don’t have to. If you want to make your own broth, but don’t know how, just let me know and I’ll gladly share the how-to.
This year I actually froze some turkey meat and made soup a couple of weeks later. The beauty of this soup is that, besides using leftovers and providing a crowd-pleasing meal, it’s not difficult to make. The only real labor involved is just a little chopping in the beginning to get the veggies ready. After all the work of preparing the big meal, it’s nice to have a simple plan for feeding everyone the next day.
To the casual observer, my childhood and upbringing could appear pretty idyllic. A beautiful mother that we’re pretty sure June Cleaver was modeled after. A handsome, airline pilot father. The brick house made to fit a family with 5 kids thanks to an additional story added by Dad. The large yard with fruit trees where Dad built us a treehouse. Not to mention the adjacent pasture where (literal) ponies grazed.
But it wasn’t always rosy. There were those moments of parental abuse that we hide deep in the closet with the other skeletons. Like those Saturday mornings when Mom would vacuum as we were watching cartoons and we’d have to lift our feet while she pushed the Hoover past us. It’s hard to imagine how we ever endured that mistreatment. But the real torture occurred every Christmas morning. While we were allowed to tear into what Santa had left us, regardless of what god-forsaken time we had gotten up, we had to wait until after breakfast before presents could be opened. You want to know the longest period of time in a kid’s life? It’s Christmas morning when one has to sit and wait while your mother prepares breakfast with no apparent sense of urgency. As I said, pure torture.
Visions of Christmas Past, with unopened presents indicating that breakfast had not yet been served. Notice my “stink eye” and what appears to be the early signs of stress-induced lunacy in my little brother.
However, as I got older, I came to appreciate the enforced slow pace of those Christmas mornings. For one thing, we were rewarded with Mom’s cinnamon rolls. And, Christmas always lasted longer when we weren’t done with everything by 7:00 am. Now, as an adult, I have to admit that I prefer breakfast before presents as well.
So, this Christmas, we wish you leisurely mornings full of anticipation and wonder and joy.
There is no other time of the year when traditions mean as much as during the holidays. Big or small, simple or complex, it seems that just the term “holiday tradition” conjures up something in all of us. It just doesn’t seem like the holidays if those things that have defined the season for us before are missing. This can especially be true with food. Yet, for many, this is also the time of year to try something new, maybe with the thoughts of introducing a new tradition for future celebrations.
My mom was someone who cultivated year-over-year traditions and tried new things. We always had the same breakfast on Christmas morning, complete with her cinnamon rolls. And Nanaimo Bars were standard, as was spiced eggnog. But one year, she found a recipe in the newspaper for one of those Bûche de Noël (Yule Log) cakes. If you’ve never made one, or witnessed someone else making one, let me just say that it’s not a simple dessert to make. My poor mom spent the better part of two days making that thing. I watched her as she made the cake from scratch, and then rolled the warm cake up in a tea towel, then as she unrolled it after it had cooled to fill with the cream filling, only to roll it up again, all the while being patient and careful so that the cake wouldn’t crack during any of these calisthenics. Then she frosted the whole thing and decorated it to look like a log. And, while the dessert won points for effort, the cake was more work than it was worth. Needless to say, that particular dessert didn’t become an annual tradition our house.
That is why this seems like good time to share my mom’s chocolate cream pie recipe with you. It’s hard for me to think of the holidays, or any family gathering for that matter, without thinking how Mom would make this pie. (Except for the year it got pre-empted by the Yule Log.) This was always a family favorite at our house.
I guess I got my need for tradition and my need for experimenting from my mom. I have made this pie countless times, for our holiday dinners and special occasion get-togethers. But I’ve also tried many, many new recipes as well. Some successfully (and worth repeating), and others, well, not so much. My own renditions of the once-seen Yule Log, I guess. Thanks, Mom, for showing me that both traditional and new have a special place in our kitchens.
Chopped Chocolate
Chocolate appears speckled as it begins to melt
Chocolate mixture has thickened and first slow bubbles have appeared
Adding the warm filling to the eggs, and then slowly incorporating it all back into the custard, ensures you don’t end up with chocolate scrambled eggs.
Plastic wrap prevents skin from forming as the filling cools
One More Note: There may be some of you who have been following along with my attempts at mastering the art of making from-scratch pie crusts and are looking at this picture and saying, “She finally did it!!” Well, in the spirit of full disclosure, I have a confession to make. This crust came out of a box. Now, before you make a snap judgment about my lack of perseverance, let me just say that I actually did attempt another pie crust from scratch for this pie. When it completely (and I cannot overstate the word “completely” here) flopped, I gave up (for today) and resorted to the can’t-fail-from-a-box pie crust. But given that Mom always used the pre-made pie crusts, it somehow seems fitting that, for her pie, I did too.
When people discuss Thanksgiving and the annual feast of turkey, stuffing, potatoes and pies, they usually seem to have pretty strong feelings about what is traditional and should be served. And that seems particularly true when it comes to cranberry sauce. Some of the strongest memories people seem to have about family Thanksgivings come from the roll of cranberry sauce, and the memories all seem so similar, regardless of what family you grew up in. The fact that the can had to be opened at both ends so that the roll could be removed intact. The etched ribs on the jellied roll made by the tin can. The glass dish that our mothers always used to serve the cranberry sauce. And the taste. This is where the fan club divides. You either loved that canned stuff (and still serve it today) or you didn’t.
I’m not here to settle the debate as to whether that roll of jellied cranberry sauce is appetizing or not. But if you’re looking for another option, that doesn’t require a can opener and IS delicious, try this one.
I got this recipe years ago from a caterer we used for a party. She gave it to me only after I promised that I wouldn’t share it with anyone else. I kept that promise for as long as I could. It’s just too good to keep secret any longer.
November 20th, 2013 | By: Hostess | Category: Pasta
Most people agree, there is a lot to love about Italy. People who have been there talk about the history. The culture. The scenery. But mostly they talk about the food. And rightfully so. The food in Italy is worth talking about.
We recently spent a couple of weeks in Italy with friends. At one point, there were 11 of us together in a rented villa in Tuscany. One day, we had chefs come to our kitchen and give us a class on Italian cooking. It was an evening to remember.
We had two chefs, Christiano and Stefano. One spoke very little English so the other did most of the talking. In his very thick Italian accent, we learned that they are fanatical about their ingredients, even making their own olive oil (which they make after they “catch” the olives). Their point was, “Everything you put in the saucepan is what you eat later.” Got it. Be picky about the ingredients. Our instruction, and subsequent meal, included homemade pasta with a ragu meat sauce, pork tenderloin and tiramisu. All of it was ridiculously delicious.
There are many aspects of that trip that I think about on an almost daily basis, and that meal is at the top of the list. A great group of friends gathered together, making and then sharing a meal. It was one of those “priceless” experiences. While we can’t recreate everything about that experience back home (for the life of me I can’t figure out how to get church bells to ring every hour), there are aspects that absolutely can be part of a dinner party at home. For starters, I came back determined to recreate the meal. Today, I’m sharing with you my version of the Tagliatelle al Ragu di Carne (Typical Tuscan meat sauce).
First, the sauce. Here, in the United States, we’ve come to associate “Ragu” with an inexpensive bottled spaghetti sauce, when in Italy it simply means “meat sauce.” Our chefs used 3 different meats for the sauce: veal, pork and chicken parts. The chicken parts actually became sort of joke because it wasn’t completely clear at first what parts they were using. Initially we thought they were using chicken livers, but after many attempts at translating, we were able to determine that it was hearts and gizzards. I think you’ll recall that I’m all about simple entertaining, and collecting/cooking/dicing chicken parts (regardless of what part it is) falls outside of my tolerance for simple, so I opted not to include it in this recipe. We tried to find ground veal to no avail (although we were told by the butcher at Safeway that we can order it), so I substituted good, lean, organic ground beef and then used ground pork as well. As a side note, the first time I attempted this recipe I used ground turkey, as I often do in sauces, and found it to be a little bland. The beef/pork combination worked well and produced a rich, flavorful sauce similar to the original Italian version. I used canned tomato sauce that seemed to be similar to the ones they used in class.
It was also a little unclear how much of what spices they used. They used an “aromatic mix” that they had made before arriving at the villa. I know their mix included rosemary and sage, so that’s what I used. They told us to add the salt early in the cooking process for flavoring, but to save the other spices until the end so that the aromas don’t get cooked out of them. They said if you add the things like the rosemary and sage too early, you just end up with “little green pisses” (said in a very thick Italian voice) by the end. I thought this was so endearingly charming and Italian, I repeated it several times as I was making our sauce.
Our Chef
Homemade Pasta
Finally, the pasta. During our class, we made the pasta from scratch. Honestly, during a cooking class in Italy, I would’ve been a little disappointed if they had shown up with packaged pasta. While it was definitely fun and actually sort of kinda easy, it’s honestly more work than I’m willing to do for dinner at home. Again, falls outside my tolerance for simple. (Coincidentally, a good friend of mine today posted pictures of her at home making pasta. I curtsy to her and her moxie). The pasta we made was “pici” (pronounced like “Pee Chee,” for any of you old enough to remember that orange folder we used to carry in school.) We weren’t able to find pici locally (but have since found it online), so we substituted a fresh, fettuccine pasta that was similar to pici in size. The point is that with this sauce, you want to use a substantial pasta.
Pasta – store-bought alternative
Pasta – not homemade
Pasta in our Tuscan villa
The result? A really tasty pasta that’s fairly easy to make and is true to the authentic dish we made in Tuscany. The next day, the Bartender declared it the “best leftovers he’s ever eaten,” which is noteworthy as well. We’ll definitely be making this one again.
A few evenings ago, the Hostess and I tended bar for a local business at their annual holiday open house. In case you’re keeping score, this was my second gig as a guest bartender – back by popular demand (or maybe just because the Hostess did a good job of farming me out) for the same event as last year. This year we decided to serve the Cosmopolitan. The Cosmo is quick and easy to make and, with its cranberry flavor and festive color, it’s the perfect cocktail for Thanksgiving and Christmas entertaining. Our Cosmopolitan recipe proved to be a big hit that evening, and I was surprised that, while most of my “customers” had heard of the Cosmopolitan, several had never actually tasted one. One person even commented that she didn’t think people drank Cosmos any more; after a few sips won her over she agreed with us that it’s high time for those people to start again.
As with last year’s event, we also wanted to offer an alcohol-free alternative to the featured cocktail so I set about concocting something that would have the same signature flavors as a Cosmopolitan. It needed the tartness of cranberry, the hint of tangy-sweet orange (normally provided by the Cointreau), along with the subtle bite of lime juice that holds all the flavors together in perfect balance. Plus some effervescence to round out the edges usually occupied by the vodka. After a few rounds of measuring, pouring, tasting, and tweaking, we’d created a virgin Cosmo Punch that was awarded the Hostess’ seal of approval. We mixed up a punchbowl-full for the open house and it earned five-star reviews from drinkers and non-drinkers alike. The best endorsements came from employees who first opted for the punch, then upgraded to Cosmopolitans once their shifts ended, and declared both to be equally delicious.
The fun and festive open house was a nice way for the Hostess and me to kick off our holiday entertaining season, and we enjoyed introducing (and re-introducing) people to the Cosmopolitan. Cheers!
As I write this, Mother Nature is doing her darndest to make it perfectly clear that fall is here. The real fall, not that oh-aren’t-the-leaves-pretty fall. The skies are gray. The wind is howling. And the temperature is almost bone chilling. But don’t get me wrong. I’m not complaining. These days, I love a good excuse for staying indoors.
Fall is actually one of my favorite times of year. I love the transition from outdoor living with barbecues and evenings spent on the patio to indoor living with soups and something good cooking in the oven that always seem right when the temperatures get cooler and the days get shorter. In honor of this blustery day and the season, here is a recipe for Apple Crisp; something good to warm your kitchen and share with anyone lucky enough to be invited. Not only does this make a very scrumptious dessert, it reminds me of everything I like about the community of kitchen-heads that this blog is all about. Upon reflection, here are some of the things I like about recipes:
They are shared. And as a result, recipes can create a community of sorts. This is an example of one of those things that you can give away and keep at the same time. While I have encountered some people that are stingy about sharing for some reason, most people are extremely generous with their recipes. For example, this recipe comes from the woman who owns our local nursery, Christianson’s. It was recently included in their newsletter, that my sister-in-law created each month. And now it’s on our blog. Years ago, people shared recipes on 3×5 index cards. Today, it’s virtual. We got the idea for this blog after responding to so many e-mails from friends requesting recipes. It just seemed easier to put them all in one place for everyone who wants them.
They become part of us. Ancestry, by definition, is the origin or background of something. People are usually very quick to say where they got a certain recipe. In the newsletter, Toni Christianson says “This recipe has been a favorite in the Christianson family for many years. We call it ‘apple crisp’ even though it’s called ‘Apple Betty Pie’ in the Better Homes and Gardens New Cookbook from 1965.” What started in a cookbook is now part of a family. And is now being shared virtually in newsletters and on blogs. Time after time when someone shares a recipe with me, copied from some index card that says, “From the Kitchen of Great Aunt Edna”, I’ll find the same recipe in a cookbook or online. After decades of enjoying what Great Aunt Edna prepared, I doubt that anyone ever stopped to consider where Great Aunt Edna got it in the first place. It became hers simply because she was the one who always prepared it. Sometimes the origins get a bit blurred over generations as the recipes are threaded into some family tapestry somewhere. Today, in this virtual world, we try very hard to respect intellectual/creative property and give people credit where credit is due. But sometimes, the lines between Great Aunt Edna and Betty Crocker can get a bit blurred.
We can make them our own. By either making a recipe exactly as written or by modifying it to make it right for us, by virtue of simply making something it becomes a part of us that we share with others. Within a recipe, there are lots of steps along the way where you can personalize, by adding a spice or substituting an ingredient or changing how you do something. We make it work for us and in that way we make it our own. I love that you can do this with a recipe. In the newsletter’s version of the Apple Crisp recipe, it read “You can use half orange juice and half triple sec orange liqueur, or you can use all liqueur.” I used all Grand Marnier and loved the results.
Now it’s time to get baking. This recipe is easy, and lets you take advantage of some of those great apples available right now. Sure, doctors may tell you that an apple a day will keep them away, but I personally think it’s here, in a crisp, where the apple realizes its true life’s mission.
All good things must come to an end. Or so they say. And lots of people are saying it around here about the end of summer. Yes, it was a wonderful summer. And, yes, we are seeing definite signs of fall. But I’m not quite as melancholy about the end of the summer as others are. Except when I think about the end of summer food. Now that does make me a little sad.
Those of you who have been reading this blog since its beginning (almost a year ago) will know I have a favorite, and apparently secret (since no one else ever seems to go there) blackberry patch where we can pick all the blackberries we can stand to eat, freeze, and cobbler-ize. But the trip to the thicket today proved that the blackberry season has come to an end for this year. My use of “slim pickin’s” this afternoon was probably the first time in my life I used the phrase in the proper context.
If you’ve ever had an overnight stay at our house, there’s a pretty good chance that we served you a fruit smoothie for breakfast. Not necessarily because you requested one but rather because I make one almost every morning for us and I just assume everyone else wants one too. For me, it seems like a whole-lotta-healthy in a glass. And who wouldn’t want that first thing in the morning? (No need to actually answer because, as I said, I just assume everyone wants one.)
These last few weeks, since the blackberries have been ripe, my new daily gotta-have has been a mango/blackberry smoothie. With each glass, I can just feel those wild antioxidants racing through my body wiping out free radicals as they go. And because of the surging healthy goodness, I can pretty effectively ignore anything else that might be in there, say like a teensie dose of sugar. We’ll just call that part of the smoothie “energy” and leave it at that.
If you’re lucky enough to have some blackberries in your freezer and you want to postpone the end-of-summer blues a little while longer, treat your guests, and yourself, to this scrumptious (and healthy!) treat.
We know that we have been woefully absent from this blog the last few weeks. Thank you to our followers that have reached out to us and inquired about our whereabouts. Nice to think we’ve been missed. We’ve been right here but we’ve just been busy doing this thing called summer.
Unlike previous summers, we’ve had a lot of visitors here. Our not-so-big house has experienced visiting pooches and blow-up mattresses in the living room and kids sleeping on the floor in sleeping bags and an endless sliding of the screen door. And, in the Pacific Northwest, where it can be gray and damp for so many months, when summer hits people come out of their houses and the place sort of comes alive. It reminds me of when the Good Witch tells the Munchkins to “come out, come out” and and everyone starts dancing around with flower pots on their heads. The sunshine is our Good Witch. So, we’ve also been experiencing people on their patios and in their yards and on their boats, all welcoming us and others with food and drink. I’ve sort of lost count of how many times we’ve been to a neighbor’s or have had friends here over the last few weeks. Everyone here knows the good weather won’t last forever and is taking full advantage of it.
So, while it may seem like we’ve been neglecting our blog duties, I prefer to think of it more like we’ve been off getting field practice. We’ve used many of our recipes that we’ve shared on the blog (some over and over again). And we’ve re-learned some critical entertaining philosophies along the way. Maybe it’s that I’m experiencing my own form of the lazy days of summer. I mean, I know there are obvious weeds in my garden, that my furniture is showing a fine layer of dust and that there is laundry piled on top of the washer, but I want to focus on what’s really important: All of our friends and neighbors that have “come out” to enjoy the summer and chosen to spend to time with us. The key is for us, as hosts, to enjoy the evening and everyone else seems to follow our example. Summer is a good time to let go of some of those nagging details and just relax a little. I felt the teensiest bit guilty when I let the local Berry Barn provide the peach pie for dessert or a week later when our guests arrived before I got home from the grocery store, but then I reminded myself that there is more to life than pretending to be Martha Stewart.
I’ve been wanting to share this recipe with you for weeks. It’s a great way to take advantage of the good, local corn and those fabulous small tomatoes that are available right now. I originally got the recipe from a great blog (With Style and Grace), where, contrary to my earlier comment about Martha, I believe they credit her for the original recipe. So, I’m not exactly sure where this one started, but I’ve made just a few tweaks to it. It’s been a big hit with everyone we’ve shared it with, so I think your guests will like it too.
Since this is the third time I’ve made this recipe in just about as many weeks, I think it’s time I shared it with you. But first we need to establish some trust. I need you to trust me when I say that you should make this recipe. Please don’t just disregard it because of the name or the ingredients. I know you do this because I do this. I look at a recipe and barely pause long enough to read it if the ingredients sound odd or off to me. So, this once, resist to urge to reject at first glance and give it a chance.
I like this recipe for several reasons. One, I can make it before guests arrive, which I always like for dinner parties. (Make and clear the mess before anyone arrives.) And, it’s not difficult to make, which is also a plus. Two, during corn season, I really can’t resist buying the sweet, local corn. Like, every time I’m at the grocery store or the farmer’s markets. I even find myself driving by the cornfields and anticipating when the corn will be ripe. But I have found that even when guests like corn, they don’t always like eating it off the cob in front of other guests. Serving corn this way allows everyone to enjoy the goodness of summer corn, at a dinner table, without the inevitable embarrassment of loose kernels hanging off their cheeks. Three, the base for the sauce is a roux, and I like making roux. Mainly because it’s French and I feel so, well, Julia Child-ish when I make one. I am a lot of things in the kitchen but a chef is not one of them. Making a roux makes me feel slightly more accomplished as a cook. I just don’t usually mention how easy it is to make a roux. And, fourth, last, but certainly not least, this is a crowd-pleaser. I’ve had guests, as they are helping themselves to seconds (and thirds), say, “I’ve never cared for creamed corn, but this is incredibly good.”
You can bake this in individual ramekins (for that you’re-so-special-I-made-food-just-for-you kind of message) or family style in a casserole dish. Either way, it’s worth giving a try. Trust me.
Signs of summer are all around us. We’re experiencing an early summer here in the Pacific Northwest, and by that I mean we have sunshine before July 5, which is the day the locals all refer to as the start of summer. (In other words, it’s rare for us to see sunshine for the 4th of July holiday, much less any time before it.) Flip flops have been dusted off, shorts have been moved from the back of the drawers to the front, and our thick fleece jackets have been replaced by thinner fleece (can’t get too carried away as it still gets cool in the evening).
We live on a salt-water channel that serves as a thoroughfare from town to the more open water around some of the islands. In the summer, we watch a constant parade of boats in all shapes and sizes as they come and go. Even when we’re not looking, we can hear the boats go by and have gotten pretty adept at identifying the kind of boat (tug versus small skiff versus large power boat) by the sound of its engine. Or lack thereof. When we can hear voices, we know the boaters are probably going by in kayaks. The channel is also used heavily by the commercial fisherman and the volume of traffic varies based on what is in season at the moment. Currently, it’s crabbing season and we see a never-ending stream of boats, laden with crab pots, off in pursuit of their daily catch. On many mornings, before the sun even comes up, we hear the boats passing by our house, getting an early start to the day.
Today was opening day of crab season for the non-commercial boats. That means people like us who own 1 or 2 crab pots and have purchased a license. The Bartender motored out about 20 minutes from the house and set our trap early this morning which resulted in 2 large “keeper” crabs a few hours later. This is as close as we ever get to being hunters or gatherers. The water was a little choppy this morning but hardly a scene from the Deadliest Catch.
In these parts, the crab is Dungeness which takes a little work in order to extract all the sweet, juicy meat but is well worth the effort. Eating this kind of crab requires an assortment of tools (crackers that can be used in the off season to crack nuts, teensie little forks, crab picks and these little zipper thingies that slice the shell). Bibs are optional. Finger bowls are recommended. And you’ll find that there are well established techniques by those that have been practicing the art of crab picking/eating for a while. Some eat a bite each time they have a forkful. Others show a great deal of patience and restraint and first pick all the meat they can, pile it into a neat little gob and then enjoy the feast unencumbered by additional stops and picks. Either way, you can be assured that there is a large amount of butter and cocktail sauce involved. But we have found that not everyone enjoys the picking aspect of the meal. They just don’t seem to find the appeal in being covered from fingertip to elbow in crab juice and shell fragments. So, for people we really like, after we cook the crabs, we’ll do all the work for them and serve it as a crab cocktail. We actually put the cocktail sauce in the bottom of the glass, which provides a little for dipping without overwhelming the sweet, yummy goodness of the crab.
Simple food. It seems to be what I always gravitate to, whether I’m planning a party for 6 or just making dinner for 2. Just as the difference between a cluttered room that causes my stress level to rise and a simple thing, like a single comfortable chair that gives me that “ahhhhh” moment, so is my feeling about fussy meals versus simple meals. To use fresh, local ingredients, prepared in a simple, flavorful way makes me relaxed. And a relaxed hostess is a happy hostess, at least in our house.
I was late to the “all organic meat” parade. But once I joined, I was a convert. It’s not a new-age, hippie-revolution, weird-science thing, regardless what some of you may think about “organic.” It makes a difference in the quality and taste of the food. Especially with chicken. You take a certified organic chicken and roast it with just a few flavors and it is a good reminder that sometimes the most gratifying meal is often the simplest.
Doesn’t a roast chicken just scream Sunday night dinner? Try it. It’s easy and oh-so-good and juicy. Just like mom used to make. Minus the dried-out breast meat.
We had one of those impromptu sort of gatherings the other day that remind me what it’s like to be a good neighbor. Okay, it was actually our sister-in-law who was the good neighbor. She is equal parts thoughtful and convivial and is always looking for a way to bring people together. So, when she heard that her friend Betty and her daughter were looking to plan a trip to Africa, she thought we should all spend some time together. We had the easy part. Just be here and be prepared to talk about the trip we’d taken to Africa a few years ago and show them our photos (at least the “friend-friendly” version that has been pared down from the nearly 5,000 photos we came home with).
I decided that since they were coming mid-morning, I should have some sort of baked good to greet them with. It felt so, I don’t know, Gone With the Wind-ish (minus the war and all the bad parts). I made lemon blueberry bread. This is just the type of recipe to have at your ready. It comes together in just a few minutes and while it bakes (for about an hour), you have time to put on lipstick, set out some napkins and make a pot of coffee. And the best part? It bakes like a bread, but tastes like a dessert. This might be a great way to say Happy Mother’s Day.
I’m wrapping up my series of Margarita Month postings with a yet another tequila-based recipe, our Top Shelf Margarita. This is actually the easiest of our margarita recipes to make, and because of its simplicity it’s the one I make most often.
I do need to point out, right up front, that we for the most part try to not be brand specific in our recipes, and that we don’t endorse specific products. But in the case of this recipe, there’s a key ingredient that, in my opinion, really makes the cocktail, and for which I haven’t found a suitable substitute…so let the endorsing begin.
A few days ago I wrote about my “signature” margarita, the one I call Shades of Taos. My goal in creating that recipe was to use only fresh-squeezed fruit and no commercial mixes. But not too long after that drink had been declared a success, a friend (and fellow tequila-lover) introduced us to Freshies brand margarita mix. At that time, Freshies was a tiny company based in Telluride, Colorado, and they’d developed a loyal following of skiers, hikers, and other outdoorsy types. And as with my hand-crafted Shades of Taos recipe, their mix’s key ingredients are lime, lemon, orange, and agave nectar, so I decided to give it a shake (pun intended, of course). Yum. The resulting margarita, after a few tweaks and happy hours (um, quality assurance cycles), was indeed reminiscent of my hand-squeezed cocktail but easier to make. A great compromise for those times when getting a lot of drinks into a lot of hands quickly is important.
Since those days Freshies has grown and become somewhat more widely available outside of Colorado. Keep an eye out for them, or check ‘em out on their website. Cheers!
Bartender’s update: We just heard from friends that you can now find Freshies margarita mix on amazon.com! Give it a try in your next margarita!
Shades (noun): A present reminder of a person or situation in the past, as in “Shades of my younger days”
After several years of serving countless blended margaritas (and single-handedly helping to fund the retirement of dozens of Jose Cuervo employees), and after developing a passion for learning to make martinis and other classic cocktails, I embarked on a quest to develop a recipe for a cocktail-style margarita. The Hostess had just given me several bottles of premium tequila for Christmas and I’d spent many evenings, unsuccessfully, pouring the “two parts tequila, one part liqueur, and lime juice” formula into my shaker, trying to hit on the concoction for a really tasty “on the rocks” margarita. And I was failing pretty miserably.
I really wanted to create a margarita that didn’t require the use of an off-the-shelf mixer. I’d experienced quite a few bottled margarita mixes over the years (including many of those advertised as “premium”) and most had resulted in artificial-tasting teeth-achingly bad margaritas. But my early home-grown versions, while at least not having an artificial tinge to their flavor, were equally bad in other ways – they were harsh, too-tart, too-boozy, and basically disappointing. So you can imagine my joy (and relief) when I finally hit on a combination of freshly-squeezed lime, lemon, and orange, a dash of agave nectar, a just-right anejo (dark) tequila, and Cointreau.
This blend proved to be perfect. Well, except that it also proved to be so smooth that over-consumption was a real threat, as we discovered one legendary evening during trip to Taos with some good friends. It was the first “public” appearance of my new creation, and before we realized it, the four of us had consumed an entire fifth of tequila and half a bottle of Cointreau while using only four lemons, four limes, four oranges, and a few dashes of agave nectar as mixer. Not pretty, and a little scary.
Somewhere during the latter part of that evening, while walking around town, the group agreed that my new margarita was a success and asked what I was going to call it. (Huh, I’d never even considered that my cocktail might need its own name.) So our “drinking team” (a group of overachievers if you’ve ever seen one) took that on as a task. But happy hour had left us in a state where, while being the most brilliant, clever, and funny four people alive, we were also well beyond the point of remembering any remotely clever name that we might have come up with. So my margarita went without a formal name for quite some time, referred to only as “those margaritas” when recalling our New Mexico road trip (the recollection usually accompanied by a slight shudder). It was months later when my drink finally got its name. We’d been invited to dinner at the home of the couple with whom we’d traveled to Taos, and they’d asked me to make “those margaritas” again. As I handed out the first round, by way of a toast I said, “Shades of Taos!” as a reminder of the last time we’d enjoyed this cocktail together. And the name stuck.
The Shades of Taos margarita is at its best when you use the very best quality citrus fruit; it’s critical that the limes, lemons, and oranges are ripe and soft so that they yield the most juice possible. You’ll be amazed at the smoothness of this margarita. I suggest having a designated driver on hand if walking them off in a quaint New Mexico town isn’t a realistic option.
There’s something about that first really nice spring day. Not that day where there’s still a chill in the air in spite of the sun being out, when you think it just might be warm enough to get by without a jacket but every light breeze convinces you otherwise. No, I’m talking about that one day, when the sun breaks out early enough to really cut through the coolness of late winter, and it stays warm even as afternoon turns into evening, and there’s just something about the way it feels, the way it smells, that causes your subconscious to suddenly decide that it’s summertime. Fleeting thoughts of barbecues, beach parties, and happy hours on the patio suddenly flood your mind as if they’d happened only yesterday, and your spirit fills with happiness and optimism for the coming warm and carefree days. If you live as we do in a place with fickle weather, this first really nice day is all the more special: Knowing it’s only a cruel tease, you savor every minute to help carry those warm feelings with you through the chilly weeks ahead.
I contend that the margarita exists specifically for the purpose of helping inspire those warm feelings of lazy summer days. Maybe it’s the result of good marketing by the tequila industry, but when I think of a margarita, I feel the same emotions that are triggered by that first nice spring day.
Of course, the margarita will also always remind me of my very earliest experiences as a bartender, when the Hostess and I became somewhat notorious for serving blended margaritas at various functions for our extended “corporate family” after a work-related relocation took us to a different part of the country. Back then we re-purposed a vintage airline ski boot bag into a travel case for an almost-vintage blender. And over the years our “blender well traveled” mixed many a margarita for friends and acquaintances in kitchens, family rooms, and ski condos throughout the Rocky Mountain area. (As a side note, this also reminds me of the many dangers of over-serving: One of our fellow partiers, years after spectacularly purging several helpings of my margaritas, unfortunately became the senior manager over my organization at work. Having been the server, and first-hand witness, at this event was likely a career-limiting move on my part). As my friends now hear as I hand them a cocktail, “Respect the Drink…”
But I digress. There are many of you who’ve probably been wondering why it’s taken me so long to get around to writing a tequila post, so without further ado (and just in time for Cinco de Mayo) over the next few days I’ll be posting several of our favorite margarita recipes. Whether you prefer rocks or blended, salted or not, there’s something here for everyone. For starters, here’s the recipe for our Blended Gold Margarita. Stay tuned for the next round!
The truth is I don’t make cakes very often. And the reasons are pretty simple. First, a big cake goes a long way, and unless there are several people indulging, it seems a little like overkill to me. And, second, unlike some desserts, there isn’t a good way to test it before serving it to guests. And that always makes me slightly nervous.
But I was asked to bring a chocolate dessert to a birthday dinner party lately (specifically chocolate, for the birthday boy), and I immediately thought of a cake that I had seen in my Pastry Queen cookbook at one time. It’s called a Tuxedo Cake and it seemed to be the right thing for the party.
It wasn’t a quick cake to make. From start to finish, it probably took over 3 hours. But let me just say this. Best. Cake. Ever. One of the guests said more than once, “I don’t really care for cake. But I want to eat that whole thing.” It was really that good.
I ended up using parts from 3 different recipes. While the traditional Tuxedo Cake calls for a whipped cream frosting, I wasn’t sure I could keep the cake refrigerated and was afraid that the whipped cream would break down a little between prep and serving. The Swiss Meringue Buttercream turned out to be a great frosting for the deep, dark chocolate cake. It isn’t as sweet as some frosting but it can hold it’s own against a strong star, like the cake. I had wanted to make this frosting for a while but had been a little (okay, a lot) intimidated by all the woeful stories I had read about people’s attempts, and failures, at making this frosting. (Perhaps it was the consistent use of the term “curdles” that caused my alarm.) But armed with some good tips from Epicurious.com, I chanced it. And I’m so glad I did. Finally, while Tuxedo Cakes are generously covered with the ganache, I found that I only needed about half of the recipe to get the coverage I wanted.
Now I’m just sitting here hoping someone calls and invites us to some get-together and asks me to bring a chocolate cake so I can make this one again.
I’ve posted quite a few of my favorite drink recipes since the launch of our blog a few months ago. Up to this point my focus has been on cocktails, so my recipes have generally followed the classic cocktail formula of two parts base liquor, one part liqueur, and mixer such as fresh-squeezed citrus fruit. I haven’t yet written about the more basic mixed drinks because, well, how tough is it to pour a slug of booze over ice and then top up the glass with mixer? Does anyone really need a recipe to make a decent vodka and cranberry? Bourbon and ginger ale? Rum and Coke? I think you get the idea. Recently, though, the Hostess and I were laughing about a New Year’s resolution she made a couple years ago, and I decided the time is right to talk about my favorite of all mixed drinks, the gin and tonic.
In the 20+ years we’ve been together, I’d never known the Hostess to drink gin. Gin, like so many things, is an acquired taste and it’s not for everyone. But we do know many people, myself included, who really like it. Especially in the form of a martini. And for whatever reason a couple of years ago, the Hostess started feeling left out of the gin party. It seemed everywhere we went people were ordering gin martinis. That’s when she announced that she was going to attempt to learn to drink gin, and she (jokingly, I think) made it her resolution for the coming year. And so it was, the following spring while on an African safari, that she decided it was time to take the plunge. During happy hour one evening in the bar of a modernized version of a British colonial hunting lodge, it seemed only fitting that we order a round of gin and tonics. After all, it was the Brits stationed in the 19th century colonies of Africa and India who first used gin to help smooth the nasty taste of the quinine tonic they regularly drank as a malaria remedy, thus inventing this popular drink. And it’s probably no coincidence that the tonic water commonly served in Africa (McKane tonic water, brewed and bottled in Namibia) tasted far superior to the brands we’re used to here in the U.S.
Honestly, I expected the Hostess to dislike the G&T as gin can be a pretty big step for someone who prefers vodka, even if a gin and tonic is kind of like gin with training wheels. But at the very first sip she proclaimed it “not bad.” She quickly acquired a taste for gin and has ordered it frequently ever since. Now that’s a successful New Year’s resolution!
Back home, and without the benefit of McKane tonic water (why doesn’t anyone import this stuff??), I had to experiment with the ingredients and proportions a bit to find a mix that the Hostess likes as much as the ones she learned to drink “in the colonies.” Her favorite recipe starts with a squeeze of lime over the ice before adding the gin (she prefers Tanqueray) so that there’s a good amount of lime juice mixed in right from the start in addition to the lime wedge garnish. It’s surprising what a difference the extra bit of lime makes. And we were both perfectly happy with our stateside recipe until, while on a recent ski trip to Jackson Hole (oh the places we go in the name of field research), the barkeep brought out a bottle of tonic water we’d never seen before: Fever-Tree, a small batch, natural, premium tonic water from Britain (named after the tree whose bark is the source of quinine). Our bartender didn’t have any information on where to find this brand, but the company’s website said it was available on Amazon.com. A few clicks later and a large box showed up on our doorstep. Is this a great world or what?
So now we can create our very own properly British, and completely delicious, gin and tonic. Although I do still occasionally check McKane’s website to see if a U.S.importer has picked them up…
Let’s be honest here. If it weren’t for our daughter’s refusal to eat pancakes made from Bisquick when she was a little girl, I probably wouldn’t have come up with a recipe to make them from scratch. The ones from the box always seemed fine to me. Leave it to the discerning tastes of a 5-year old to convince me otherwise.
In our house, the luxury of a full breakfast has always been something reserved for weekends. Especially when we were working full-time, we just never took the time during the week to deal with the preparation, and mess, of making breakfast. We still don’t make it everyday, but now we’ve found that when guests stay over, many times we make breakfast (or “brunch,” if we’re slow to get moving) in the morning. Thanks to this recipe, pancakes are now one of the mainstays of our breakfast routine. And when I realized that making them from scratch is not much more work than using the mix, it made me wonder why I didn’t do it all along.
Although Mom used to use Bisquick, which I no longer do, it is her technique for cooking pancakes that I still use. Using the tines of a fork, she used to spread a glob of Crisco over the surface of the pan (which was usually her cast iron skillet) each time she added batter to the pan. I’ve tried other things, like butter and oil, but nothing else provides the crispy edges quite like an ample dollop of Crisco does.
Recently, our friends were here with their two young sons. The boys desperately wanted to try and make a pancake bigger than the one they made last year while visiting. (And, at one point they thought they should try and beat the world’s record for largest pancake. Thankfully, they abandoned that idea when a Google search revealed that the record-holding pancake was more than 4′ in diameter.) Instead, they made one that was about 12″ in diameter. It took 2 adults and several spatulas to flip that sucker, and the wall behind the stove wore some evidence of the attempt, but all in all it was successful.
Besides using Crisco, the other thing we’ve discovered when making these is that it’s better to add the blueberries (if you’re using them) to the pancake after you’ve poured a pancake’s worth of batter onto the griddle. If you mix them into the batter, it tends to make a purple batter. Just pour some batter and then sprinkle a few berries on top, before flipping.
Last week would’ve been my dad’s 95th birthday. In his memory, and to celebrate his birthday, I decided to make his favorite pie: coconut cream. Which means this is the next installment of the The Great Pie Challenge (TGPC) here in the Entertaining Couple’s kitchen.
The first pie I made last week was a throw-away. I mean, dump-in-the-garbage-can kind of throw-away. There were basically two things wrong with it. First, I didn’t roll the crust thin enough which resulted in (yet again) too much crust for the filling. I could’ve lived with that had it not been for the second problem. The half and half I used had apparently gone bad. Even though the date on the carton indicated that it was good for another few weeks, the cream inside didn’t get the message. One taste and we both knew it was bad. So into the garbage can my sour, overly-crusted pie went.
Since we had friends coming for a visit, I turned right around and made a second pie. It tasted great! And it looked pretty good. But despite my best efforts with baking an unfilled pie crust (often referred to as blind baking, which somehow seems appropriate to me), I was still getting a pie crust with air bubbles and some shrinkage. My crimped edge lost its definition. So I finally cried “Uncle” and ordered some pie weights.
Which brings me to last week’s Pie #3. The dough was a great consistency when I took it out of the food processor and shaped it into a disk. I put it in the refrigerator for an hour. When I rolled it out, it was still working okay. But when I attempted to lift it into the pie pan, things went downhill. The dough was breaking, not stretching like it should. I dumped it back onto my floured surface, made a new ball and re-rolled it. The second time it worked better, but not perfectly.
I’m not really a “if at first you don’t succeed, try, try, try again” kind of person. I’m more of a “if at first I don’t succeed, try again; get discouraged and then really have to talk myself into trying one more time” kind of person.
I just keep looking at this process and, quite frankly, am absolutely astonished that I’m having so much difficulty with it. I mean, it’s flour, Crisco and water, for god’s sake. How difficult can this be? Well, if my attempts are any kind of proof, the answer is “plenty.”
As I attempted to make Dad’s pie, I kept thinking about those women (and men) who enter their pies at the state fairs and come home with blue ribbons. I looked at my poor, tattered pie crust as it lay waiting in the pie pan and the thought of anyone viewing it, much less judging it, actually made me laugh. Which is pretty amazing given that in situations like that I would normally be closer to tears than laughter.
So it wasn’t perfect. What the heck. I’d be serving it to friends and to my husband, not entering it into any contest. The same people would be eating it that, on a daily basis, I am grateful for because they overlook my flaws and love me, imperfections and all. These people are the ones who teach me that I judge myself much more harshly than they ever would. So it would be with my pie. Maybe it’s not the prettiest thing to look at. But looking at my pie was a good reminder that there is so much more that matters than looks. At the end of the day, I think Dad would’ve been pleased with his pie.
Hostess Note: Many recipes for coconut cream pies call for covering the entire pie with whipped cream. This is how you’ll see it many times in restaurants. I didn’t do that with this pie because (a) Dad never ate his pie that way and (b) we have one of those whipping cream dispensers and we have found that our guests really, really like to add their own (plentiful dollop) of whipped cream to their own desserts.
It’s early March. In many parts of the country, that means there are starting to be hints that spring is in the air. Here, in the mountains? Not so much. We’ve been watching it snow all morning. We have about 10″ of new snow in the yard. It’s beautiful, to say the least. But it’s definitely not spring. Regardless of what the calendar says, it is still very much winter here.
We eat differently in the winter than we do, say, in the summer. Hearty, stick-to-your-ribs food, served with robust red wine, somehow seems appropriate when the temperatures are low and the snow accumulation is knee-deep. This winter, beef stroganoff has become one my go-to dishes when friends are in town. It’s super easy to make but it’s one of those dishes that tastes and presents like you went to a whole lot of trouble.
This is one of my favorites. Which is a remarkable statement for me, given that I don’t like mushrooms. I can’t think of many situations where I’d actually eat a mushroom, except in this dish. I’m not sure where my aversion to them started. Maybe because they are also known as toadstools. Okay, not very appetizing. Or because they are fungus. Okay, absolutely not appetizing. All I can think is that they grew everywhere where I grew up (Seattle) and I’d walk through the grass kicking them with my little saddle shoes. I just never looked down and thought, “Gee, I’d love to eat one of those.” Until now. This recipe has converted me. At least to the point where I’ll eat a mushroom if it comes to the party with top sirloin, beef broth, butter and onions as its date.
Sometimes it just starts with a hankering. And many times, as in this case, I really don’t even know where the desire came from. I just woke up one day and wanted orange rolls. I was actually pretty sure that I had a recipe and that I had made them before. But I couldn’t find anything in my notebook, so I had to get creative.
Since my mom’s cinnamon roll recipe makes such a good dough, I decided to start with that. Then, I just adjusted the filling (substituted white sugar for brown and orange zest for the cinnamon). And I tweaked the frosting, as well, to give it a taste of orange.
And, I don’t mean to brag, but holy cow these rolls are good! The term that comes to mind is scrump-dilly-icious! Thankfully I only made half a recipe because we managed to polish off the entire batch of rolls in just a couple of days. And there were just two of us doing the polishing.
I have no intention of replacing cinnamon rolls in my diet. But these zesty rolls provide a nice alternative, in case any of you are finding that a cinnamon-only diet is rather dull.
Hostess Hint: There are many suggested ways to zest an orange. My lack of patience makes the idea of first peeling an orange and then dicing the peel into a zest, well, beyond my tolerance. When something starts to look like a pain in the patootie, I usually bail. So, my preferred method is to use a microplane grater. Because of the oil, zest can be kind of sticky. I grate it onto a piece of wax paper and then sprinkle it on the dough from that. Or, if you find sprinkling the zest a bit challenging, then you can mix the butter, sugar and zest together in a bowl first and then spread the mixture over the dough.
I’ve spent a fair bit of time around pastries. Probably more time consuming them than preparing them, but still enough time to know a good one when I eat it. So, if you’re like me and are somewhat of a pastry aficionado, you’re probably familiar with Red Velvet. It shows up frequently on menus and and in bakeries. The original recipes seem to date back to the 1800’s, although I’m guessing that, by name alone, it got a bad rap during the “red dye #6 scare” in the 50’s. However, Red Velvet seems to have survived time and the FDA and has kept its rightful place as a well-loved dessert. If you’re interested in the colorful (no pun intended) history of the cake, you can read it here.
When it comes to cake, I’m a firm believer that cake simply exists because it is a more socially acceptable way to eat frosting than with a spoon. That’s probably why I like mini-cupcakes. The cake to frosting ratio is a pleasing proportion for a frosting enthusiast like me. It seems that the original recipes for Red Velvet Cake called for an ermine or boiled milk frosting which I’m curious to try sometime when I’m playing bakeress in the kitchen, although quite frankly neither name does much to entice me. (Ermine? Really? What marketing genius decided that was the perfect name for a frosting?) Regardless, for my Red Velvet Cupcakes, I use a cream cheese frosting.
But even with enough frosting, if the cake is dry and bland, there’s just really no point in it. Velvet, as in Red Velvet, supposedly refers to the velvety crumb of the cake. A moist, chocolate-y cake with cream cheese frosting. The red is really just a little bling to make it the star of the party.
February 6th, 2013 | By: Hostess | Category: Pasta
This is not your kids’ mac and cheese. This is an I’m-all-grown-up, serve-me-with-wine, call-me-pasta-not-macaroni kind of dish. This is a perfect example of how food doesn’t have to be fussy or complicated to be good. Serve it to guests without apology.
Check out our recipe, and follow the easy steps below to make the best mac and cheese:
Comfort food. Even the name conjures up a happy place. It’s the kind of food we want to eat when we want to feel good. Yet it seems that comfort food has to fight for its rightful place at the dinner party table. For some reason, many of us feel the need to serve shi-shi food to guests (“Look at the fancy meal I prepared for you!”) and overlook some of the best food out there, that can nourish, comfort and impress. I think about how much effort we put into ensuring our guests feel comfortable in our home. It just seems like comfort food is an obvious extension of that message. One of the “new” restaurants in town (that opened a couple of years ago) serves good, home-cooked food, like meatloaf and mashed potatoes. If you don’t get there early, you won’t get a table. Locals love the restaurant and the food on their menu. We love that we don’t have to get all gussied up to go there and we feel good when we leave. That’s how I want our guests to feel about our home.
This recipe for chicken potpie was adapted from the Marshall Field’s Cookbook. Growing up in Seattle, I was very familiar with Frederick & Nelson, which was a division of the Marshall Field’s in Chicago. It was the kind of department store that made shopping feel like a special experience. Parents flocked there at Christmas to get their kids’ pictures taken with the Santa. Brides-to-be ordered their mints from there, because they could be dyed to match the wedding colors. They had a hat department, and the hats went home in hat boxes when you bought them. It was the type of store where a voice in the elevators announced “4th floor, Women’s Lingerie.” My mom loved Frederick & Nelson’s, and we were all a little sad when it went out of business in the early 90’s. The Marshall Field’s Cookbook is no longer in print, but I was able to find a used copy on Amazon. It’s full of great recipes that were served in their dining room. The chicken potpie was one of their most popular dishes on the menu over the years.
I love this recipe. And the times we’ve served it to guests, they have loved it, too. Some variation of the recipe has been around for over 100 years in one of the most iconic dining rooms in the country, so it seems like it has the credentials to proudly attend any dinner party. With or without the good china and silver. Good food made from scratch. If that doesn’t say, “Welcome to our home,” I don’t know what does.
Hostess’ notes:
If you’re afraid of making your own dough, give this recipe a try. I’ve had good luck with it and found it to be user-friendly. Here are some tips for making it work:
I found a plastic lid that’s slightly larger than the ramekins. I use this to cut the top crust.
When I flute the edges, I press my thumb against the edge to help seal the crust to the ramekin.
A quick brush of the egg wash and they’re ready for the oven!
I never really considered how the phrase, “Necessity is the mother of invention,” might apply to bartending. But a few weeks ago, while visiting our son and daughter-in-law, we came home from an afternoon of shopping (which happened to include a trip to the liquor store) and, as I laid out the ingredients to make my classic Lemon Drops, I realized – horror of horrors – that I’d forgotten to buy lemons! Fortunately, the Hostess talked me back down off the window ledge and suggested that, rather than scrap the Lemon Drops altogether, I could improvise and try using some of the tangerines that were in a bowl nearby. I was pretty sure it wouldn’t work (yeah, I sometimes don’t roll with change very well) but I went for it anyway…and damn if we didn’t end up inventing a pretty decent cocktail!
I did have some justification for my hesitation at altering my usual recipe. What makes a Lemon Drop so good is the freshly-squeezed lemon juice. The lemon gives the cocktail a nice tart bite that complements the sweetness of the Cointreau and the lemonade. I find tangerines to be more sweet than tart so was concerned that they wouldn’t measure up as a substitute for lemons. To give them a fighting chance, I tried squeezing in an entire tangerine where I’d normally only use half of a lemon. Wintertime tangerines (often sold as “Clementines” or “Cuties”) are seedless and super-juicy, and they gave the cocktail a rich orangey color along with a smooth and refreshing flavor that, surprisingly, was the perfect balance between sweet and sour. I’m declaring the recipe a success!
So, in addition to being change-averse, I’m also not very creative when it comes to naming things. The Hostess has suggested “Tangerini,” but since my goal hadn’t been to highlight the tangerine’s flavor (I’ll attempt that soon with a tangerine martini, and will report on it in a future post), I’m calling this the Tangerine Lemon Drop. Clever, huh?
We tend to be late adopters in general. You’ll probably never hear about some new technique or gadget here first. We sit happily on the sidelines watching and observing to make sure something is really valid before we jump in and start using it. But, when we do finally embrace something, rest assured we’ll holler from the rooftops with a level of gusto that will suggest anyone who has not yet jumped on the bandwagon is surely missing something big.
So it was with brining meat.
I just never really got the concept of brining. When people would explain it to me, they always sort of lost me after “salt.” What I didn’t realize, until experiencing the process for myself, is that when done correctly, the salt preserves the moisture and tenderness in the meat without making the meat saltier. Salt, when introduced to meat through a proper brining process, works to increase the moisture holding capacity of the meat, and also serves to help the meat absorb the seasonings from the brine mixture.
Our foray into brining started innocently enough. One day I returned from the grocery store with these nice, thick “center cut rib pork chops.” Because of the word “rib,” I had assumed they were just big, meaty pork ribs, and that we would cook them like we normally cook ribs. It was the Bartender that pointed out that they weren’t actually ribs but rather thick chops. And we had our dilemma.
The challenge was rooted in my childhood, as so many things are. My mom, being a mother in the 50’s and 60’s, had a propensity for over-cooking pork chops. It wasn’t her fault, really. She had been warned of the perils of eating under-cooked pork, and she was not going to be responsible for subjecting her family to what probably seemed like a fate worse than death: worms. I don’t know if people in those days actually got sick from under-cooked pork, but it was clear that my mother was not going to take the chance. She cooked pork chops to the point where a cobbler could have re-soled our shoes with them. But I should appreciate her effort. We never got worms.
So, I just grew up thinking that pork chops were something to be avoided, at all costs, unless of course I was craving a pork jerky of some sort. Hence the quandary with this large, family pack of pork chops now sitting in our refrigerator. I needed a plan. I started where I often do when I have a problem to solve: on the internet. Researching “how to cook a moist pork chop” I stumbled across all kinds of information about brining meat. And also about how today’s pork can safely be served at lower temperatures than when we were kids. My thoughts about both pork chops and brining started to shift.
As I started my journey down the brining path, I learned that brining meats is all the rage now in professional kitchens. Who knew? And, that the results are even better when the meat is cooked on a covered barbecue, which was great news because it meant I could delegate the cooking to the Bartender. The process is actually quite simple, which was also a plus.
There are just a couple of basic rules to keep in mind when brining. First, there is actually an optimal amount of time for brining pork chops. While opinions on perfect time vary slightly by recipe and source, we went with the 10 – 12 hour recommendation and found that worked well. (If you allow the pork chops to brine longer, they will actually start to absorb the salt and before you know it you’ll have ham.) Second, the brine needs to be completely cool before adding it to the meat. So you’ll need to plan ahead a little. If you’re pressed for time, you can use an ice bath to speed things along. Once brined, you can refrigerate the pork chops for several days before cooking, which for this Hostess is an ideal “make ahead” kind of thing. And, while I’m sure the process would work for any pork chops, we’ve always used the thick cut chops and have had great results (and rave reviews) each time. Finally, as with many recipes, don’t confuse kosher salt with table salt.
These pork chops have become one of our favorite dinner party main dishes.
It’s not that I’m really a perfectionist, but I don’t like making mistakes. I mean, really, who does? But I wanted to let you know that the original recipe we posted for chili was not correct. I’m not even sure how that version got drafted. At any rate, the correct version is now posted.
The good news with all of this is that it gives us the opportunity to re-post the recipe. The temperatures here have hovered around frigid now for a couple of weeks and there’s nothing like a good, robust chili to warm one from the inside out. I started a batch of chili yesterday, and then we went for a snowshoe while our dinner stewed a bit. I was so happy to come in from the cold and have a hot bowl of chili (and a cold beer!) waiting for me. And, this chili freezes really well. Which means all the work is done so there’s nothing else to do but re-heat and enjoy.
Thanks again to our friend Kent for providing the inspiration for this recipe.
When happy hour approaches and I ask our guests if I can shake them up a little something at the bar, a response I often get is, “Sure! What are you having?” Often, especially if it’s a big group, I’ll stick with one of my standard crowd pleasers so I can make a big batch and fill a lot of glasses quickly. But sometimes, when the mood is just right, I may suggest something more risky, something with a more complicated flavor that may, or may not, prove to be a hit. The Aviation is just such a drink.
The Aviation is most definitely for you gin martini lovers. When you’re looking for an unconventional twist on your martini, check out this pre-prohibition classic. It’s a refreshing combination of a stiff pour of gin, a squeeze of fresh lemon, and a splash of a clear, complex 19th-century liqueur derived from sour Marasca cherries. I came across the recipe for the Aviation years ago in Paul Harrington’s cocktail book (read more about it in my earlier post) in which he calls it “the prince of classic cocktails.” The drink caught my eye as one of the gin-based cocktails in the book that seemed simple to make. Probably the hardest part was finding a bottle of Maraschino liqueur. It seems like only the larger liquor stores carry it, and it’s usually hanging out on the bottom shelf, a few rows below the Goldschläger and Jägermeister (look for a tall green bottle wrapped in straw lattice). The cocktail’s name has always thrown me a bit. Why not something more, I don’t know, singular – like “Aviator” or “Airplane” – instead of naming the drink after a concept or profession or industry or whatever. Word has it that when the cocktail was invented in the early 1900’s, manned flight was in its infancy and the drink’s name was meant to evoke the excitement and futurism of the aviation industry. Maybe it’s just me, but that seems a little bit like if someone had named a cocktail “Social Networking” a few years ago. Something doesn’t ring quite right when I say, “Here, try an Aviation!”
Anyway, it’s a damn fine cocktail regardless of its name. It smacks you with the perfect balance of gin’s herbal bite, lemon’s sour tang, and the not quite sweet, not quite bitter, incredibly intriguing flavor of the Maraschino liqueur. To borrow a quote from Paul Harrington’s book: “The most wonderful thing about this drink? It makes you smarter. Trust us.”
Drink this one with caution, it packs a serious punch that has caught me by surprise more than once. I can attest that smarter is not always better.
First there was Cracker Jacks. Followed by Fiddle Faddle. And then Kettle Corn. A distinct evolutionary track of my caramel corn addiction. There is just something about the perfect combination of sweet and salty that I can’t seem to resist. If only Brussels sprouts could have that effect on me.
Honestly, I’d never bothered to try and make caramel corn at home before. The whole “making caramel” thing was slightly intimidating to me for some reason, probably because it involves boiling corn syrup and sugar to the just-right stage of caramelization. That just seemed like a level of precision that was beyond my level of competency and desire. And I had heard too many stories about failed attempts by others. But it became a curiosity and desire for me when my sister-in-law, Lisa, kept asking if I had a recipe for caramel corn, so I decided to try it out for myself.
I had several recipes for caramel corn that I had cut out over the years in my expansive “to try” file. I was happy to see that none of the recipes required the use of a candy thermometer, because that seemed to simplify things. The recipe that I ended up using was a modified version of Kendall-Jackson’s Double Gold Caramel Corn, which they tout as a perfect snack pairing with one of their Chardonnays. I think “Chardonnay” was probably the selling point for me, so I tried it. The results were good, but I ended up making it again a few days later and increasing the recipe for the caramel which provided more caramel coating. The popcorn just seemed to need a little more coating to hold it all together, probably due to the addition of the nuts. The result is a sweet and salty caramel corn that we’re finding to be a little addictive. We’ve easily worked our way through two large containers of it in just a few days.
There is a season of giving. A season of hope. We all know about football season and the season of change. Even Audi has its own event season. But for us, the most marked season is the season of entertaining, which is just about to kick off in earnest. And, as it turns out, it happens to coincides with ski season.
Last winter, over the course of 25 weeks, we entertained a total of 26 guests for an average of 3 days each. We had several guests that stayed for a week. Besides breakfasts and lunches, think of it as hosting 21 dinner parties in 3 months.
And, according to our calendar, this year will be no different.
Now, don’t get me wrong. We live for this. We invite this. When we built this house, we envisioned this and operated under the mantra “If we build it, they will come.” We’ve now been here long enough that we have more repeat visitors than new visitors. They come to ski, they come to eat, they come to drink and they come just to hang out. In many cases, it’s the adult’s turn at a slumber party. And with each round of guests, it seems, new laughs are had and new memories are made.
Our guests often request certain meals or call for one of the many adult beverages for which Bartender is famous, which is great. It’s flattering and frankly simplifies things from a planning perspective. But we also try and serve different things as well, just to keep ’em guessing. I keep an entertaining diary to keep it all straight. What we served, what people liked, what foods people won’t or can’t eat. I sit down at the beginning of the season and plot out menus. Last year one of our dear friends opted to celebrate her birthday here, so we asked her wanted she wanted to eat for her celebration dinner. (Her choice was Italian, which was good news. If she had said “sushi,” since we have no idea how to prepare it, dinner may have looked more like fish sticks.) But most times the choices are left to us.
We have many, many recipes that we rely on to run what sometimes feels like a B&B,L,D (bed and breakfast, lunch and dinner). As you know, we don’t post any recipes here that haven’t been road tested at least once. And entertaining season is where recipes earn their stripes. One of our recipes, for buttermilk pancakes, has become a standard breakfast offering when entertaining becomes more than just a dinner party. And it’s one of the reasons I always have a container of buttermilk in the refrigerator.
1. Rice and cheese. Okay, technically that’s two reasons, but it’s because this dish is a combination of rice and cheese that makes it so ridiculously good. For those of us that like dishes that combine the two perfect foods of starch and cheese, this is a nice alternative to macaroni and cheese.
2. This risotto also has butter and peas. Maybe not exactly fat free, but then again, it’s not supposed to be, which is another reason to love it.
3. It’s made with wine. Which means you need to open a bottle of wine. Which means you stand there, making the risotto, while sipping wine. It’s the kind of cooking one should do while drinking a glass of wine. Or two. What’s not to love.
4. You can’t rush the process. And in this world of microwaves and the internet, it’s nice to have something that forces us to slow down, just a little, and enjoy the process. I love standing over my stove, sipping wine, and creating risotto. And the results are so worth it. But with that said, …
5. You can walk in the door and be serving risotto an hour later.
6. You can have everything on hand and make it without much planning or forethought. A lot of the ingredients are non-perishable and others have a long shelf life, so without turning into a paranoid stockpiler, you may already have frozen peas in the freezer, a bottle of wine anywhere, and parmesan cheese in the refrigerator, which means you can make this risotto whenever the urge hits.
7. It plays well with others. This goes well with fish, poultry, beef, pork or lamb. It can be the Boy Wonder side kick to any Batman main dish you serve.
8. There are many variations and easy substitutes. Don’t have peas? You can use asparagus. Like mushrooms? Use those. Leftover veggies? Toss them in. The pot of rice can become your own blank canvas if you feel the need to be creative.
9. My copper risotto pan. It’s the only copper pan I own, but I do love it. You can use any large frying pan or saucepan with high edges.
10. It seems difficult to make and it’s so not. It seems like something a “chef” would make but it’s easy enough for someone who is just a cook, like me. Besides the time that’s involved, it’s really very simple but with results that impress.
So, go ahead, make some risotto today and enjoy all the reasons it will make you happy.
A few years back, The Hostess and I vacationed with friends for a couple weeks on Italy’s Amalfi Coast. We knew to expect good food as that region is well-known for its simple, rustic recipes made with the freshest regional ingredients. But we had no idea what an understatement good food is when you apply that term to the Amalfi region. “Where are we going to eat next?” became something we started asking as soon as we’d licked our plates clean from the previous meal.
I realized I’d fallen off the caloric deep end when, a week into the trip, some of my clothes were no longer fitting. The temptation behind my total loss of self control was the combination of fresh mozzarella, tomatoes, and basil known as “caprese” (literally, “from Capri”). I’ve always been a sucker for a good tomato and mozzarella salad, but nothing prepared me for just how delicious that combination would taste in the region of Italy where it was born. I didn’t need to understand Italian to hear caprese beckoning me from every restaurant doorway. Caprese sandwiches, caprese pasta, caprese salad, I ate them all with reckless abandon. And the most irresistible form of caprese proved to be Pizza Margherita.
Legend has it that the Margherita pizza was named for Queen Margherita who, during a visit to Naples in the late 19th century, favored it because the three toppings evoked for her the green/white/red colors of the Italian flag. We found Pizza Margherita literally everywhere. Even at truck stops. (Where, on our first morning in the country, we observed two little old ladies eating it for brunch. They each folded a huge slice in half and ate it like a sandwich.) Possibly the best one I enjoyed was in a café just outside the entrance to the ruins of Pompeii, where they let us park in their lot for free if we agreed to eat lunch there. My mouth still waters when I think of it.
I returned from Italy twelve pounds heavier and with a determination to learn how to make my own Margherita pizza at home. The simplicity of the ingredients made this look to be pretty straightforward. I’d never used fresh mozzarella on a pizza before, but it was easy enough to find in the deli section of most grocery stores. Same with fresh basil leaves. I expected that the biggest challenge would be finding an appropriate tomato sauce, since the authentic Italian topping is more tomato-y and less sauce-y, but I quickly found a very satisfactory brand of canned “organic crushed tomatoes.” And I’d actually been making homemade pizza for years, using a handmade crust that was based on an old Betty Crocker recipe from my childhood. But it was the crust that tripped me up. The pizzas we’d enjoyed in Italy had a crust that was crispy and light while still having a hearty chewiness to it. Suffice it to say that it took me dozens of pizzas and numerous tweaks and fiddles before I found a combination of ingredients and process that I think is close to authentic. I must admit that I now use a bread machine rather than hand-kneeding. And while more authentic recipes require that the dough rest in the refrigerator for at least a day or two, my recipe shortens the entire process to less than three hours so that I can have my pizza on the same day that the cravings hit. I’ll also acknowledge Alton Brown, as it was his recipe that finally unlocked some of the secrets for me. Finally, until the day that I have my own dedicated pizza oven (preferably wood-fired!), I’ll never again make a pizza without using a pizza stone. That’s the only way I’ve found to get the perfect combination of crisp and chewy.
Now I can make pizza that reminds me of that parking lot café at Pompeii whenever I get the urge. In moderation, of course.
Also, I’m using the festive red-and-green color of this pizza as my excuse for posting the recipe right in the middle of the Christmas holiday. Serve it as a delicious break from the traditional holiday fare, then enjoy it throughout the year!
With the holidays coming on, it only seems right to pay homage to the Cosmopolitan. This crowd-pleasing cranberry-hued cocktail is one of the easiest martini-style drinks to mix, and its flavor and appearance make it the perfect holiday libation. Because it’s easy to make, but impressive to serve, you may want to make this your signature cocktail at your holiday party. Shake up a big batch and I guarantee you won’t have any leftovers.
Google “Cosmopolitan recipe” today and you’ll get over 3 million hits. Everyone seems to have their own unique take on the ingredients. We’ve sampled quite a few variations, and in my opinion there is only one way to make a proper Cosmopolitan. Use a top-quality, unflavored vodka. Don’t use triple sec; Cointreau is a must. And leave the Rose’s Lime Juice on the shelf. Any cocktail I’ve ever made using Rose’s tastes SO much better when I squeeze in a fresh lime instead…and that’s possibly never been more true than in the Cosmopolitan.
The Cosmo attained a bit of “fern bar” stigma when its popularity skyrocketed about 15 years ago thanks to a TV series. I’ve known people who avoid ordering them because they think they’re cliché, which really is a shame for such an impressive cocktail. If you’ve never tried one, do it. You owe it to yourself to experience the incredible balance of sour-sweet-bitter flavors. The pinkish drink looks like it will be overly sweet, but it will surprise you. If you do prefer a sweeter taste, try sugaring the rim of your martini glass. And, if you’re intimidated by the color, because it looks too girly, you may just want to man-up and get over it.
Before there was Cinnabon’s, there was my mom. Growing up, we never bought cinnamon rolls at the mall. Our cinnamon rolls started in mom’s bread bowl and ended in her oven. She would make them on Christmas morning and my memories of her rolls are firmly planted in my consciousness. Just the smell of the milk, butter and sugar mixture warming on the stove reminds me of her rolls.
I’ve carried on the tradition over the years. Although I use a bread maker to mix and knead the dough, which frankly feels a teensie bit like cheating to me. I overcome the guilt by telling myself that I am, after all, making homemade rolls. Which in some cultures is reason for reverence, I believe. While Mom would make the dough and shape the rolls the night before, I haven’t gotten to the point where I trust the refrigerator with my dough. So, there have been many Christmas mornings when I’ve gotten up at 4:00 AM to start the bread machine. In both cases, the goal is to have freshly baked rolls for Christmas morning. And few things, I think, make a place smell better than cinnamon rolls baking in the oven. But, as we’ve seen in the mall, these are not just reserved for the holidays. Few things will say “good morning” to overnight guests quite like a homemade cinnamon roll.
Mom never frosted her cinnamon rolls but I do frost mine. Because, honestly, frosting has been robbed of its rightful place in the food pyramid as one of the major food groups.
I should start by saying that I’m not one of those people that goes berserk over celebrities. While I can think of a few A-listers that I would be thrilled to have at one of our dinner parties (Ellen, or Tom Hanks, for instance), I feel that way because I think they’d be fun to talk with, not because of their star power. If I ran into them in the grocery store, I wouldn’t ask them for an autograph; that’s just not my thing. Which I find somewhat ironic because, for some reason, I have met, or at least seen, a lot of celebrities in my time. (All of our friends have grown quite weary of our over-told story about how we spent an entire evening drinking margaritas with Kathy Bates. But it’s one of our favorite stories, so maybe we’ll share it on Entertaining Couple sometime.) So, given all of this, it’s a little amusing to me that I sorta kinda have a celebrity crush on Tyler Florence. There’s just something about him that trips my trigger. So, I’ve awarded him the high honor of My Favorite Celebrity Chef. Hands down, if I went into a grocery store and came across Tyler, Rachel Ray, Paula Dean AND Guy Fieri all standing around picking out tomatoes together, Tyler is the one I’d ask to come to my house and cook something for me to eat. And I wouldn’t mind if he brought his super-attractive, cool wife with him.
In my well-tattered copy of his cookbook, Dinners At My Place, he has a recipe for a chicken meatball and tortellini soup. First time I came across this recipe, I wanted to make it in my own soup pot. But of course didn’t have the gumption to actually make the meatballs. Or the homemade broth. So, this recipe is my way of making a good, homemade chicken soup with a little less effort than he puts into it. (Which is probably why he’s a famous chef and restauranteur and I am not.) But I thank him for his inspiration on this one.
We’re posting this recipe now because this soup is equally good if you use turkey, so it’s a great way to use some of your leftovers from Thanksgiving.
Recently The Hostess and I volunteered to serve drinks at an open house for a local business. The event was an interesting experience for both of us as it resulted in us fielding many questions about our own “business” that we’ve not really had to answer before. No, we’re not caterers. No, we don’t hire out to host parties. And no, I’m definitely not a professional bartender. We just love to entertain our friends and family, we feel like we’re pretty good at it, and we started this blog to share what we do so that others, like you, can entertain without the need for caterers. And yes, everything we do is right here on our blog for all to see and share.
Anyway, I was quite flattered when the business owner asked me if I’d be interested in bartending for her event. We’re always looking for ways to give back to our communities and were happy to be given this opportunity to help a local business. The owner asked that we serve a “red” cocktail (because the name of her business is Salon Rouge), so we brought makings for our Pomegranate Martini (which, incidentally, was a huge success). And she requested that we also serve an non-alcoholic “mocktail” version. Alcohol-free is not a something we often get asked for when entertaining at home, so we had to scramble a bit to come up with a recipe. We deconstructed our martini recipe, experimented with ingredients, did some taste-testing, and now, just in time for the holidays, here’s our recipe for a festive Pomegranate Mocktini. We mixed this up in a punch bowl and it was a big hit for all ages. One little girl came back for a fourth helping saying it was the tastiest punch she’d ever had. In her words, “Deee-licious!”
On Friday, I was sitting here having one of those serious “what was I thinking” moments. My family Thanksgiving get together at my sister’s house was less than 24 hours away. I had volunteered to bring, among other things, a couple of pies. Pumpkin, for obvious reasons, and chocolate cream, because the chocolate cream reminds everyone of our mom. This should not have been a big deal. I’ve been making pies for years. But, I’ve been making them with store-bought crusts. Our big family secret to perfect pies always included the red box out of the dairy section. For several reasons, personal pride, ambition, our daughter’s inspiration and encouragement (and perhaps just a hint of chagrin at my crusts-from-a-box), I decided that I would learn to master making pie crusts from scratch this year. You know the kind I’m talking about. The old fashioned ones, made with ice cold ingredients that make that super flakey crust you see on Crisco commercials. And, of course, I waited to take this on until the day before I needed to be good at it.
However, I’ve been anticipating this day for a while. I started preparing by eating a lot of pie. And by collecting recipes and tips from experts I found in various articles I read. Equipped with my stack of written paraphernalia, I hit the kitchen hard yesterday morning. Hours later, I was covered in flour, and I had finished the two pies, but I was feeling less than elated with the results. One of the tips from a pie-making expert said to roll the dough thick, because you want your crust to be “generous.” So, for the first pie I did just that. Well, the crust was, without a doubt, generous. There was a LOT of crust to this pie. It didn’t help that my new glass pie pan (bought specifically for this purpose) was the size of a hub cap. The pumpkin pie looked like the sad, misguided skinny girl who made an unfortunate choice in prom dresses and purchased a dress consisting of one too many layers of ruffles. The girl just gets lost in the dress. It’s all about proportions, after all. I mean, in regards to the pie, the filling was there, you just had to look a little bit to find it. I rolled the second crust thinner but it lost some of its shape as it baked, so in the case of the chocolate cream pie its frame is a little lackluster. If my worst case scenario is unattractive appearances, I can live with that. My real fear was that the crusts would be chewy, not light and flakey as they should be. And of course that wouldn’t be known until the pies were served.
You know how I’ve talked about being realistic about your skills and level of effort you’re willing to put into something? This was a case of my overestimating my skill and ability. I really thought I’d be able to master it. The first time I tried it. With nothing as a back-up plan except a trip to Costco to buy a couple of their pies. So, I just focused on the positives. One, my pies will be eaten by family. My family has to love me regardless of my pie crusts. Two, I’m confident the fillings turned out well. I’ve had lots of practice at those. And, three, there will be whipping cream. Whipping cream has saved bigger disasters than this on more than one occasion.
So, my pies and their crusts made their debuts yesterday. I won’t say they received standing ovations, but they were edible. And the pumpkin pie even got some honorable mentions for the crust. So, I’m sharing recipes for the pies and until I master the crusts, I’ll just let you provide your own.
Several years ago, we were fortunate enough to take a ski trip to Switzerland. In the land of the Alps, 3-hour dinners are the norm, not the exception. Which is actually a pleasant and indulgent way to enjoy dinner. Except, that is, if it’s your first day in Switzerland and you’re dealing with the inevitable jet lag. The first night at dinner, as we were fighting said jet lag, and after a couple of hours of sitting and several courses of food, we had reached the point where we were more interested in our pillows than in dinner. That’s when the waiters brought out dessert, which was basically a scoop of sorbet accompanied by a shot of vodka. The waiters poured the vodka over the sorbet. And we perked up. We all promptly took our spoons and mushed it all together, making an adult version of a Slushee. Sleep could wait. We wanted a second serving. Which all seemed to amuse the waiters greatly.
This really is a perfect solution to a dessert. Especially after a big meal. It’s light, refreshing, and beyond easy. Basically, scoop and serve. It’s been a hit every time we’ve served it. While you might be tempted to serve with a straw, I would only do so at the risk of listening to that irksome slurping sound that may result from your guests trying to get the last drops out of the bottom of the dish.
If you want to look like you made a fuss, serve with an assortment of chocolates. Because putting chocolates on a plate is slightly more fussy than scooping sorbet.
The sorbet pictured here is a blueberry pomegranate sorbet. (Delicious, with or without vodka.) But any fruit-flavored sorbet will work.
I didn’t grow up in an Italian family. Far from it, actually. Yet somehow I wandered into adulthood with this idea of big and boisterous Italian families crowded around dining tables sharing their weekly Sunday dinners. And I wanted to be a part of it. My fantasy has always included some meal that is easily shared regardless of how many hungry relatives and neighbors show up. Maybe that’s one of the reasons I like making soup. There’s just something about making a big pot of soup that seems to scream, “Come and share this meal with us.”
Many soup recipes say that they only need to simmer for about 30 minutes. But for me, part of the reason I like making soup is letting it simmer on the stove for an entire afternoon. I like to think that this is when the soup is “souping.” I love the aroma and the anticipation of it all. Not to mention that after the prep work of slicing and peeling and chopping the ingredients, the souping stage is when I get to take a break. So, while this soup would probably be fine if you can only let it cook for a short time, my recommendation is that you let it do a slow simmer for a couple of hours. And speaking of those ingredients, with all the great fresh vegetables available in the fall, it is a great time to make this soup. All those carrots at the Farmer’s Markets and the zucchinis from their gardens that your neighbors are still trying to offload? Give them a home in a pot of soup.
We served this last night as the main course with nothing more than focaccia bread and red wine as side dishes. We were slightly less than boisterous, and the table wasn’t crowded, but it still felt good to share a Sunday night meal with neighbors who are both friends and family. My inner-Italian-wannabe was very happy.
This particular drink has been served at our house on countless occasions. I can’t remember exactly when “pomegranate martini” became a household name around here, but I have no doubt we first discovered this desirable libation in some bar where it was on the menu. No doubt it was good; and by good I mean there were going to be more of them in my future. Perhaps being enjoyed in the comfort of my own home while wearing slippers. Assuming the history of this particular drink followed that of so many of our other house classics, the next thing that happened was I requested one at home and then Jon figured out how to make it.
While we’ve been drinking these for several years, I never really gave it a moment’s thought as to where pomegranates come from. I mean, clearly the juice we use comes from the POM bottle that’s in the refrigerator, but I never really wondered about where it came from before it became POM. While I don’t know the exact origins of the pomegranates that go into making POM, what we did learn recently while visiting Turkey is that pomegranates grow there. Everywhere. We found fruit-bearing trees growing haphazardly along backstreets, along dirt paths and along major roads. Vendors on nearly every street in nearly every town were selling cups of freshly squeezed pomegranate juice. And almost without exception, every time I saw one of those sidewalk juice vendors squeezing the juice out of those poor homely fruits, all I could imagine is how good the juice would be mixed with a squeeze of orange and a shot of vodka. Sigh. Alas, it was not meant to be. Turns out that while pomegranates and their juice are plentiful in Turkey, vodka in a Muslin country is not.
Because of the amazing anti-oxidant/health promoting benefits that are associated with pomegranate juice, our standard toast for these drinks has become, “To your health!” And wouldn’t you agree that a little dose of heathy goes a long way to making every hour happy?
Those old enough to have been a fan of the 70’s TV series M*A*S*H may remember that Nehi Grape soda was Radar O’Reilly’s favorite drink. As a kid at that time, I’d never heard of Nehi anything. The only soft drinks I was aware of in those days were Coke, Pepsi, 7-Up, Orange Crush, and a bunch of crazy-ass “Cragmont” flavors that my parents would get at Safeway (24 cans for a buck). I figured Nehi Grape was a mid-century relic that the creators of M*A*S*H had dragged up for historical authenticity, that it probably wasn’t very good since I’d never seen it myself, and I seldom gave it another thought.
Then, in the early 90’s, we were at one of Seattle’s yuppie watering holes with a dear friend of ours who insisted that we just had to try his new favorite drink, a “Grape Nehi,” and he ordered a round. From my earlier preconceptions, I was expecting a sticky-sweet artificial-grapey-flavored mess of a drink, and was surprised to instead be presented with a gorgeous translucent purply-pink cocktail served “up” in a martini glass. The first sip was a stunner: tart and lemony, ever-so-lightly carbonated, and balanced by a subtle dark berry finish that just begged another taste, then another round. The Grape Nehi quicky became a fast friend of our happy hour crowd. It was customary to order yours alongside a pint of locally-brewed Heffeweizen. Something about the tart carbonation of the wheat beer melded perfectly with the flavor of the Grape Nehi. I wheedled the recipe out of a bartender friend and for a couple of years this was nearly the only cocktail I ever made. I even worked out the proportions for mixing up a large batch in a pitcher (an approach that’s definitely not recommended if any of your guests will be driving home!). I never did come across an actual Nehi Grape soda but was always happy I could explain where the cocktail’s name came from. Eventually, we all moved on to other cities and other cocktails and the Grape Nehi faded into the background.
A couple weeks ago we found ourselves reminiscing on our Grape Nehi era. I decided to try mixing up a batch and realized I didn’t really remember the recipe all that well. It actually took several iterations before hitting on the right proportions. In the process I learned that, unlike many liquors, Chambord’s flavor does not stay fresh more than a couple months after it’s been opened. That had never been a problem two decades earlier (when I could barely keep it in stock) but the dusty half-bottle I dug out from the back of my bar resulted in what one guest called a “Prune Nehi.” After an emergency trip to the liquor store and a few more practice rounds, I think my updated recipe is even better than the original. I hope you enjoy it as much as we do!
To be true to the classic, I suggest serving your Grape Nehi accompanied by a pint of good wheat beer, a two-fisted presentation that’s guaranteed to jump-start your happy hour. Cheers!
First, let’s be very clear what this isn’t. This is NOT a blatant attempt to incite a debate over what constitutes legitimate chili. I am fully aware that diehard chili cooks feel quite strongly about the presence of beans in something called “chili.” But, I honestly don’t want to argue the point. One, I am a conflict avoider. And, two, in this season of election debates, I have no desire to debate yet another controversial, yet futile, issue just to be heard and win the popular vote. I call this “chili” because that’s what I call it. It’s not meant to be slanderous. If you find the title offensive, because the recipe contains beans, then by all means call it something else. Like bean stew. Food is supposed to comfort, not agitate.
Name aside, some things just go together. Fall and chili, for me, are two of those things. Throw in a real wood fire in the fireplace, an oversized sweater to lounge in, and a good bottle of wine shared with friends or family, and the weather (and candidates) can spit and holler all they want. And maybe after enough wine, we can debate something worthwhile. Like whether or not it’s appropriate to wear white after Labor Day.
Not everyone is a fan of the classic gin martini. It’s an acquired taste, and like caviar, or oysters, or even green olives, the gin martini is not for everyone. But for some of us, there are times when there is nothing better than the chill against your lips, the herbal bite on the sides of your tongue, and the wisp of piney essence rising through your sinuses that only a crisp, clear gin martini can provide.
You’d think that something as basic as a stiff pour of gin, a few drops of vermouth, and a couple green olives would be a ridiculously easy cocktail to make at home. But have you ever noticed how sometimes one martini tastes so much better than another, even when using the same brand of gin? I’m convinced it all comes down to the mixing process. It seems like every gin-lover has their own opinion on what works best. Some keep their gin in the freezer and pour it directly into a chilled glass that’s been coated with a swirl of vermouth. The “stirred vs. shaken” debate can be polarizing. As you might have guessed, I have my own opinion, and since you’ve read this far you may as well hear it:
1. I’m not afraid to taste a little vermouth in my martini. I think people take the concept of a “dry” martini too far. The original martini was 50% vermouth and, without some of this key ingredient, it’s not a martini in my book – it’s merely a glass of gin.
2. Melted ice is not the enemy of a good cocktail. Shaking a drink with ice does indeed introduce some water, but in a stiff cocktail like a martini a little water goes a long way towards smoothing out the taste.
3. Two olives, skewered, is the best garnish. One to eat early, to complement the flavor of the cocktail. And one to play with, to stir the bottom half of the drink in anticipation, to be savored with the last gulp. Some say that only an odd number of olives will do, but at my bar, one olive just isn’t enough, and three is gluttonous.
Of course, some people substitute vodka for gin. But really, why would you want to?
Fall. People either love the season or they don’t. I fall into the love category. As the weather turns cool, I still feel this longing to go buy some new shoes, some new pencils and a lunch box. But with school days long behind me (especially the days when I carried a lunch box), my new fall activities seem centered around the kitchen. And I tell you, as soon as we get our first crisp, cold day, I immediately start craving pumpkin bread. I’m like one of Pavlov’s dogs. Fall = drooling for pumpkin bread for me.
Speaking of the good ol’ days, as I was making pumpkin bread yesterday, I was thinking about how housewives, my mom included, used to get together at each other’s houses for coffee. And things like coffee cake. Starbucks, and other coffee houses, and the fact that a lot fewer women are actually at home during the day, have long since replaced that tradition. But I was thinking that IF someone came to my house for coffee, in the fall, I’d serve them pumpkin bread. If they got here shortly after I made it. It doesn’t last long around our house. I made a loaf yesterday and at this rate, it won’t see Friday.
We’ve just returned from a 3-week vacation in Turkey where, among other things, we spent a week on a boat cruising the Turquoise Coast. The boat came with a captain and first mate, and I dare to say we may have met the Ultimate Entertaining Couple. All week, we (Jon and I and our two friends) sat idly by while Andy (the captain) and Lou (the first mate) did all the work manning the boat, cleaning the boat, getting us in and out of harbors and docks, and feeding us. And feed us they did. The food was delicious and ample (as I feared my rear-end was becoming after eating it for a week). For someone who is accustomed to being hostess and cook, I was pleasantly surprised how easily I relinquished the role to someone else. Apparently, even the control freak in me was on vacation.
One day Lou served us a Tomato Basil soup that we all loved. We raved and then, of course, asked for the recipe, which she generously shared with us. As Margaret and I frantically took notes, she rambled off the recipe, which sounded something like this: “Let’s see, I use onion and four tablespoons of butter, and about 2 tablespoons of olive oil. Oh, and garlic. And about a cup of white wine. Of course, tomatoes. And, let’s see, what else do I use?” She actually gave us a pretty good description even from memory; enough to give me the basics (and inspiration) for sure.
We arrived home from our trip to a beautiful Indian summer. The days are warm and sunny but the mornings and nights are cool and a reminder that summer is behind us. And, for me, nothing ushers fall into being quite like a pot of soup on the stove. With my notes fresh from Lou’s recital, I was dying to try her soup for myself. To make sure I understood the right ingredients and process for her recipe, I Googled recipes and came across several renditions of a recipe for “Nordstrom’s Famous Tomato Basil Soup,” which as it turns out is quite similar to Lou’s. So, my recipe is a compilation of the the two and the result, if I do say so myself, is a creamy, flavorful and hearty soup that will definitely be added to my fall/winter repertoire.
What I learned when making this soup. One, I’m a big fan of simple cooking. If I can just use one pan or one bowl, I’m a happy cooker. Unfortunately, this recipe makes a little bit more of a mess than I would normally like because of the puree step. I may try to use my immersion blender next time, which will cut out the use of the conventional blender, but I was really happy with the texture I got with the blender. So we’ll see. And, because the recipe makes enough soup for 8, I had to do the pureeing in batches, which required yet another bowl to be used after the blender and until I had emptied the pot. My process was: Ladle the soup from the pot to the blender until the blender was about 3/4 full, puree, and then pour the pureed soup into a large bowl (with pouring spout). Repeat 3 times. But honestly, I think the end result was worth the extra washing required. The other thing I learned was that, because the soup needs to cool slightly before putting it in the blender or food processor, there is a span of time when you’re just waiting. Or, in my case waiting and stirring/blowing the soup trying to hurry along the cooling process. If you’re planning this for a dinner party (or even dinner at a certain time), I would recommend making the soup ahead of time if possible. Get all the way through the puree part. Then, all you’ll need to do to serve it is add the cream and reheat it. We refrigerated the leftovers and it made for great leftovers as well.
When summer corn is in season, I just can’t resist it. When it’s sweet, local (which means cheap!) and good, it’s like my drug of the moment. And I just always assume everyone else loves it as much as I do, so then I serve it every chance I get. But, as the Bartender pointed out, corn on the cob is one thing. Not everyone likes to eat corn off the cob, especially when they are having their picture taken (as was the case a couple of weeks ago when we had a photographer here shooting our dinner party for the blog). As Dear Abby once wrote, “Those who are sticklers for socially acceptable table manners are not likely to serve corn on the cob.” So, how does one take advantage of seasonal corn and not disturb the delicate balance of etiquette and decorum? Creamed corn casserole!
When we served this, some of our guests admitted that they had never really cared for creamed corn until they tasted this recipe. We think it’s the cheese. But it’s ridiculously good with none of that socially awkward gnawing the kernels off the cobs. No bits of corn hanging precariously to cheeks and lips. No unwelcome corn juice squirting across the table. Just sweet summer corn that can be eaten with a fork.
My signature cocktail is, without question, my Lemon Drop. Our return guests expect them as soon as they walk through the door. Year over year I probably serve as many lemon drop martinis as all other drinks combined. Hostess Debbie positively loves a good lemon drop martini, so years ago when I really got interested in developing my skills at mixing cocktails, the lemon drop was one of the first recipes I took on. But mastering the lemon drop martini proved to be surprisingly difficult – and the lessons I learned in the process made me much better at bartending.
Looking back, I had several different challenges to overcome. First, I’m the kind of person who reads users’ guides cover to cover. Next, I don’t like to deviate from a plan once it’s in motion. Add those traits together and there I was, trying to convince Debbie that she really should be enjoying the crappy drink I’d served her because I’d carefully followed the recipe in my cocktail book so it had to be good! So here’s my Lesson One: Be flexible and open-minded, listen to what your guests like (and don’t like), and be ready and willing to make adjustments. Your guests’ satisfaction (not your own) is what matters!
A challenge with learning any new cocktail is that you have a limited number of attempts in a given day to perfect your recipe before you (and your fellow tasters) get too snockered to distinguish the adjustments you’re making from round to round. (This is why wineries offer spittoons. Although, honestly, “swirl and spit” has never worked for me). So it may take multiple happy hours of tweaking before you find the right proportions for a cocktail you can be confident will be a hit with your guests. Lesson Two: Don’t rush the process, and don’t get discouraged. It can take much trial and error to find the right recipe. Taking notes on what’s worked so far and what changes you’re going to try next time is a good idea, in case your “tasting session” results in short-term memory loss.
My early lemon drop martinis flat-out didn’t taste good. I was basically serving up a too-strong vodka shot paired with a face-puckering slap of sour lemon. The goal of any great cocktail is balance, where each of the ingredients complements the others. My cocktail book suggested using simple syrup to smooth things out, but adding more of that only made the lemon drop sweeter, not more balanced. So I tried different vodkas, tried adding triple sec, experimented with a squeeze of orange in addition to the lemon, and tweaked and fiddled with the proportions. Weeks later my lemon drop had improved from “Yuck!” to “Huh, that one’s not quite as nasty.” Progress, but I still had a ways to go.
Finally one evening I replaced the simple syrup with a splash of premium lemonade. Wow. The resulting lemon drop was crisp, refreshing, and perfectly balanced between sweet and tart, yet still packed enough kick to remind why people consider the lemon drop to be a martini. Success!!!
Which brings me to Lesson Three: The key secret ingredient to a cocktail may be simpler than some exotic concoction you’ve made from scratch or spent a lot of money on. It’s not cheating to use something off the shelf – all that matters is that your guests like the end result!
So now, when Debbie’s considering ordering a lemon drop in a bar or restaurant, she can tell merely from how one looks on the server’s tray whether or not it’ll be any good. She says I’ve set the bar so high that, instead of taking a chance on the bartender’s recipe, she’d just as soon wait for one of mine at home. That’s a pretty good endorsement!
We all have those memories from our childhood of things we didn’t like to do. It was part of growing up. Our parents made us do some things that we didn’t enjoy. For me, one of the dreaded chores was picking blackberries. Growing up in the Pacific Northwest, where they grow wild and abundantly, it was an annual occurrence to go out and pick blackberries for a cobbler. Or jam. Between the long, willowy branches full of those hateful prickles, the bees and the purple fingers, I was just a phone call away from notifying the Child Labor Union that I was being mistreated.
No doubt, it probably wasn’t that pleasant for my mom, either. Not the berry picking, which she probably enjoyed, but rather having me along “helping.” Given how many berries had to be picked to even make a small dent in the coffee can that we used to gather the berries, I’m guessing I was slow to pick but quick to voice my misery the whole time.
So here’s the ironic thing. Now I pick wild blackberries whenever I can. When I discover untapped blackberry brambles, as I did last summer near our house, I get that same rush as when I find something special on sale. I have a berry pail that I take and I pick my way along the thorny bushes until my pail is full. While I pick, I honestly think about how fortunate I am to live somewhere where I can pick my own berries and am amazed that there aren’t dozens of people there picking as well. And, truth be told, I may spend a little time secretly calculating how much the equivalent harvest would cost me at the grocery store. My fingers still turn purple and sticky, but now they are a brand of accomplishment rather than irritation to me. I still don’t love the bees. I’d like to say that I’ve evolved to a greater place in nature and understand that all creatures have a place here and we have to all just learn to live together. In reality, I’ve just learned that there are fewer bees when it’s cool, so I try and do my picking right before sunset or in-between rain showers.
The serious quest for a good cobbler recipe started in earnest after I discovered the wild blackberries growing near our house last year. It was a great year for blackberries. They were small and juicy and sweet. The rewards of my pails full of berries and purple fingers is this cobbler. I tried several versions of cobblers, and believe me there is a variety out there, and finally landed on this one. Truth be told, even as I was making it the first time, I thought, “This will never work.” But boy was I wrong. The result is a little bit of crust and berries in each bite. Simply scrumptious.
Here’s the interesting thing. I wasn’t a fan of blueberries for a long time. Like most of my life. Not sure why but I just had this impression that they didn’t really have any flavor, so on my “take it or leave it” food list, they were on the “leave it” side. I’m guessing somewhere as a kid I had some and they just didn’t taste very good. (Unlike, say, raspberries that I couldn’t get enough of.) Or maybe it was that creepy blueberry kid in Willy Wonka. Whatever the reason, I just wasn’t a fan. Blueberries, like sunscreen and shoes with good arch support, apparently required a little age and maturity before they could be fully appreciated.
All that has changed now. I have discovered the wonderfulness of blueberries. So, when it’s blueberry season in the valley, our kitchen is overflowing with them. Our kitchen towels have blueberry stains on them. The little green cartons get piled up on the counter. Blueberries get bagged and frozen so we can enjoy them all year round. And blueberries get added to all sorts of food. They’re great in smoothies. I love them in spinach salad. And, of course, not to be forgotten or overlooked, the epitome of what blueberries stand for: The blueberry muffin.
Almost 30 years ago I received a small cookbook, cookbook-ette really, that only contained muffin recipes. It was a little cookbook for little foods. I got it from my sister for Christmas, and she had bought it at one of those wonderful small bookstores in Seattle. I know both of these things because the bookmark from the bookstore and the gift tag from the package are both tucked into the front cover of my small book. Looking back, I think this is when my affection for muffins started. I like them so much more than coffee cake for some reason. Probably because, like cupcakes, they are these individual little treats. Unless you butter them, they require no utensils. They are like little self-contained, paper-wrapped morsels of goodness. If you’re hosting overnight guests, they are a great way of saying “good morning” because, let’s face it, who doesn’t like to get out of bed to the smell of fresh-baked muffins? Plus, you don’t have to get up at the crack of dawn to prepare them because they really are relatively quick and easy to prepare.
In the Breakfast/Brunch section I’ve posted two recipes for blueberry muffins. One uses the classic process of creating a well in the middle of the dry ingredients where you add the wet ingredients. It also has a hint of lemon to it, just to take the fancy factor up one notch. The second recipe uses a mixer to blend the butter and wet ingredients and then you add the dry ingredients to it. I think because this one uses the mixer, it seems like an easier recipe to me and I would make this one if I was in a hurry. Although, honestly, the prep time is about the same (about 45 minutes start to finish). But, the results are slightly different. In a side-by-side taste test, Jon thought he preferred the muffins made the “classic” way over the second recipe. However, both seemed to disappear at about the same rate.
Thanks to Mostly Muffins, my little cookbook-ette, for inspiring me.
Recently our friends came to visit for the weekend and brought their 3 1/2 year old daughter for her first ski experience. While she’s not a finicky eater, and is about the most adorable child in the whole entire world, getting her interested in food was the challenge. She had never had a smoothie before, so I made these for breakfast. They must have been a hit because this is what she requested for breakfast the next day, too. I’m thinking that pleasing a 3-year old is about the best compliment in the world.
They are quick, easy and pack a punch of good-for-you stuff in them.
A few of notes about this recipe. I’ve made this with many different combinations of fruits and juices. We always seem to have Pomegranate juice on hand, so I use that. And we keep a stash of blueberries in the freezer, so they are great for this recipe. I’ve tried different yogurts, too, and my preference is a vanilla bean yogurt. If you use a plain or Greek yogurt, add a tablespoon of vanilla to the recipe to add some flavor. And, finally, I admit I use fresh-squeezed orange juice when I make these. (Love my little juicer!) But I’m sure it would work with any orange juice.
It seems that everyone has a favorite recipe for guacamole. Or at least their own “special recipe.” Our daughter-in-law suggested once that we have a Guac Off because we were debating who makes the best guacamole.
Our recipe was born in a summer haze, inspired by a restaurant that we frequented often one summer. We would meet our good friends in the bar, order margaritas and the chips and guacamole, then sit and solve all the problems that plagued the world. Or so it seemed after a couple margaritas. Our Friday night meetings never really changed anything in the outside world, but we did develop a love for their guacamole. We watched how they made it (which they did table side) and we were able to come up with a similar recipe. I’m not saying it’s better than everyone else’s, but no matter how much we make, there’s never any left when we serve it. That says enough about it for me.
I learned this process of making French toast from the owner of a bed and breakfast in Portland, Oregon that I stayed in several years ago. The trick, he taught me, is soaking the bread for several hours in the milk mixture. As he pointed out, soaking the bread makes for moist pieces of French toast. Otherwise, all you have is pieces of bread with a thin layer of fried egg cooked on the outside. I’ve been making it this way ever since.
You need to start preparing this several hours before you make it. I usually make it the night before. Which is good, because that means most of your work will be done before it’s time to start cooking/serving. Trust me, the recipe works. When I first tried it, I was sure it wouldn’t work. Friends have watched me make it, and they never think it’s going to work. Everyone assumes the bread will just fall apart. But it will work and it makes the moistest, best French toast. And your whole house will smell wonderful.
Many years ago, when my husband and I were first dating, we took a weekend trip to the wine country in Northern California. This was long before we actually lived in California, and it turned out to be the first of many trips we’d take to the wine country together. But back then, enveloped in our new love and lust, it was a magical weekend for many reasons. We stopped for dinner in Rutherford and ordered the cornbread. I think it’s safe to say that it was the best cornbread I had ever eaten. A far cry from the stuff my mom made from the little blue box. We asked for the recipe and, while they weren’t able to give us the actual recipe, they did provide the basic ingredients. Years later, I found a recipe in a cookbook I bought from a bed and breakfast, which became my base and inspiration for this recipe.
Thanks to my mother-in-law, I have a hand-me-down, perfectly-seasoned cast iron skillet that I use for making this bread. I have to admit, I’ve never made it in any other pan, but I’m sure any 8″ pan will do nicely.
This recipe will easily feed 4 – 5. Leftovers can be kept for a day or two. But be forewarned, after this sits in your refrigerator overnight, it will resemble Flubber (I’m actually old enough to remember the original Flubber movie) and has the consistency and look of paste. Do not be discouraged!!! Simply add a little milk (about one tablespoon per bowl), and reheat in the microwave for about 2 minutes. (Or, on the stovetop if you’re really being true to Grandma and her oatmeal.) Then, give it a really good stir and you’ll get it back to the right (and edible) consistency.


 Which wouldn’t be a bad thing if we were just eating naked berries. If that were the case, we would be congratulating ourselves on our healthy diet. Instead, because we are making a daily habit of eating the berries layered up as shortcake desserts, the gorging behavior has crossed over into gluttony. Somehow we have rationalized that since it’s summer, and almost the 4th of July, we’re just doing our part to celebrate the season. I’m guessing if this behavior continues, my pants and I are going to have to have a little chat about who is to blame for the discomfort.


 Until now, I’ve always thought of this as a “winter cake.” Maybe because it’s a dark cake with lots of oomph to it, so it has always seemed like something you eat during sweater season. Or, maybe it’s because it’s my favorite cake, and the one I always want for my birthday, and my birthday is in December. But I had an “aha moment” last week that this would actually be a great Easter dessert. You know, carrots…bunnies…spring.


 Maybe it’s my upbringing, but I can’t imagine eating pimento cheese on anything but white bread. The last time I was in Texas, I ordered a pimento cheese sandwich at what might be the equivalent of a food truck without wheels, and it was served on thick, white “Texas toast” bread. The bread was perfect but my sisters and I couldn’t help but notice that the pimento cheese spread was not as good as Mom’s. Like I said, everyone has an opinion.


 He chose one of our favorite cakes, the


 This was one of my first posts when we launched our blog. I’m re-posting it because, get this, the first week of June 2015 has been declared “


 I’ve been making this Key Lime Pie recipe for years. The original recipe came from a magazine (Cottage Living) that is no longer in publication. I was initially drawn to it because it called for using crème fraîche as the topping, which sounded like a perfect complement to the tart lime. It was and is. I’ve made a few tweaks to the original recipe but for the most part it’s just as it was printed back in 2008.
 But that darn cute pan was just like those “adopt me” puppies on Facebook. Need quickly gets overrun by the heart screaming, “You must take it home with you!” Because cute trumps logic every time. And so now I’m the proud owner of a


 Debbie got a chuckle out of what I did next. I uncapped the bottles, lined them up, and took a sniff from each one. I wanted to find the one that smelled perfect for a daiquiri, and one of them (an unassuming bottle of Whaler’s Original Dark) had exactly what I was looking for: A warm, sweet whiff of rum that gave me an intense flashback of sitting barefoot on a bamboo bar stool, under a thatched roof on a sandy beach, breathing in the humid, floral-scented tropical air, and sipping a frosty umbrella-garnished rum cocktail. Just the kind of place where, if you can’t get there physically, the taste of a daiquiri should take you to in spirit. So I fired up the blender, poured in the Whaler’s, and after a few minutes of experimentation we were enjoying two perfect pineapple daiquiris. The key to the recipe, we decided, is using frozen pineapple rather than fresh. Frozen fruit in a blended drink results in a perfectly smooth and creamy cocktail that’s good all the way to the last sip (not much ice is needed, so the ingredients don’t separate as the ice melts).

 Easter is such a happy holiday. And a perfect time to get together with family and friends to celebrate. And, as much as I enjoy the holiday as an adult, I have to admit I miss the days when Easter was also the holiday when I got a brand new pair of patent leather shoes and a new hat. Now that was reason to celebrate!


 As much as I enjoy Bloody Marys, making a decent one myself has always been a kind of unachievable “holy grail.” And maybe a bit of an embarrassing shortcoming as an amateur mixologist. A big part of this is because Bloody Marys are traditionally enjoyed in the morning (often well before noon) and that’s just not the time of day when I do much experimenting with cocktail recipes. No judgment here…but for me, I kind of feel like I’ve committed myself to an unproductive day if the vodka comes out while the coffee is still brewing. So my efforts at perfecting a Bloody Mary recipe have been somewhat limited.
 So what, finally, was the answer in my search for the best Bloody Mary? I’ve simplified. Thanks to a tip from a local bartender (whose recipe is one of the best I’ve ever had), I’m using an
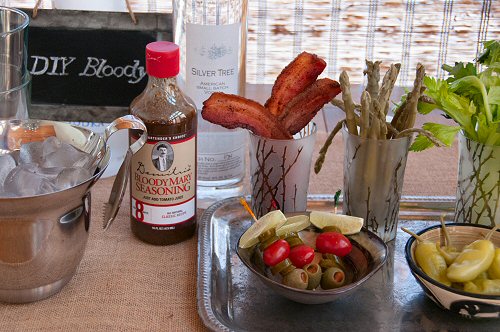


 If you are having people to dinner and you need a simple dessert idea, here’s what I do. Serve some good chocolates with a good aperitif. My favorite combination is dark chocolate (See’s lemon and pineapple truffles are absolutely decadent) and Limoncello. Sometimes I even take the chocolates out of the box and serve them from a fancy candy dish. But not always. We keep the Limoncello (and the glasses) in the freezer so we can serve it ice cold. (Lukewarm Limoncello could be considered barbaric, so don’t do it.) And, speaking from experience, I can tell you this: You shouldn’t be surprised if you and your guests finish the bottle.
 So, when it came time to think about dessert, I wanted something perfectly celebratory and special but not something that would feel like a big ol’ belly bomb of a dessert. Mousse seemed like a good choice. White Chocolate Mousse, in bite size proportions, even that much better.

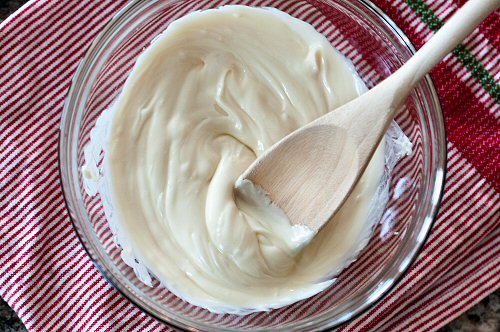
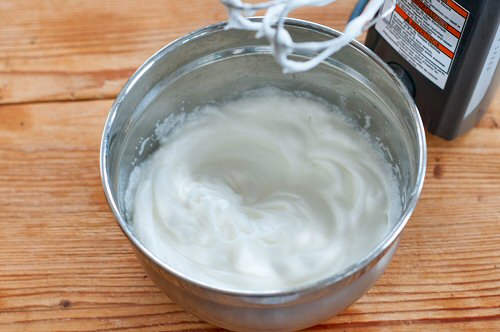
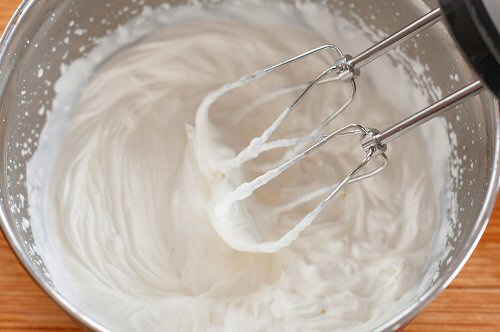
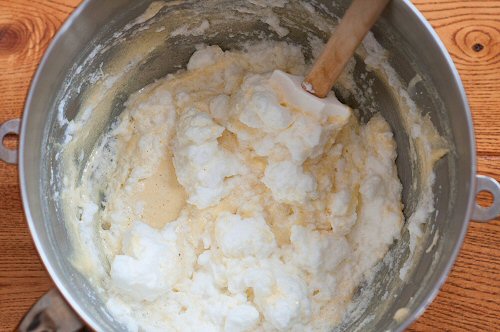


 We’ve been sort of on a cranberry kick lately, and to provide fair warning, there are more cranberry recipes to come. And to think that for a good part of my life, I just thought of cranberries as the berry that becomes the juice that is served with vodka. I’m so happy to discover that the little red berries have a much richer, and tastier, purpose on this earth.


 JoAnn provided the edible eyeballs (as I called them, they are actually Wilton Candy Eyeballs). You just gotta love a world where you can purchase edible eyeballs. Since these were for a party, I used a 3 1/2″ round cookie cutter because I wanted them to be big and, due to their large size, imply one serving per guest. For the frosting, I used a good, basic vanilla buttercream. After baking and cooling the cookies, I got down to the business of decorating. I used a dab of frosting on the back of each eyeball to adhere them in place (Jon’s brilliant suggestion). Then, using a standard basket weave decorating tip, I just sort of randomly ran stripes of frosting across the cookie. To answer my own question, it wasn’t hard at all.


 And then there’s the whole pumpkin carving thing. Remember when carving pumpkins meant you just grabbed one of your mom’s kitchen knives and hacked away at it until you had a jagged, 3-toothed grinning Jack-o-lantern? Now with the pumpkin carving tools and patterns that are available, one feels a little old-school if armed only with a knife and an imagination. But, I’ll admit it. In this case, I’ve fallen prey to the hype.


 I’m actually a little surprised it’s taken me this long to write about the Caipirinha. It’s one of my favorite drinks — especially when I’m in the tropics (or when I’m creating a tropical atmosphere at home) — and it’s a super fun cocktail to make. Plus, it’s the national cocktail of Brazil, which (to me, at least) makes it seem exotic and sexy. A Caipirinha that’s faithful to the original recipe is made with cachaça, a Brazilian liquor distilled from sugar cane. Cachaça is similar to rum, but a bit less sweet, a bit more “raw,” and a bit more challenging to acquire a taste for. Here are some pronunciation tips. Say “kye – purr – reen – yuh” for Caipirinha, and “kuh – shah – suh” for cachaça. Easier than it looks, right?


 According to one website, soup is probably as old as cooking itself. Something as simple as combining a variety of ingredients in one pot to make a nutritious, filling and satisfying meal, over the centuries, has fed the rich and the poor, the sick and the healthy around the world. The different types of soup evolved with different cultures and local ingredients and tastes.


 And, here’s the part of this story I probably love the most. Even though the baby is a girl, rather than choosing a traditional pink-themed shower, the mom-to-be instead opted for a nautical, blue and yellow theme in honor of the years she spent boating with her parents. That made my job easy. And fun. Something lemony would provide the yellow while the blue/nautical was easily taken care of after a quick shopping trip through the aisles of Etsy.


 But, some things have not changed. Like the untapped blackberry bramble in our neighborhood. Every year, I cannot believe the bountiful harvest we get from that undiscovered thicket. (Of course, when neighbors ask where it is, I have to admit we’re a little vague about its whereabouts. “Oh, you know, over there in that direction.”) And my thrill of coming home with our harvest and making blackberry cobbler has not changed either. We know that several of you have made this cobbler, and have shared your prize-worthy efforts with us, which makes the whole thing that much grander.
 So, in honor of where we are today, what we’ve learned along the way, and the blackberries that will soon become cobblers, here is an updated post complete with more pictures. Including this adorable picture of Olivia, helping my wonderful friend Kim (Olivia’s grandmother) make the cobbler. I don’t know which part of this I love the most: The fact that a toddler is helping to make our


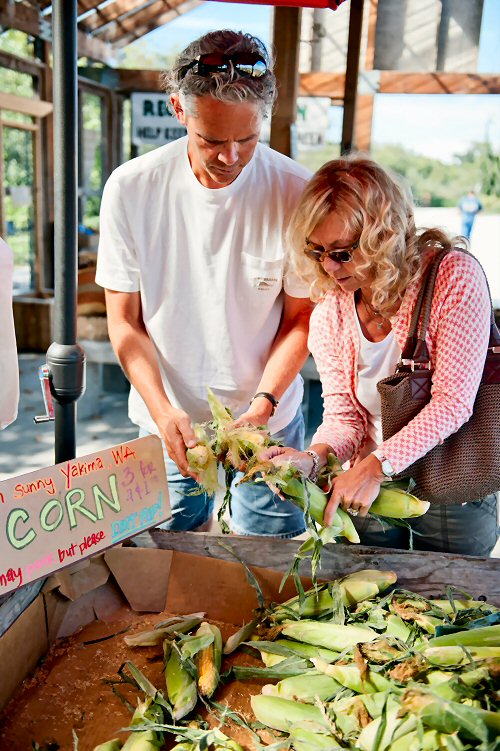


 Occasionally on Facebook or in e-mails I see one of those lists that contain things that “kids born today” will never experience. Like VCRs or walking across the room to change the TV channel. At the risk of totally dating myself here, I’d like to add something else to the list: Hand-crank ice cream makers. Oh, sure, kids today have to occasionally stand in line at Molly Moo’s or Coldstone, so I guess they’ve suffered some anticipation angst in the name of ice cream. But like so many aging adults, I just have to say it’s just not the same as when we were kids and had to make the stuff the old-fashioned way.


 Like any soup, it takes a little bit of prep to get everything in the pot. But after that, it’s simply cook and serve. Pair our chowder with a salad and you have a great summertime meal.
 Jon asked if he should pull it. My response was, “If it wants to be there, who am I to persuade it otherwise.” Over the winter, that lone strawberry vine seemingly rounded up a couple dozen of its friends to make a verifiable strawberry patch right there in our front yard. It makes me smile to think that, without any effort on our part, these little plants took it upon themselves to show up and produce. Even though our crop can hardly be called a bounty, we now have enough strawberries for strawberry shortcake several nights a week.

 adding ice cream to the mix, but now I can’t imagine serving it any other way. I used to use Krusteez Scone Mix for the shortcake. It was easy and good. But, we’ve recently started using


 It’s always a fun challenge to try to come up with a cocktail from a new ingredient, and this time was no exception. I started with two parts vodka and one part Cointreau (that combination never lets me down as the basis for a good fruit-based cocktail). The trick was finding the perfect balance of flavors for the watermelon-based mixer. I started by muddling some watermelon, and was amazed at the amount of juice that comes out of a relatively small amount of melon (hmm, I guess that’s why it’s called a watermelon).


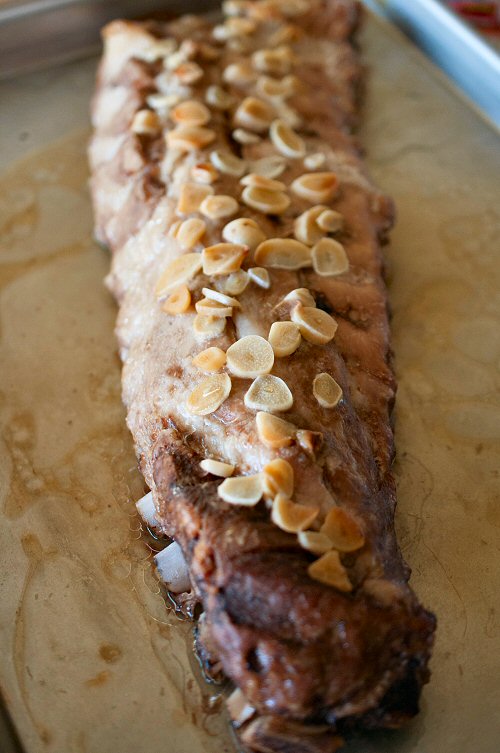


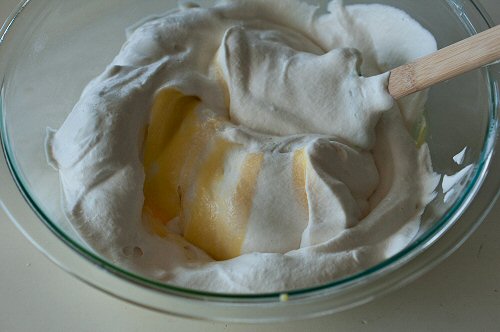


 Lemonade is one of those things that has been around forever. Supposedly it originated in Egypt around 700 AD. Can’t you see those cute little Egyptian kids selling lemonade from a stand for a coin? And lemonade continues to be a favorite beverage today. Talk about lasting popularity. Tang didn’t fare so well, even if the astronauts drank it in space.


 This is a versatile salad. You can serve it as a starter or side salad, or it can be a main dish spinach salad by simply adding diced roasted chicken. It will work with any mixture of fresh berries, which means you can make it with whatever berries are in season. Blackberries, blueberries, strawberries and raspberries are all wonderful options in this salad. For the dressing, we use a raspberry vinaigrette, but I’ve seen similar recipes that use a poppy seed dressing, which would probably be delicious as well. And, while we use a nut mix (Sahale Snacks – almonds with cranberries, honey and sea salt), I think you’d get the same good taste by using almonds and some dried cranberries. See, versatility in a salad bowl!


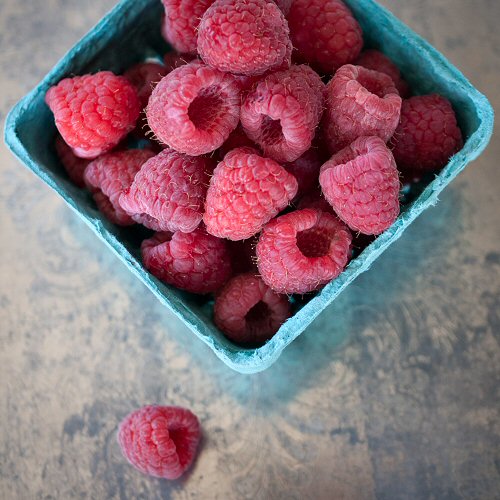
 whim, I substituted their vodka for the usual Absolut Citron in my lemon drop recipe. I didn’t really know what to expect, and the result was a stunner. The berry-sweetness of the raspberry-infused Hangar 1 vodka proved to be the perfect complement to the tartness of the lemon. I tweaked the proportions a bit to find the right balance, and our delicious

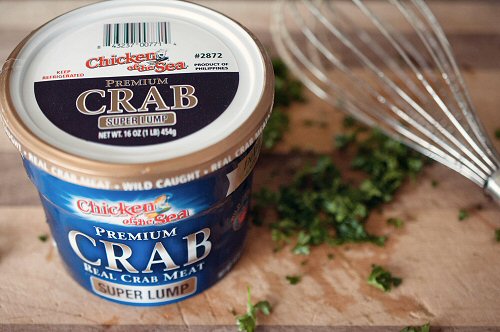
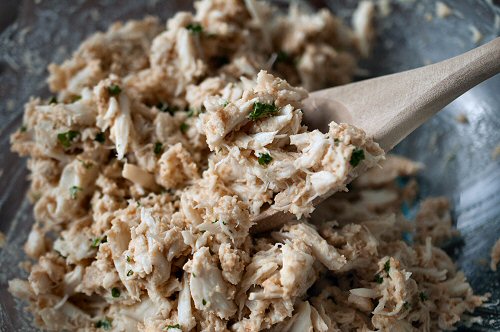
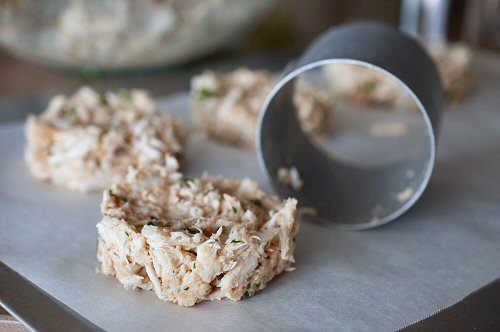
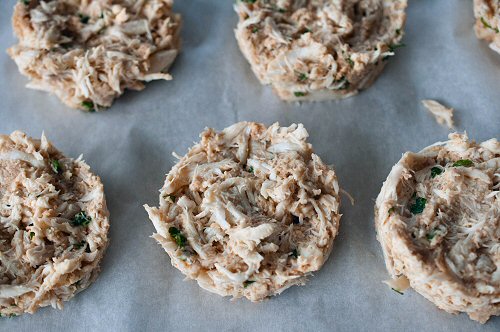
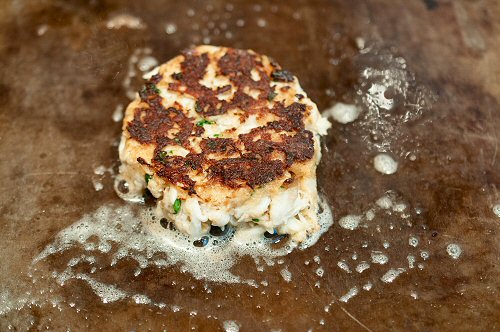
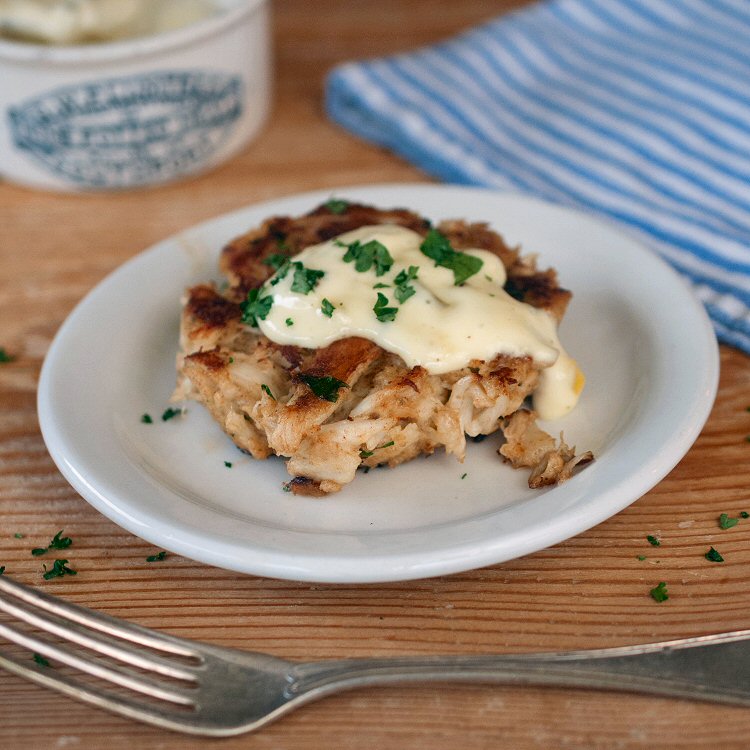


 All of which is really a shame, because the

 Two years of freezer frost created a lot of water when thawed. So to take care of that problem, I just opened one end of the baggie about an inch and squeezed until all of the liquid was gone.


 There’s a reason I waited so long to make these Caramel Layer Chocolate Squares. And, I almost didn’t tell you about it because in doing so I’m going to disclose how lazy I really am. But here it is. I didn’t want to unwrap a whole package of caramels. I’m not a patient person and the task of taking the caramels out of those little cellophane wrappers is just a little slow and tedious for me.
 provided me with an easy way out. It makes me fear I’m about to qualify as a card-carrying member of the Lazy People Club.


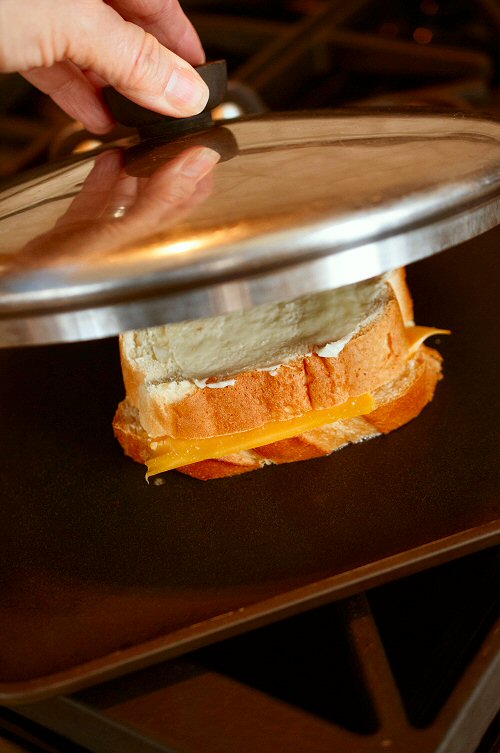


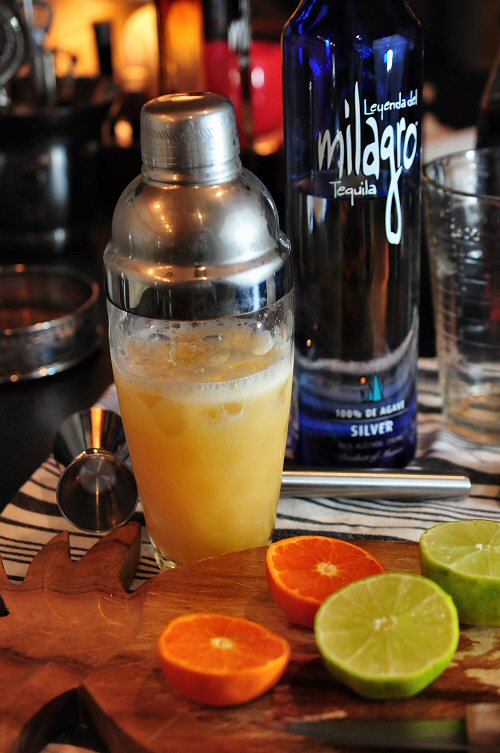 Not that I needed another favorite cocktail. But this may be the best margarita I’ve ever had. If you’ve been a bit hesitant about tequila, say for the last decade or so, here’s a great way to slip back into it. Our

 including one in particular who is passionately so. I get that the Irish are a fiercely proud (and gregarious) bunch with a tremendously rich heritage. But to me, the celebratory rituals of St. Patrick’s Day (drinking copious quantities of Guinness, Jameson, and green-dyed beer while surrounded by people wearing goofy green outfits and feasting on cabbage), make about as much sense as honoring St. Nicholas by eating candy out of your socks or celebrating the day of Resurrection by hunting for eggs that were laid by a rabbit.
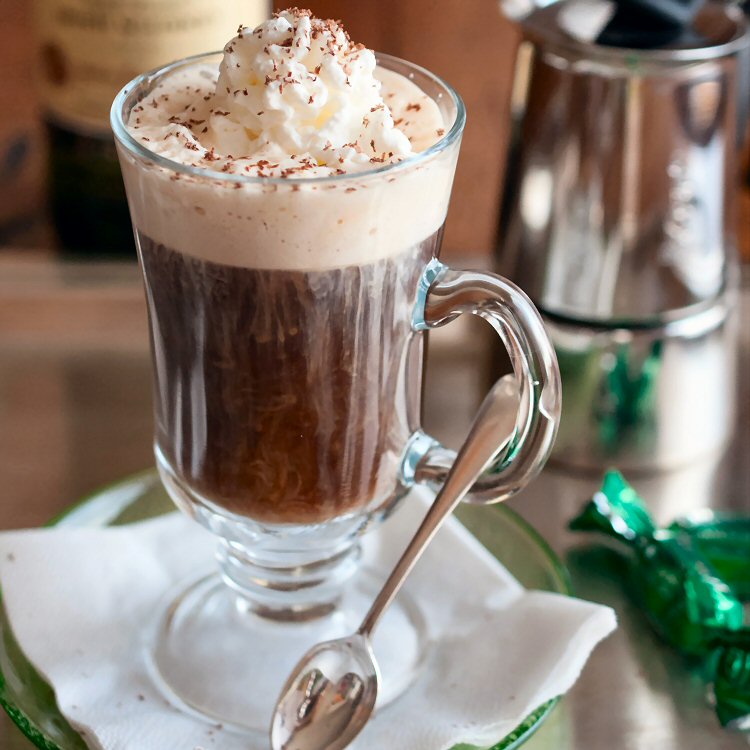


 In the past, we have always just made


 Manhattan — gets some headlining space on our blog. I do like cocktails that have stood the test of time, and the


 Here’s our suggestion for a real breakfast treat. Waffles. We’ve long ago shifted away from waffles made from a mix. Like homemade pancakes, waffles from scratch really don’t take much more time than those made from a box. And they are so much better. This recipe is for a


 Surprisingly, though, we didn’t immediately warm up
  happened and I’m on a roll, I tend to think that the brilliant idea was mine to begin with. So I’m hoping to get brownie points from the Hostess for actually acknowledging, here in public, that the Blueberry Martini was indeed


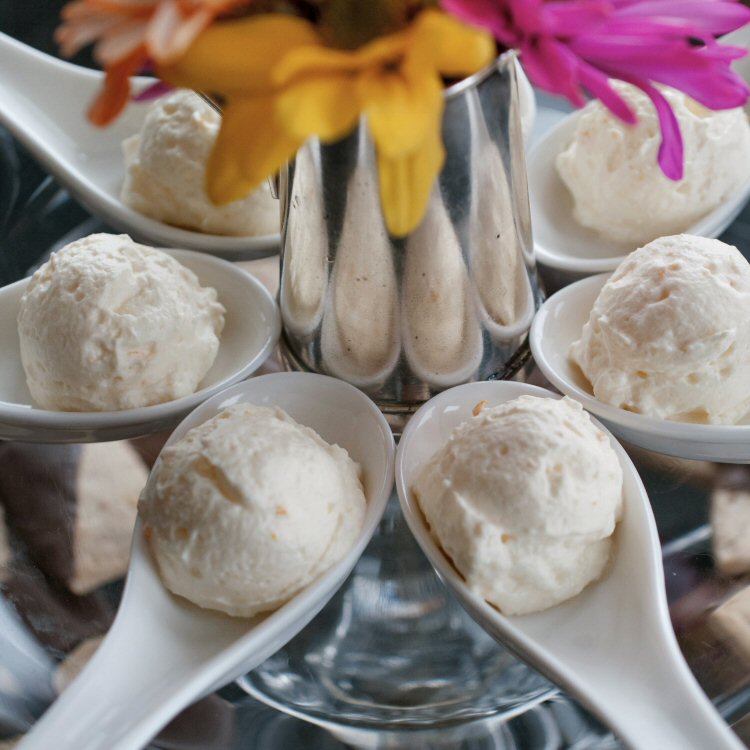


 One of my favorite ways to use turkey leftovers, and feed several people, is to make


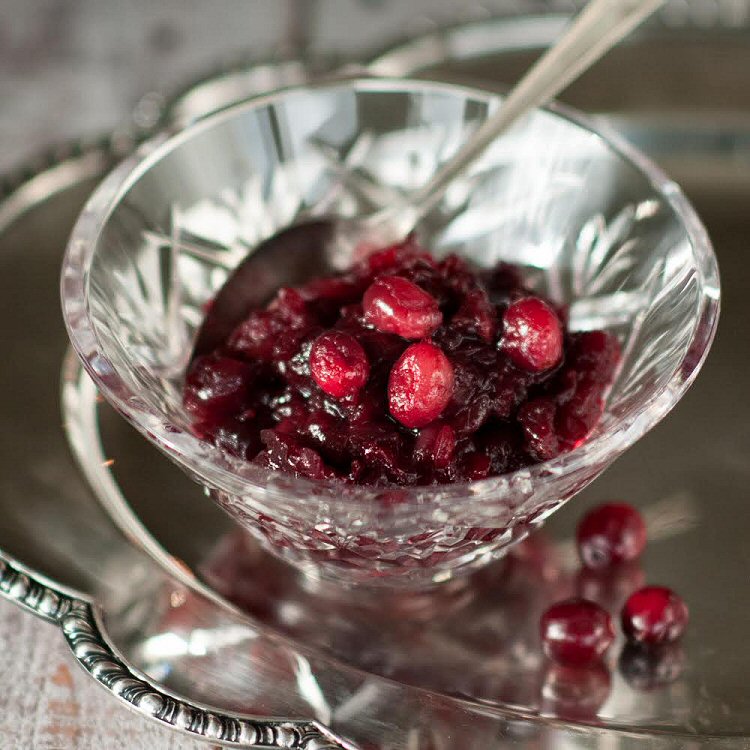
 Most people agree, there is a lot to love about Italy. People who have been there talk about the history. The culture. The scenery. But mostly they talk about the food. And rightfully so. The food in Italy is worth talking about.


 bite of lime juice that holds all the flavors together in perfect balance. Plus some effervescence to round out the edges usually occupied by the vodka. After a few rounds of measuring, pouring, tasting, and tweaking, we’d created a


 These last few weeks, since the blackberries have been ripe, my new daily gotta-have has been a
 Unlike previous summers, we’ve had a lot of visitors here. Our not-so-big house has experienced visiting pooches and blow-up mattresses in the living room and kids sleeping on the floor in sleeping bags and an endless sliding of the screen door. And, in the Pacific Northwest, where it can be gray and damp for so many months, when summer hits people come out of their houses and the place sort of comes alive. It reminds me of when the Good Witch tells the Munchkins to “come out, come out” and and everyone starts dancing around with flower pots on their heads. The sunshine is our Good Witch. So, we’ve also been experiencing people on their patios and in their yards and on their boats, all welcoming us and others with food and drink. I’ve sort of lost count of how many times we’ve been to a neighbor’s or have had friends here over the last few weeks. Everyone here knows the good weather won’t last forever and is taking full advantage of it.
 days of summer. I mean, I know there are obvious weeds in my garden, that my furniture is showing a fine layer of dust and that there is laundry piled on top of the washer, but I want to focus on what’s really important: All of our friends and neighbors that have “come out” to enjoy the summer and chosen to spend to time with us. The key is for us, as hosts, to enjoy the evening and everyone else seems to follow our example. Summer is a good time to let go of some of those nagging details and just relax a little. I felt the teensiest bit guilty when I let the local Berry Barn provide the peach pie for dessert or a week later when our guests arrived before I got home from the grocery store, but then I reminded myself that there is more to life than pretending to be Martha Stewart.
 I like this recipe for several reasons. One, I can make it before guests arrive, which I always like for dinner parties. (Make and clear the mess before anyone arrives.) And, it’s not difficult to make, which is also a plus. Two, during corn season, I really can’t resist buying the sweet, local corn. Like, every time I’m at the grocery store or the farmer’s markets. I even find myself driving by the cornfields and anticipating when the corn will be ripe. But I have found that even when guests like corn, they don’t always like eating it off the cob in front of other guests. Serving corn


 Today was opening day of crab season for the non-commercial boats. That means people like us who own 1 or 2 crab pots and have purchased a license. The Bartender motored out about 20 minutes from the house and set our trap early this morning which resulted in 2 large “keeper” crabs a few hours later. This is as close as we ever get to being hunters or gatherers. The water was a little choppy this morning but hardly a scene from the Deadliest Catch.


 the shell). Bibs are optional. Finger bowls are recommended. And you’ll find that there are well established techniques by those that have been practicing the art of crab picking/eating for a while. Some eat a bite each time they have a forkful. Others show a great deal of patience and restraint and first pick all the meat they can, pile it into a neat little gob and then enjoy the feast unencumbered by additional stops and picks. Either way, you can be assured that there is a large amount of butter and cocktail sauce involved. But we have found that not everyone enjoys the picking aspect of the meal. They just don’t seem to find the appeal in being covered from fingertip to elbow in crab juice and shell fragments. So, for people we really like, after we cook the crabs, we’ll do all the work for them and serve it as a crab cocktail. We actually put the cocktail sauce in the bottom of the glass, which provides a little for dipping without overwhelming the sweet, yummy goodness of the crab.


 I’m wrapping up my series of Margarita Month postings with a yet another tequila-based recipe, our Top Shelf Margarita. This is actually the easiest of our margarita recipes to make, and because of its simplicity it’s the one I make most often.
 types. And as with my hand-crafted Shades of Taos recipe, their mix’s key ingredients are lime, lemon, orange, and agave nectar, so I decided to give it a shake (pun intended, of course). Yum.
 The
The 
 relocation took us to a different part of the country. Back then we re-purposed a vintage airline ski boot bag into a travel case for an almost-vintage blender. And over the years our “blender well traveled” mixed many a margarita for friends and acquaintances in kitchens, family rooms, and ski condos throughout the Rocky Mountain area. (As a side note, this also reminds me of the many dangers of over-serving: One of our fellow partiers, years after spectacularly purging several helpings of my margaritas, unfortunately became the senior manager over my organization at work. Having been the server, and first-hand witness, at this event was likely a career-limiting move on my part). As my friends now hear as I hand them a cocktail, “Respect the Drink…”


 Hostess Note: Many recipes for coconut cream pies call for covering the entire pie with whipped cream. This is how you’ll see it many times in restaurants. I didn’t do that with this pie because (a) Dad never ate his pie that way and (b) we have one of those whipping cream dispensers and we have found that our guests really, really like to add their own (plentiful dollop) of whipped cream to their own desserts.


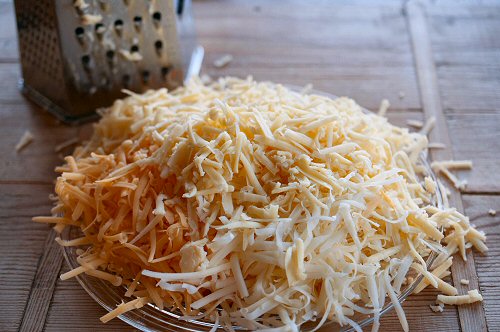


 a squeeze of fresh lemon, and a splash of a clear, complex 19th-century liqueur derived from sour Marasca cherries. I came across the recipe for the Aviation years ago in Paul Harrington’s cocktail book (read more about it in my
  I had several recipes for caramel corn that I had cut out over the years in my expansive “to try” file. I was happy to see that none of the recipes required the use of a candy thermometer, because that seemed to simplify things. The recipe that I ended up using was a modified version of Kendall-Jackson’s Double Gold Caramel Corn, which they tout as a perfect snack pairing with one of their Chardonnays. I think “Chardonnay” was probably the selling point for me, so I tried it. The results were good, but I ended up making it again a few days later and increasing the recipe for the caramel which provided more caramel coating. The popcorn just seemed to need a little more coating to hold it all together, probably due to the addition of the nuts. The result is a sweet and salty caramel corn that we’re finding to be a little addictive. We’ve easily worked our way through two large containers of it in just a few days.


 9. My copper risotto pan. It’s the only copper pan I own, but I do love it. You can use any large frying pan or saucepan with high edges.
 Italian flag. We found Pizza Margherita literally everywhere. Even at truck stops. (Where, on our first morning in the country, we observed two little old ladies eating it for brunch. They each folded a huge slice in half and ate it like a sandwich.) Possibly the best one I enjoyed was in a café just outside the entrance to the ruins of Pompeii, where they let us park in their lot for free if we agreed to eat lunch there. My mouth still waters when I think of it.
 Google “Cosmopolitan recipe” today and you’ll get over 3 million hits. Everyone seems to have their own unique take on the ingredients. We’ve sampled quite a few variations, and in my opinion there is only one way to make a proper Cosmopolitan. Use a top-quality, unflavored vodka. Don’t use triple sec; Cointreau is a must. And leave the Rose’s Lime Juice on the shelf. Any cocktail I’ve ever made using Rose’s tastes SO much better when I squeeze in a fresh lime instead…and that’s possibly never been more true than in the Cosmopolitan.


 I never really wondered about where it came from before it became POM. While I don’t know the exact origins of the pomegranates that go into making POM, what we did learn recently while visiting Turkey is that pomegranates grow there. Everywhere. We found fruit-bearing trees growing haphazardly along backstreets, along dirt paths and along major roads. Vendors on nearly every street in nearly every town were selling cups of freshly squeezed pomegranate juice. And almost without exception, every time I saw one of those sidewalk juice vendors squeezing the juice out of those poor homely fruits, all I could imagine is how good the juice would be mixed with a squeeze of orange and a shot of vodka. Sigh. Alas, it was not meant to be. Turns out that while pomegranates and their juice are plentiful in Turkey, vodka in a Muslin country is not.
 Those old enough to have been a fan of the 70’s TV series M*A*S*H may remember that Nehi Grape soda was Radar O’Reilly’s favorite drink. As a kid at that time, I’d never heard of Nehi anything. The only soft drinks I was aware of in those days were Coke, Pepsi, 7-Up, Orange Crush, and a bunch of crazy-ass “Cragmont” flavors that my parents would get at Safeway (24 cans for a buck). I figured Nehi Grape was a mid-century relic that the creators of M*A*S*H had dragged up for historical authenticity, that it probably wasn’t very good since I’d never seen it myself, and I seldom gave it another thought.
 stunner: tart and lemony, ever-so-lightly carbonated, and balanced by a subtle dark berry finish that just begged another taste, then another round. The

 Name aside, some things just go together. Fall and chili, for me, are two of those things. Throw in a real wood fire in the fireplace, an oversized sweater to lounge in, and a good bottle of wine shared with friends or family, and the weather (and candidates) can spit and holler all they want. And maybe after enough wine, we can debate something worthwhile. Like whether or not it’s appropriate to wear white after Labor Day.
 2. Melted ice is not the enemy of a good cocktail. Shaking a drink with ice does indeed introduce some water, but in a stiff cocktail like a martini a little water goes a long way towards smoothing out the taste.

 We’ve just returned from a 3-week vacation in Turkey where, among other things, we spent a week on a boat cruising the Turquoise Coast. The boat came with a captain and first mate, and I dare to say we may have met the Ultimate Entertaining Couple. All week, we (Jon and I and our two friends) sat idly by while Andy (the captain) and Lou (the first mate) did all the work manning the boat, cleaning the boat, getting us in and out of harbors and docks, and feeding us. And feed us they did. The food was delicious and ample (as I feared my rear-end was becoming after eating it for a week). For someone who is accustomed to being hostess and cook, I was pleasantly surprised how easily I relinquished the role to someone else. Apparently, even the control freak in me was on vacation.
 When summer corn is in season, I just can’t resist it. When it’s sweet, local (which means cheap!) and good, it’s like my drug of the moment. And I just always assume everyone else loves it as much as I do, so then I serve it every chance I get. But, as the Bartender pointed out, corn on the cob is one thing. Not everyone likes to eat corn off the cob, especially when they are having their picture taken (as was the case a couple of weeks ago when we had a photographer here shooting our dinner party for the blog). As Dear Abby once wrote, “Those who are sticklers for socially acceptable table manners are not likely to serve corn on the cob.” So, how does one take advantage of seasonal corn and not disturb the delicate balance of etiquette and decorum? Creamed corn casserole!
 When we served this, some of our guests admitted that they had never really cared for creamed corn until they tasted this recipe. We think it’s the cheese. But it’s ridiculously good with none of that socially awkward gnawing the kernels off the cobs. No bits of corn hanging precariously to cheeks and lips. No unwelcome corn juice squirting across the table. Just sweet summer corn that can be eaten with a fork.